<?xml version="1.0" encoding="utf-8"?><feed xmlns="http://www.w3.org/2005/Atom" ><generator uri="https://jekyllrb.com/" version="4.4.1">Jekyll</generator><link href="https://skartek.dev/feed.xml" rel="self" type="application/atom+xml" /><link href="https://skartek.dev/" rel="alternate" type="text/html" /><updated>2026-07-21T11:11:47+00:00</updated><id>https://skartek.dev/feed.xml</id><title type="html">Skartek</title><subtitle>macOS security research and tinkering — Matteo Bolognini</subtitle><author><name>Matteo Bolognini</name></author><entry><title type="html">Jamf Pro LAPS</title><link href="https://skartek.dev/jamf-pro-laps/" rel="alternate" type="text/html" title="Jamf Pro LAPS" /><published>2023-05-03T00:00:00+00:00</published><updated>2023-05-03T00:00:00+00:00</updated><id>https://skartek.dev/jamf-pro-laps</id><content type="html" xml:base="https://skartek.dev/jamf-pro-laps/"><![CDATA[<p>With the release of Jamf Pro 10.46, LAPS have been introduced into the product: https://learn.jamf.com/bundle/jamf-pro-release-notes-current/page/New_Features_and_Enhancements.html</p>
<p>Straight from the Admin’s guide the TL;DR:</p>
<div class="language-plaintext highlighter-rouge"><div class="highlight"><pre class="highlight"><code>LAPS allows you to:
Automatically rotate local administrator passwords

Store local administrator passwords in a secure online location

Audit who has accessed local administrator passwords
</code></pre></div></div>

<p>In this first phase of the launch, LAPS is available via API only.</p>

<p>So I thought would be fun to poke around to learn a bit more about it by making a Slack slash command to interact with.</p>

<p>No fancy diagram this time but here’s a brief overview of how it all works together:</p>

<ul>
  <li>
    <p>a Slack app will make available a slash command</p>
  </li>
  <li>
    <p>the command will hit an AWS API gateway</p>
  </li>
  <li>
    <p>API gateway invoke a lambda</p>
  </li>
  <li>
    <p>Lambda will retrieve the LAPS credentials from Jamf Pro and store them in Secrets Manager for an easy retrieval</p>
  </li>
</ul>

<p>This last bit is where I asked myself it it was the best delivery method possible. We have to keep in mind we’re dealing with administrator credentials to our end devices, so we want to store and share them as securely as possible.</p>

<p>An idea could be to integrate a password manager and wire it up to the Lambda via API, but that’s maybe for a future post.
For now, we’ll use Secret Manager which provides at rest and in transit encryption with Amazon’s managed KMS.</p>

<p>To start, we need to enable LAPS.
For this we can use the <code class="language-plaintext highlighter-rouge">/v1/local-admin-password/settings</code> endpoint.</p>

<div class="language-plaintext highlighter-rouge"><div class="highlight"><pre class="highlight"><code>url = f"https://{jamf_url}.jamfcloud.com`/v1/local-admin-password/settings`"
payload = {
 "autoDeployEnabled": true,
 "passwordRotationTime": 3600,
 "autoExpirationTime": 7776000
}

headers = {
 "Authorization": f"Bearer {token}",
 "accept": "application/json",
 "content-type": "application/json"
	 }
	
response = requests.put(url, json=payload, headers=headers)
</code></pre></div></div>

<p>We can then do a GET request against <code class="language-plaintext highlighter-rouge">/v1/local-admin-password/settings</code> to verify LAPS has been enabled correctly.</p>

<p>We can now move on to the AWS side of things.
I’ve covered in previous posts how to setup the API gateway + Lambda so we’ll skip that part.
The only addition in this case is that we’ll need to give our Lambda IAM user permissions not only to read but also to write to Secrets Manager.</p>

<p>The way Slack sends back to your APIs the payload data is… fun… so I did come up with an extremely inelegant solution to parse out some data:</p>

<div class="language-plaintext highlighter-rouge"><div class="highlight"><pre class="highlight"><code>#Parse the Slack message content
output = f"""{event}"""
data = ast.literal_eval(output)
body_value = data&amp;#091;'body']
decoded_body = urllib.parse.unquote(body_value)
query_params = urllib.parse.parse_qs(decoded_body)
 
#Parse extract device Serial Number from Slack
serial_from_slack = query_params.get('text', &amp;#091;None])&amp;#091;0]
user_name = query_params&amp;#091;'user_name']
user_name = user_name&amp;#091;0]
user_name = user_name.strip("&amp;#091;]'")

#Parse extract user's details from Slack
user_id = query_params&amp;#091;'user_id']
user_id = user_id&amp;#091;0]
user_id = user_id.strip("&amp;#091;]'")
</code></pre></div></div>

<p>I’m extracting the user who invoked the slash command in Slack so we can then use the Jamf Pro Azure AD API endpoint /<code class="language-plaintext highlighter-rouge">v1/cloud-idp/1002/test-user-membership</code> to do some access based checks.
In our script we will define an Azure AD group (or multiple) that are allowed to use LAPS. This way we can lock down the use of LAPS to only administrators or whoever is deemed to get access to it.</p>

<p>Unauthorized users will get a message in Slack to inform them they’re not allowed to use LAPS:</p>

<p><img src="/assets/img/screenshot-2023-05-03-at-14.24.29.png" alt="" /></p>

<p>A quick video to show how that would look like:</p>

<p>https://youtu.be/Agqbpb1sJGs</p>

<p>When instead the user requesting the LAPS workflow is member of the Azure AD group, and hence authorized:</p>

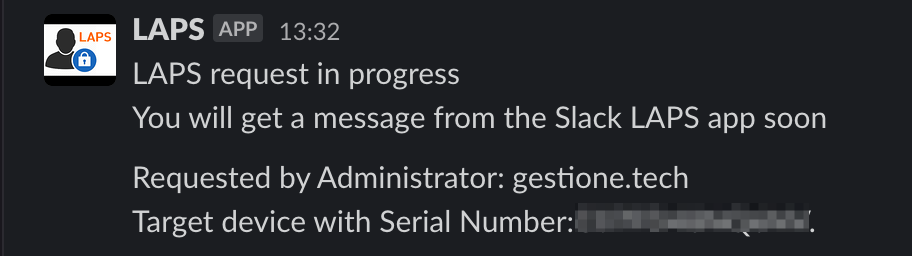
<p>First we display a message to let the admin know we got the request and are working on it:</p>

<p><img src="/assets/img/screenshot_2023-05-03_at_13_46_34.png" alt="" /></p>

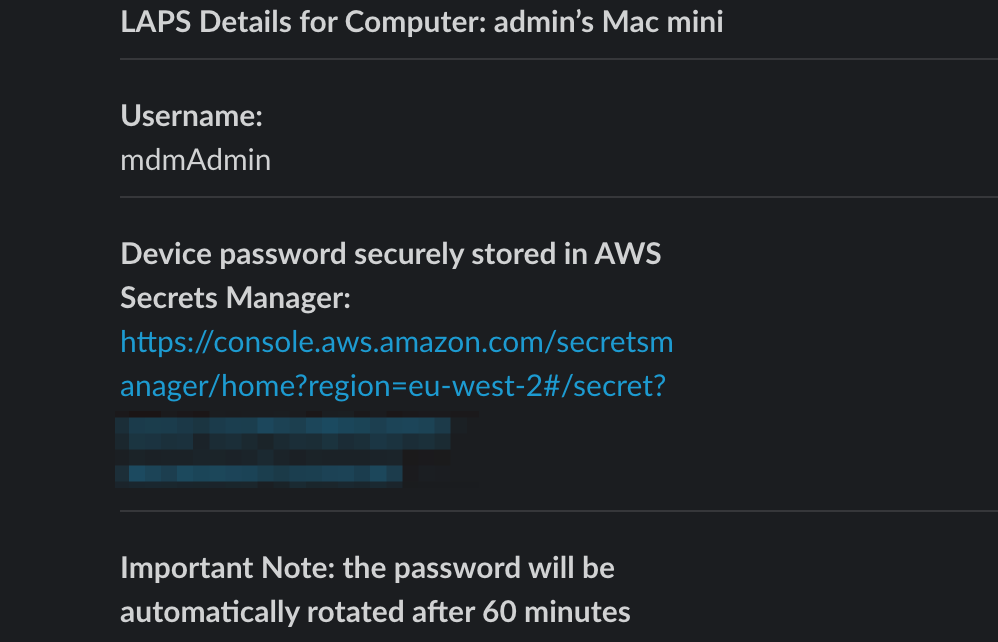
<p>Then the Slack bot will send a message to the user with a link to AWS Secrets Manager that will contain the credentials:</p>

<p><img src="/assets/img/screenshot_2023-05-03_at_13_46_22.png" alt="" /></p>

<p>Here’s how it will play together:</p>

<p>https://youtu.be/sTPRBWRK0XA</p>

<p>And that’s pretty much it.</p>

<p>The python script for the Lambda is available here: https://github.com/matteo-bolognini/Jamf-Pro/blob/main/scripts/python/laps.py</p>

<p>As a disclaimer, none of this is something production ready and should not be blindly implemented without proper testing.</p>

<p>This is just a first step exploring the capabilities of the newly released LAPS function, I’m curious to see how others would use it and also can’t wait for this to make it to the Jamf Pro UI.</p>]]></content><author><name>Matteo Bolognini</name></author><summary type="html"><![CDATA[With the release of Jamf Pro 10.46, LAPS have been introduced into the product: https://learn.jamf.com/bundle/jamf-pro-release-notes-current/page/New_Features_and_Enhancements.html]]></summary></entry><entry><title type="html">Over-Engineering 101: detect duplicate Jamf Pro device records.</title><link href="https://skartek.dev/over-engineering-101-detect-duplicate-jamf-pro-device-records/" rel="alternate" type="text/html" title="Over-Engineering 101: detect duplicate Jamf Pro device records." /><published>2023-04-13T00:00:00+00:00</published><updated>2023-04-13T00:00:00+00:00</updated><id>https://skartek.dev/over-engineering-101-detect-duplicate-jamf-pro-device-records</id><content type="html" xml:base="https://skartek.dev/over-engineering-101-detect-duplicate-jamf-pro-device-records/"><![CDATA[<p>A premise as usual, this work is mostly my “lab” to learn python and serverless and try to apply workflows to real use-case scenario.</p>

<p>The “over-engineering” post title is actually a comment my colleague Allen made when I showed him this workflow :) 
So I thought that’d be a great title to show what I’ve been working on.</p>

<p>To start with the usual: what problem are we trying to solve.</p>

<p>When Mac are sent to repair, it is not uncommon for those to get some hardware replace, causing them to come back with the same Serial Number but a different UDID.
Those devices are usually wiped before being sent to repair, so they will need to be re-enrolled in Jamf Pro.
If the previous device record haven’t been deleted, Jamf Pro will create a new record for this device enrolling as it’s de-facto a “new” device given it has a new UDID, but it has also the same Serial Number as the old record… and this can lead to some issue.</p>

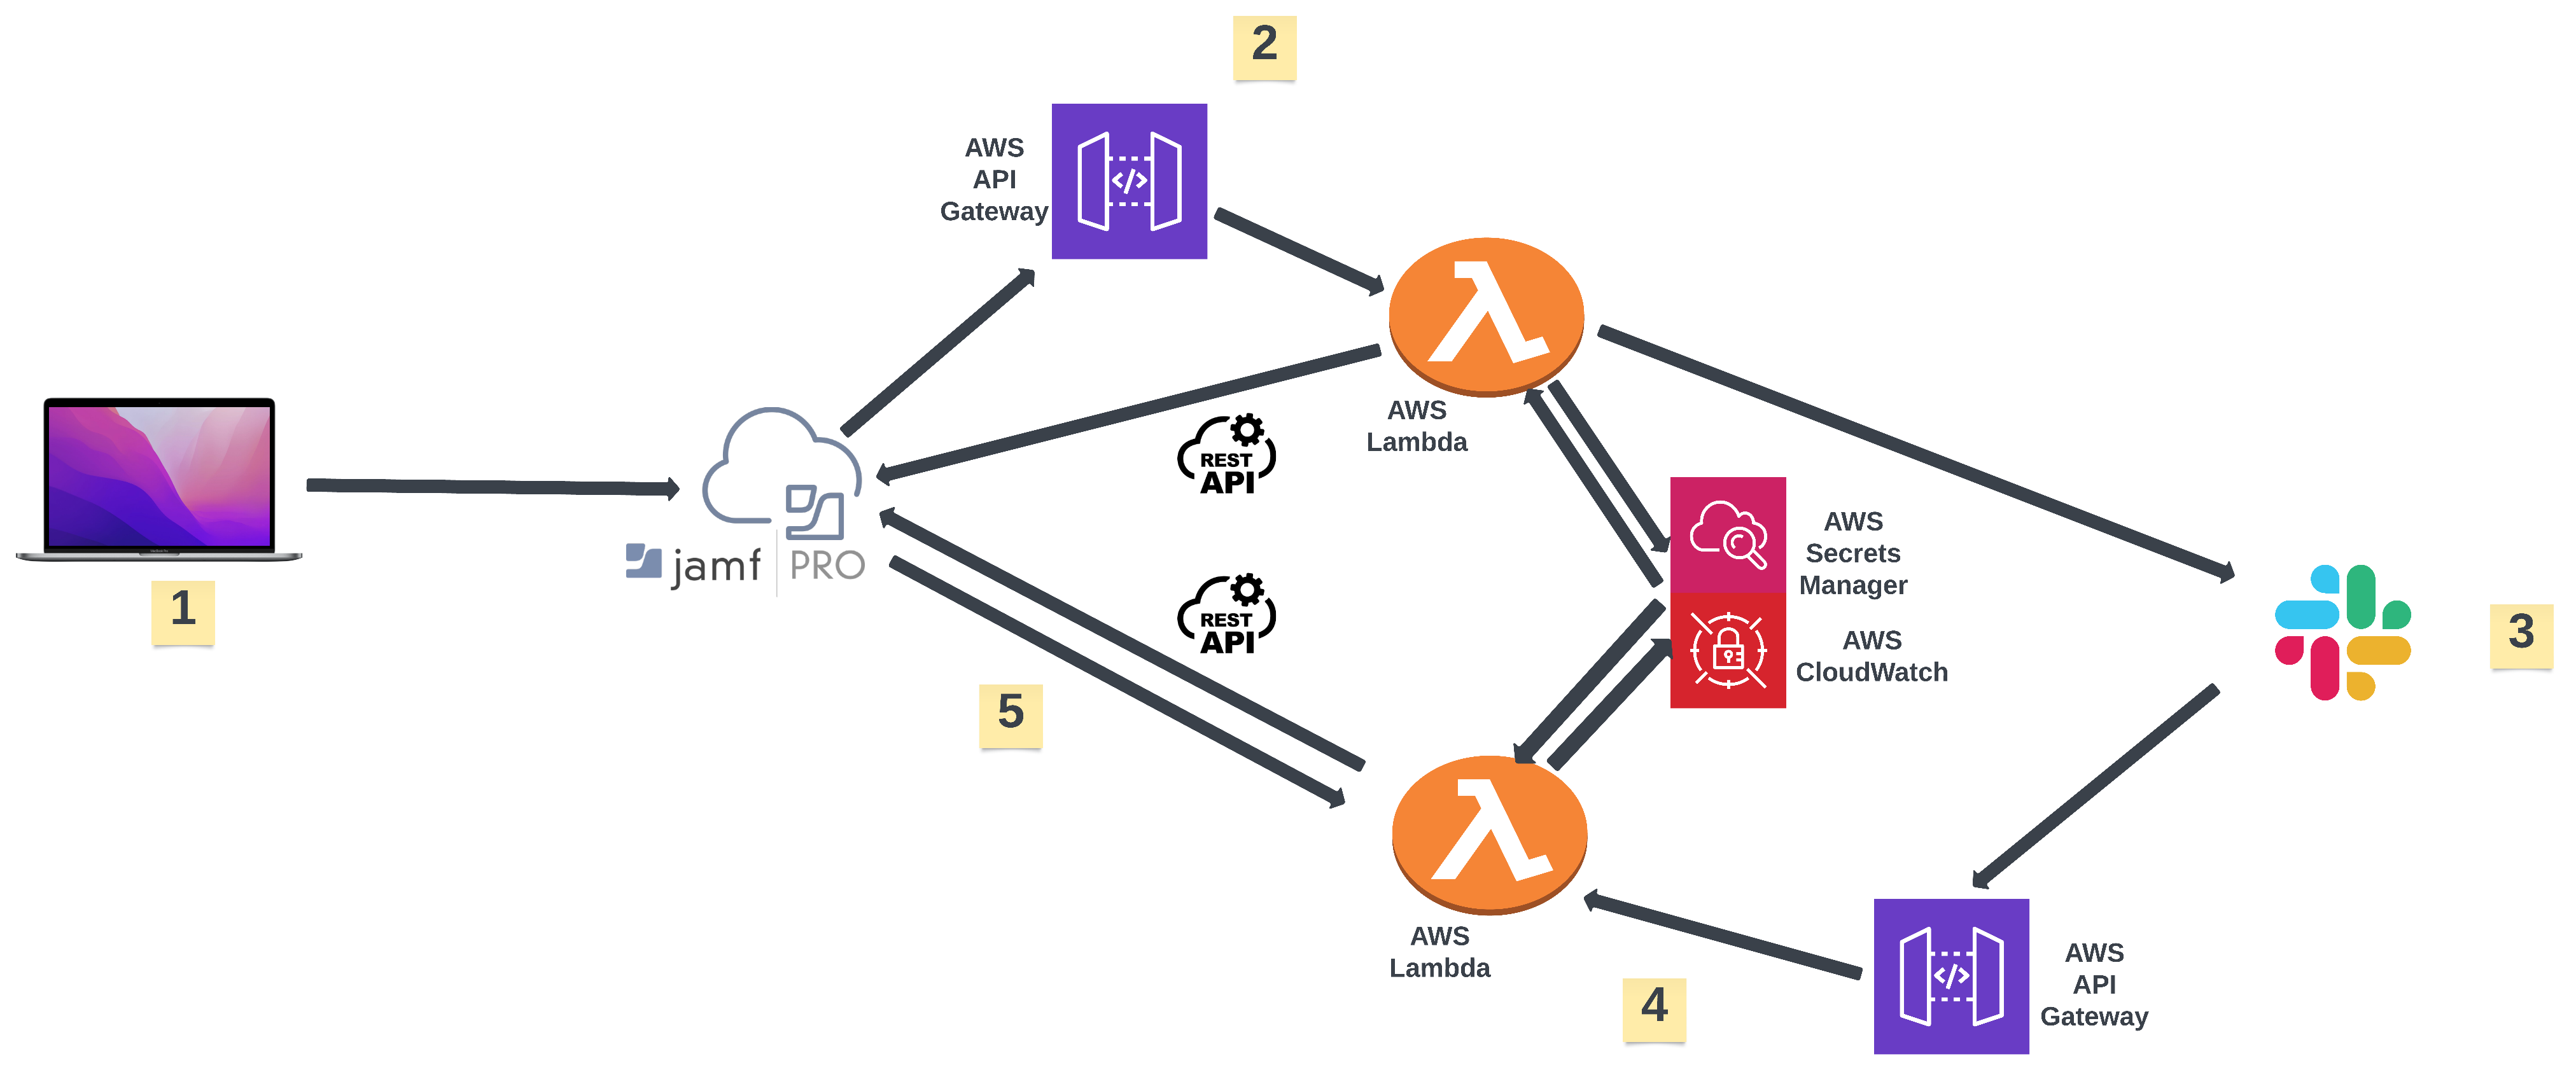
<p>Lets get right into it with a graph to show what’s the idea to overcome this issue (and to understand the “over-engineering” bit):</p>

<p><img src="/assets/img/blank-diagram.png" alt="" /></p>

<p>Breaking it down it looks more or less like:</p>

<ul>
  <li>
    <p>Device come back from repair and is enrolled in Jamf Pro.</p>
  </li>
  <li>
    <p>A webhook on <code class="language-plaintext highlighter-rouge">DeviceAdded</code> trigger is fired off by Jamf Pro to AWS api gateway which then post the json content of the webhook to a Lambda.</p>
  </li>
  <li>
    <p>Lambda will process the webhook, check if a duplicate record of this device exist and if yes, will post a message to Slack, giving the details of the 2 device records and an option to delete the old one</p>
  </li>
  <li>
    <p>When an admin pick the “delete” button in Slack, a payload is sent to another AWS api gateway which invokes another Lambda which will parse the admin’s choice</p>
  </li>
  <li>
    <p>An API call is made to Jamf Pro to delete the device record.</p>
  </li>
</ul>

<p>Lets analyze the first Lambda, which is written in Python.
On the webhook we get from Jamf Pro, we will have the SerialNumber and UDID of the device that has just enrolled.
We need then to check in Jamf Pro if another record exist with that same SerialNumber.
The Classic API (CAPI) is designed to return only 1 results, but here come to rescue the Jamf Pro API (JPAPI) which offers a nice RSQL filter which will return multiple results (if exist) for the given SerialNumber:</p>

<div class="language-plaintext highlighter-rouge"><div class="highlight"><pre class="highlight"><code>https:&amp;#047;&amp;#047;{jamf_url}.jamfcloud.com/api/v1/computers-inventory?section=HARDWARE&amp;page=0&amp;page-size=100&amp;filter=hardware.serialNumber%3D%3D%22{serial_number}%22%22
</code></pre></div></div>

<p>Once we have data back from this endpoint, we can easily grab the JSS_ID (device identifier) and UDID out of the json blob:</p>

<div class="language-plaintext highlighter-rouge"><div class="highlight"><pre class="highlight"><code>id_multiple = list(map(int, id_multiple))
 id_multiple.sort()
 
 id1 = id_multiple&amp;#091;0]
 id2 = id_multiple&amp;#091;1]
 
 udid_multiple = &amp;#091;]
 for result in output&amp;#091;"results"]:
 udid = result&amp;#091;"udid"]
 udid_multiple.append(udid)
 print(f"UDIDs : {udid_multiple}")
 
 udid_multiple.sort()
 
 udid1 = udid_multiple&amp;#091;0]
 udid2 = udid_multiple&amp;#091;1]
</code></pre></div></div>

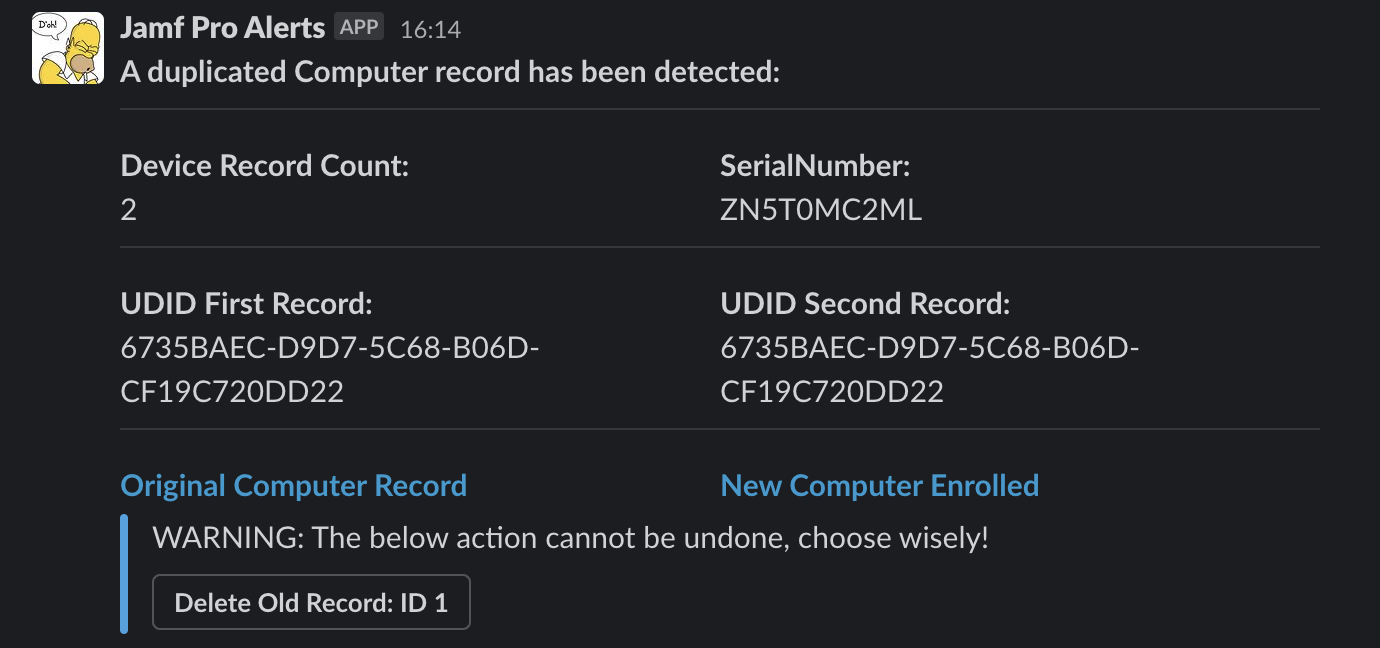
<p>And that’s pretty much if for the first function, we will just use <code class="language-plaintext highlighter-rouge">slack.com/api/chat.postMessage</code> to post the message into Slack, which will look like this:</p>

<p><img src="/assets/img/screenshot-2023-04-13-at-16.14.51.png" alt="" /></p>

<p>The next part of the job is to actually capture the user’s input from Slack.</p>

<p>This is done with a pretty simple HTTP response where Slack will post a payload when a user will click any menu item button, and will be sent to our api gateway which will then pass the json blob to the Lambda to be worked on.
I have to admit I struggled a bit with Slack formatting of the payload and came up with the (incredibly in-elegant) code below to parse:</p>

<div class="language-plaintext highlighter-rouge"><div class="highlight"><pre class="highlight"><code>request_body = event&amp;#091;"body"]
request_body_parsed = request_body.replace('payload=','', 1)
request_body_parsed = urllib.parse.unquote(request_body_parsed)
request_body_parsed = json.loads(request_body_parsed)
 
device_id = request_body_parsed&amp;#091;"actions"]&amp;#091;0]&amp;#091;"value"]
serial_number = request_body_parsed&amp;#091;"actions"]&amp;#091;0]&amp;#091;"name"]
udid = request_body_parsed&amp;#091;"callback_id"]
username = request_body_parsed&amp;#091;"user"]&amp;#091;"name"]
</code></pre></div></div>

<p>So we now have the device SerialNumber, the “original” ID and the UDID, we can go ahead and delete.</p>

<p>I thought it would be nice to add some little validation of which user can actually delete the device record.
Given it’s a no-going-back operation, we might want to restrict that to specific users only, even if you’re posting those alerts in private Slack channels.</p>

<p>JPAPI come to rescue again as we can leverage the Cloud IdP integration (AzureAD, Google LDAP) to actually check if the user who clicked the button is member of an LDAP group or not:</p>

<div class="language-plaintext highlighter-rouge"><div class="highlight"><pre class="highlight"><code>url = f"https://{jamf_url}.jamfcloud.com/api/v1/cloud-idp/1001/test-user-membership"
 payload = {
 "username": f"{username}",
 "groupname": f"{control_group}"
 }
</code></pre></div></div>

<p>The <code class="language-plaintext highlighter-rouge">control_group</code> is a variable we can define in our script which will be an actual LDAP group we will check the user’s membership against.</p>

<p>If the user is not member of the group, they will get a message advising them they’re not allowed to perform the delete operation from Slack:</p>

<div class="language-plaintext highlighter-rouge"><div class="highlight"><pre class="highlight"><code>return {
 'statusCode': 200,
 'body': (f"Account:{username} attempted to delete the device record:{device_id} but is not authorized due to lack of permissions, contact your Jamf Pro administrator.")
 }
</code></pre></div></div>

<p>This is how it looks like in Slack:</p>

<p><img src="/assets/img/screenshot-2023-04-13-at-16.49.25.png" alt="" /></p>

<p>Otherwise, if the user is member of the LDAP group, they will be allowed to proceed with the deletion and a message in Slack will confirm the success of the operation:</p>

<div class="language-plaintext highlighter-rouge"><div class="highlight"><pre class="highlight"><code>url = f"https://{jamf_url}.jamfcloud.com/JSSResource/computers/id/{device_id}"
 headers = {"Authorization": f"Bearer {token}", "Accept": "application/json"}
 response = requests.delete(url, headers=headers)
 print(f"Status Code: {response.status_code}")
 print("Old device record successfully deleted from Jamf Pro")
 
 return {
 'statusCode': 200,
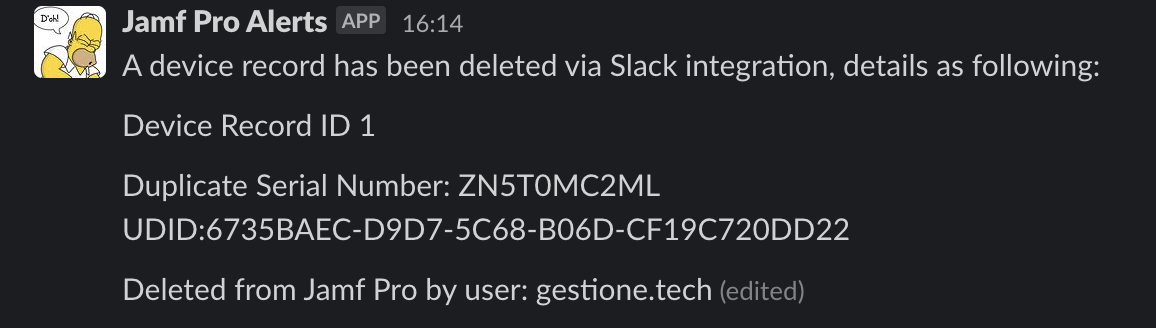
 'body': (f"A device record has been deleted via Slack integration, details as following:\n\nDevice Record ID {device_id}\n\nDuplicate Serial Number: {serial_number}\nUDID:{udid}\n\nDeleted from Jamf Pro by user: {username}")
 }
 
</code></pre></div></div>

<p>This is how it looks like in Slack:</p>

<p><img src="/assets/img/screenshot-2023-04-13-at-16.15.04.png" alt="" /></p>

<p>Time to see a demo:</p>

<p>https://www.youtube.com/embed/7nMBHHW7jcs</p>

<p>The python scripts for the lambdas are available on my GitHub:</p>

<p>https://github.com/matteo-bolognini/AWS-Projects/blob/main/webhook-processor.py
https://github.com/matteo-bolognini/AWS-Projects/blob/main/slack_responder.py</p>

<p>That’s a wrap!
Hope you enjoyed this journey into over-engineering simple tasks :)</p>]]></content><author><name>Matteo Bolognini</name></author><summary type="html"><![CDATA[A premise as usual, this work is mostly my “lab” to learn python and serverless and try to apply workflows to real use-case scenario.]]></summary></entry><entry><title type="html">Jamf Protect SSO with AzureAD with SAML</title><link href="https://skartek.dev/jamf-protect-sso-with-azuread-with-saml/" rel="alternate" type="text/html" title="Jamf Protect SSO with AzureAD with SAML" /><published>2023-03-09T00:00:00+00:00</published><updated>2023-03-09T00:00:00+00:00</updated><id>https://skartek.dev/jamf-protect-sso-with-azuread-with-saml</id><content type="html" xml:base="https://skartek.dev/jamf-protect-sso-with-azuread-with-saml/"><![CDATA[<p>To begin with, at a super high level, modern IdPs generally support SAML and OIDC (in addition to proprietary standards like ROPC for example), if we want to take a super high level overview of that they are:**</p>
<ul>
  <li>SAML 2.0 is XML based and in it’s current version has been around since 2004</li>
  <li>OIDC (OpenID Connect) is a newer protocol based on OAuth 2.0 framework and JWT based.</li>
</ul>

<p>Jamf provides documentation on how to setup the Single Sign On integration with Protect and Azure AD, by default using OIDC: https://learn.jamf.com/bundle/jamf-protect-documentation/page/Integrating_with_Microsoft_Azure_AD.html</p>

<p>In this post, we will explore how to setup the connection using SAML.</p>

<p>First of all, lets head to Azure AD via portal.azure.com and go to <code class="language-plaintext highlighter-rouge">Enterprise Applications</code> and make a new app:</p>

<p><img src="/assets/img/screenshot-2023-03-09-at-13.54.08.png" alt="" /></p>

<p>Choose then <code class="language-plaintext highlighter-rouge">Create your own application</code>:</p>

<p><img src="/assets/img/screenshot-2023-03-09-at-14.02.11.png" alt="" /></p>

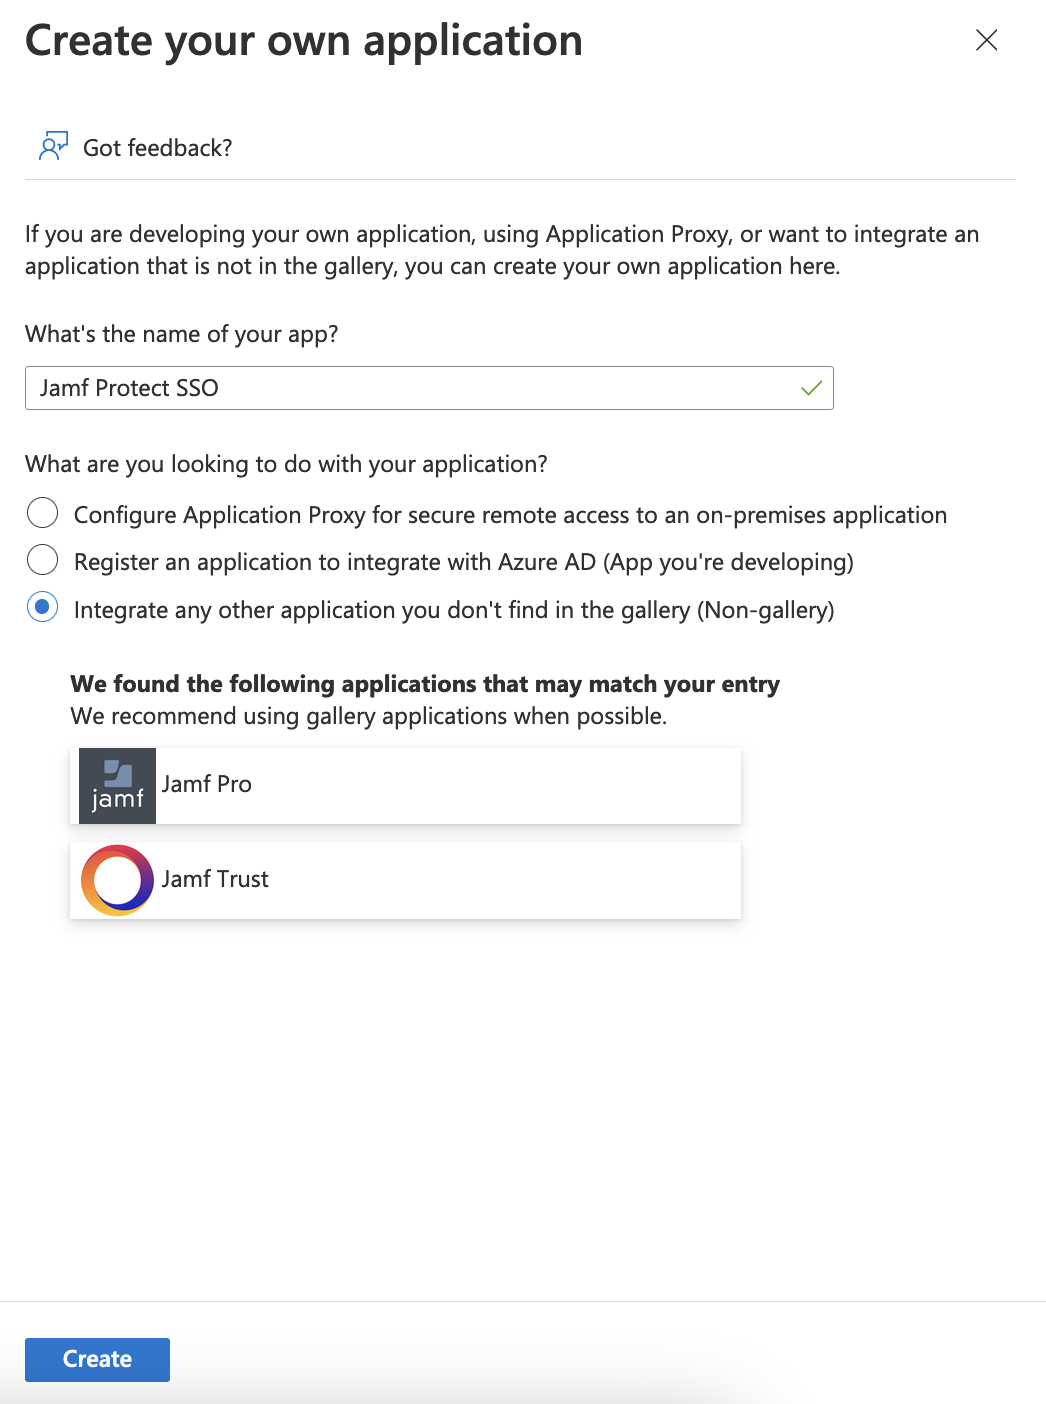
<p>Give the app a display name and select <code class="language-plaintext highlighter-rouge">Integrate any other application you don't find in the gallery</code>
(Ignore the pop-up displaying other similar apps in the Gallery) and then click <code class="language-plaintext highlighter-rouge">Create</code>:</p>

<p><img src="/assets/img/screenshot-2023-03-09-at-14.03.35.png" alt="" /></p>

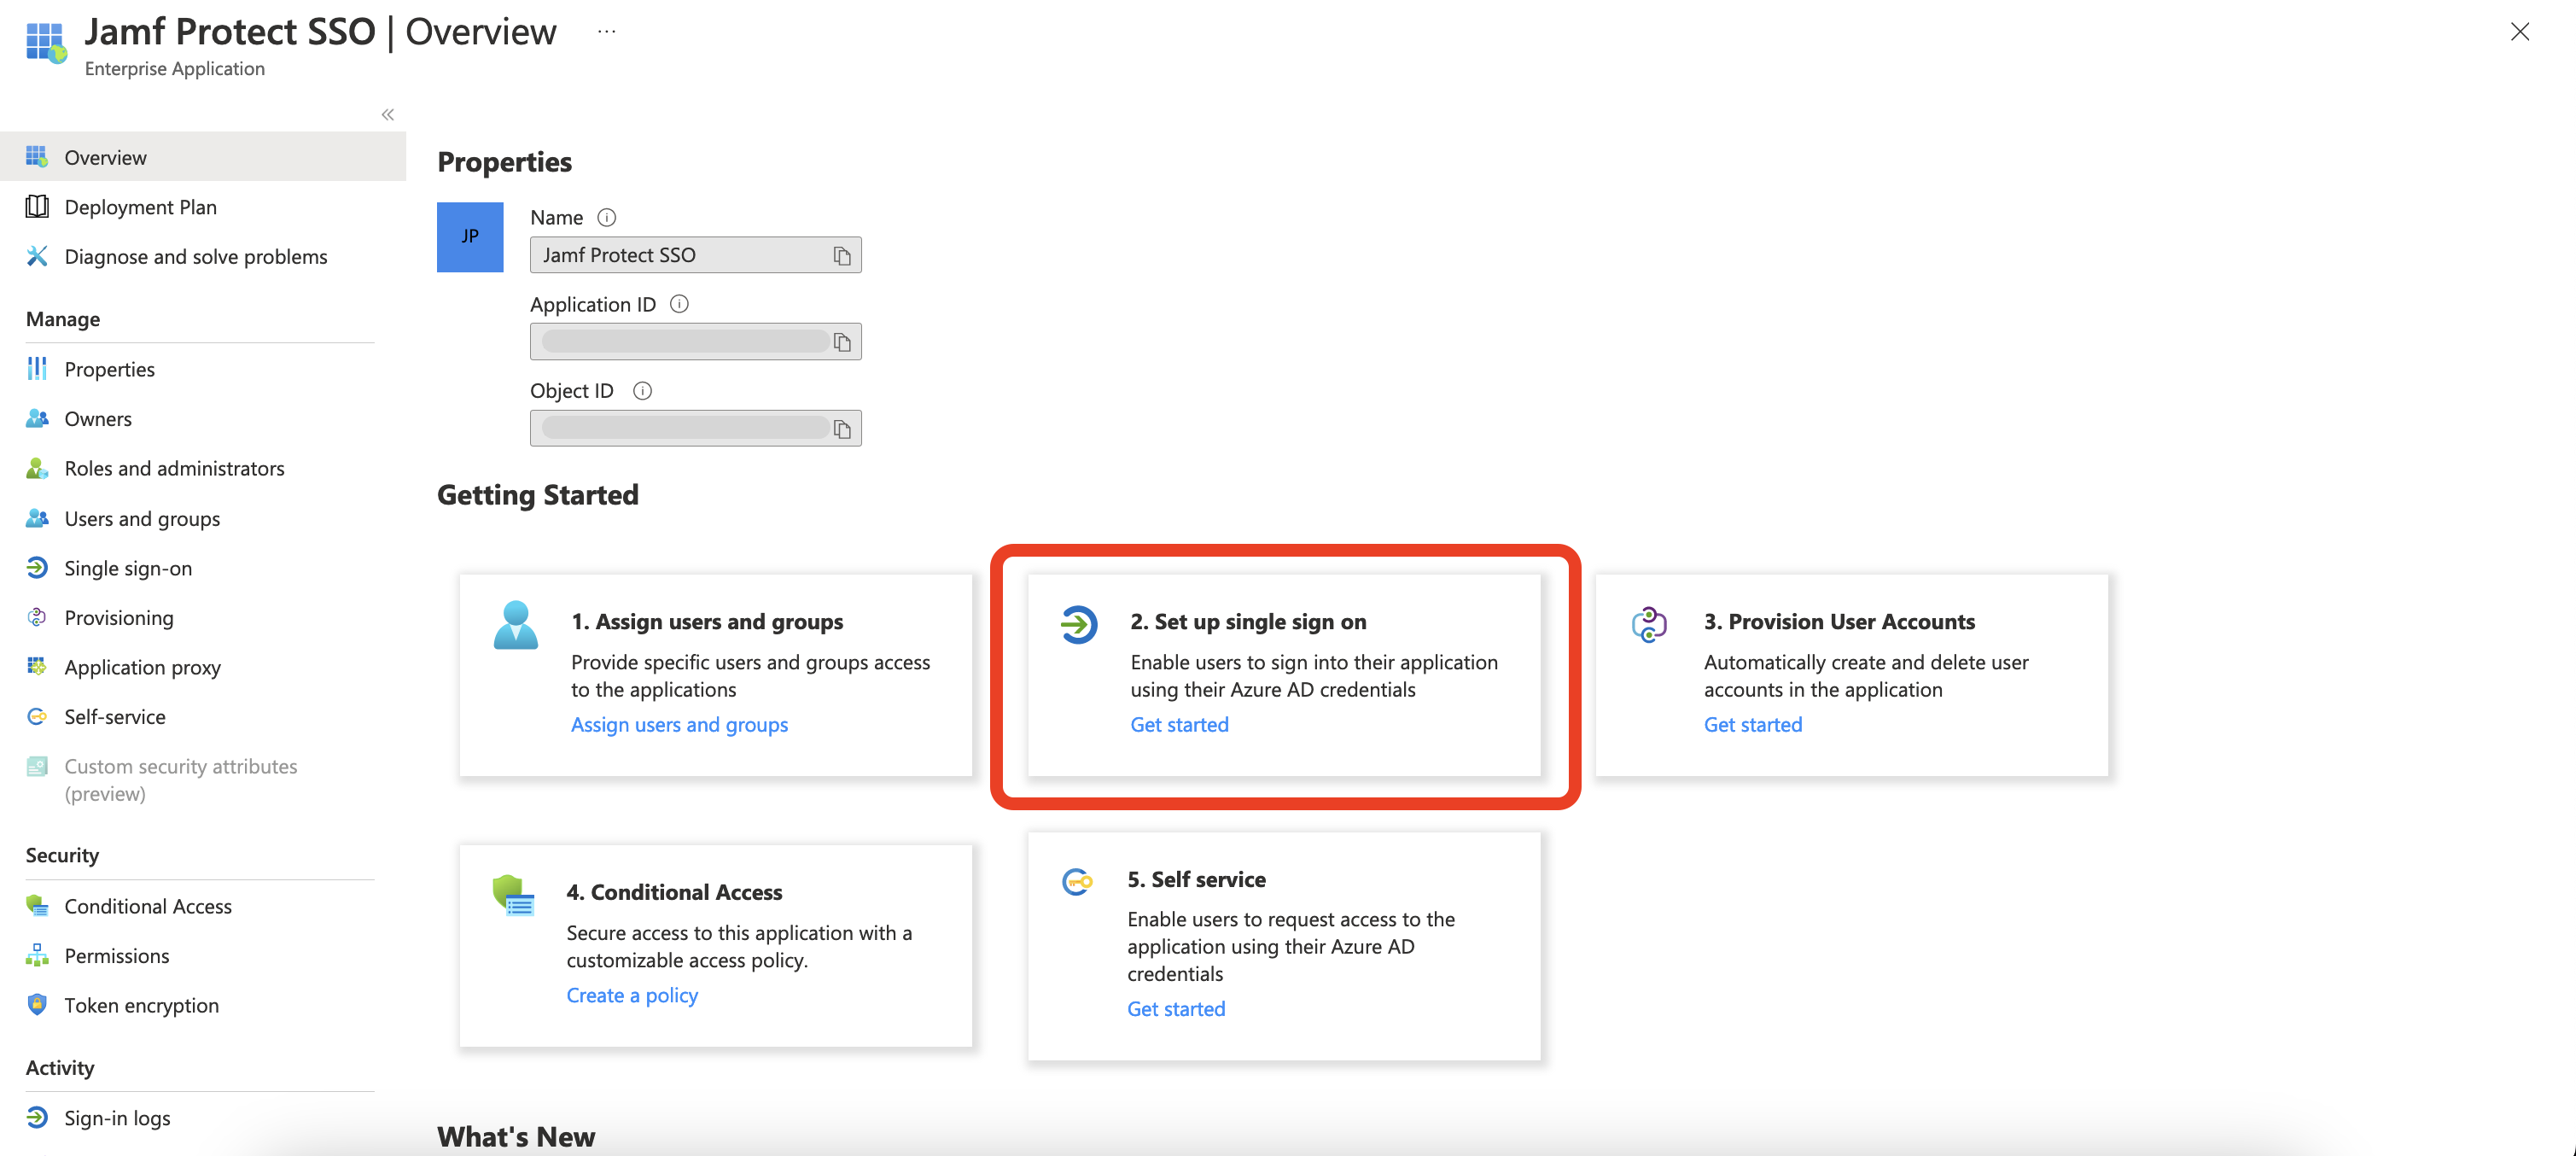
<p>Once the app has been created, in the <code class="language-plaintext highlighter-rouge">Getting Started</code> section pick <code class="language-plaintext highlighter-rouge">2. Setup single sign on</code>:</p>

<p><img src="/assets/img/screenshot-2023-03-09-at-14.06.11.png" alt="" /></p>

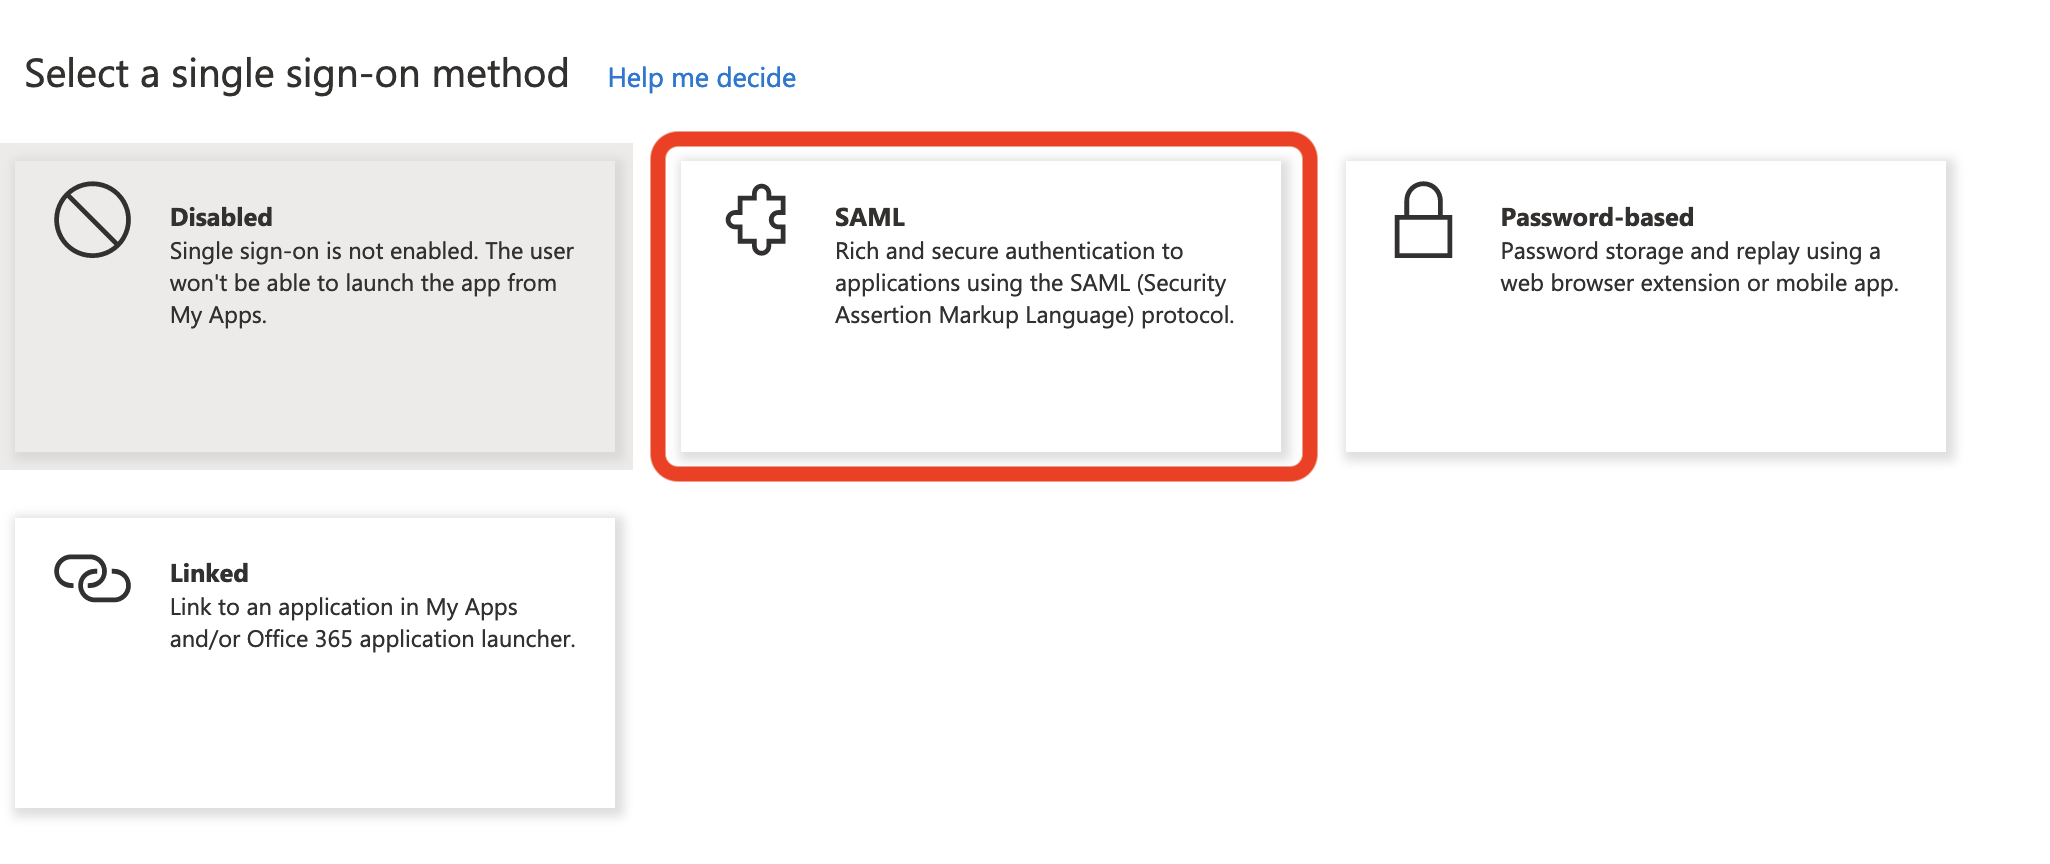
<p>Select then <code class="language-plaintext highlighter-rouge">SAML</code>:</p>

<p><img src="/assets/img/screenshot-2023-03-09-at-14.08.21.png" alt="" /></p>

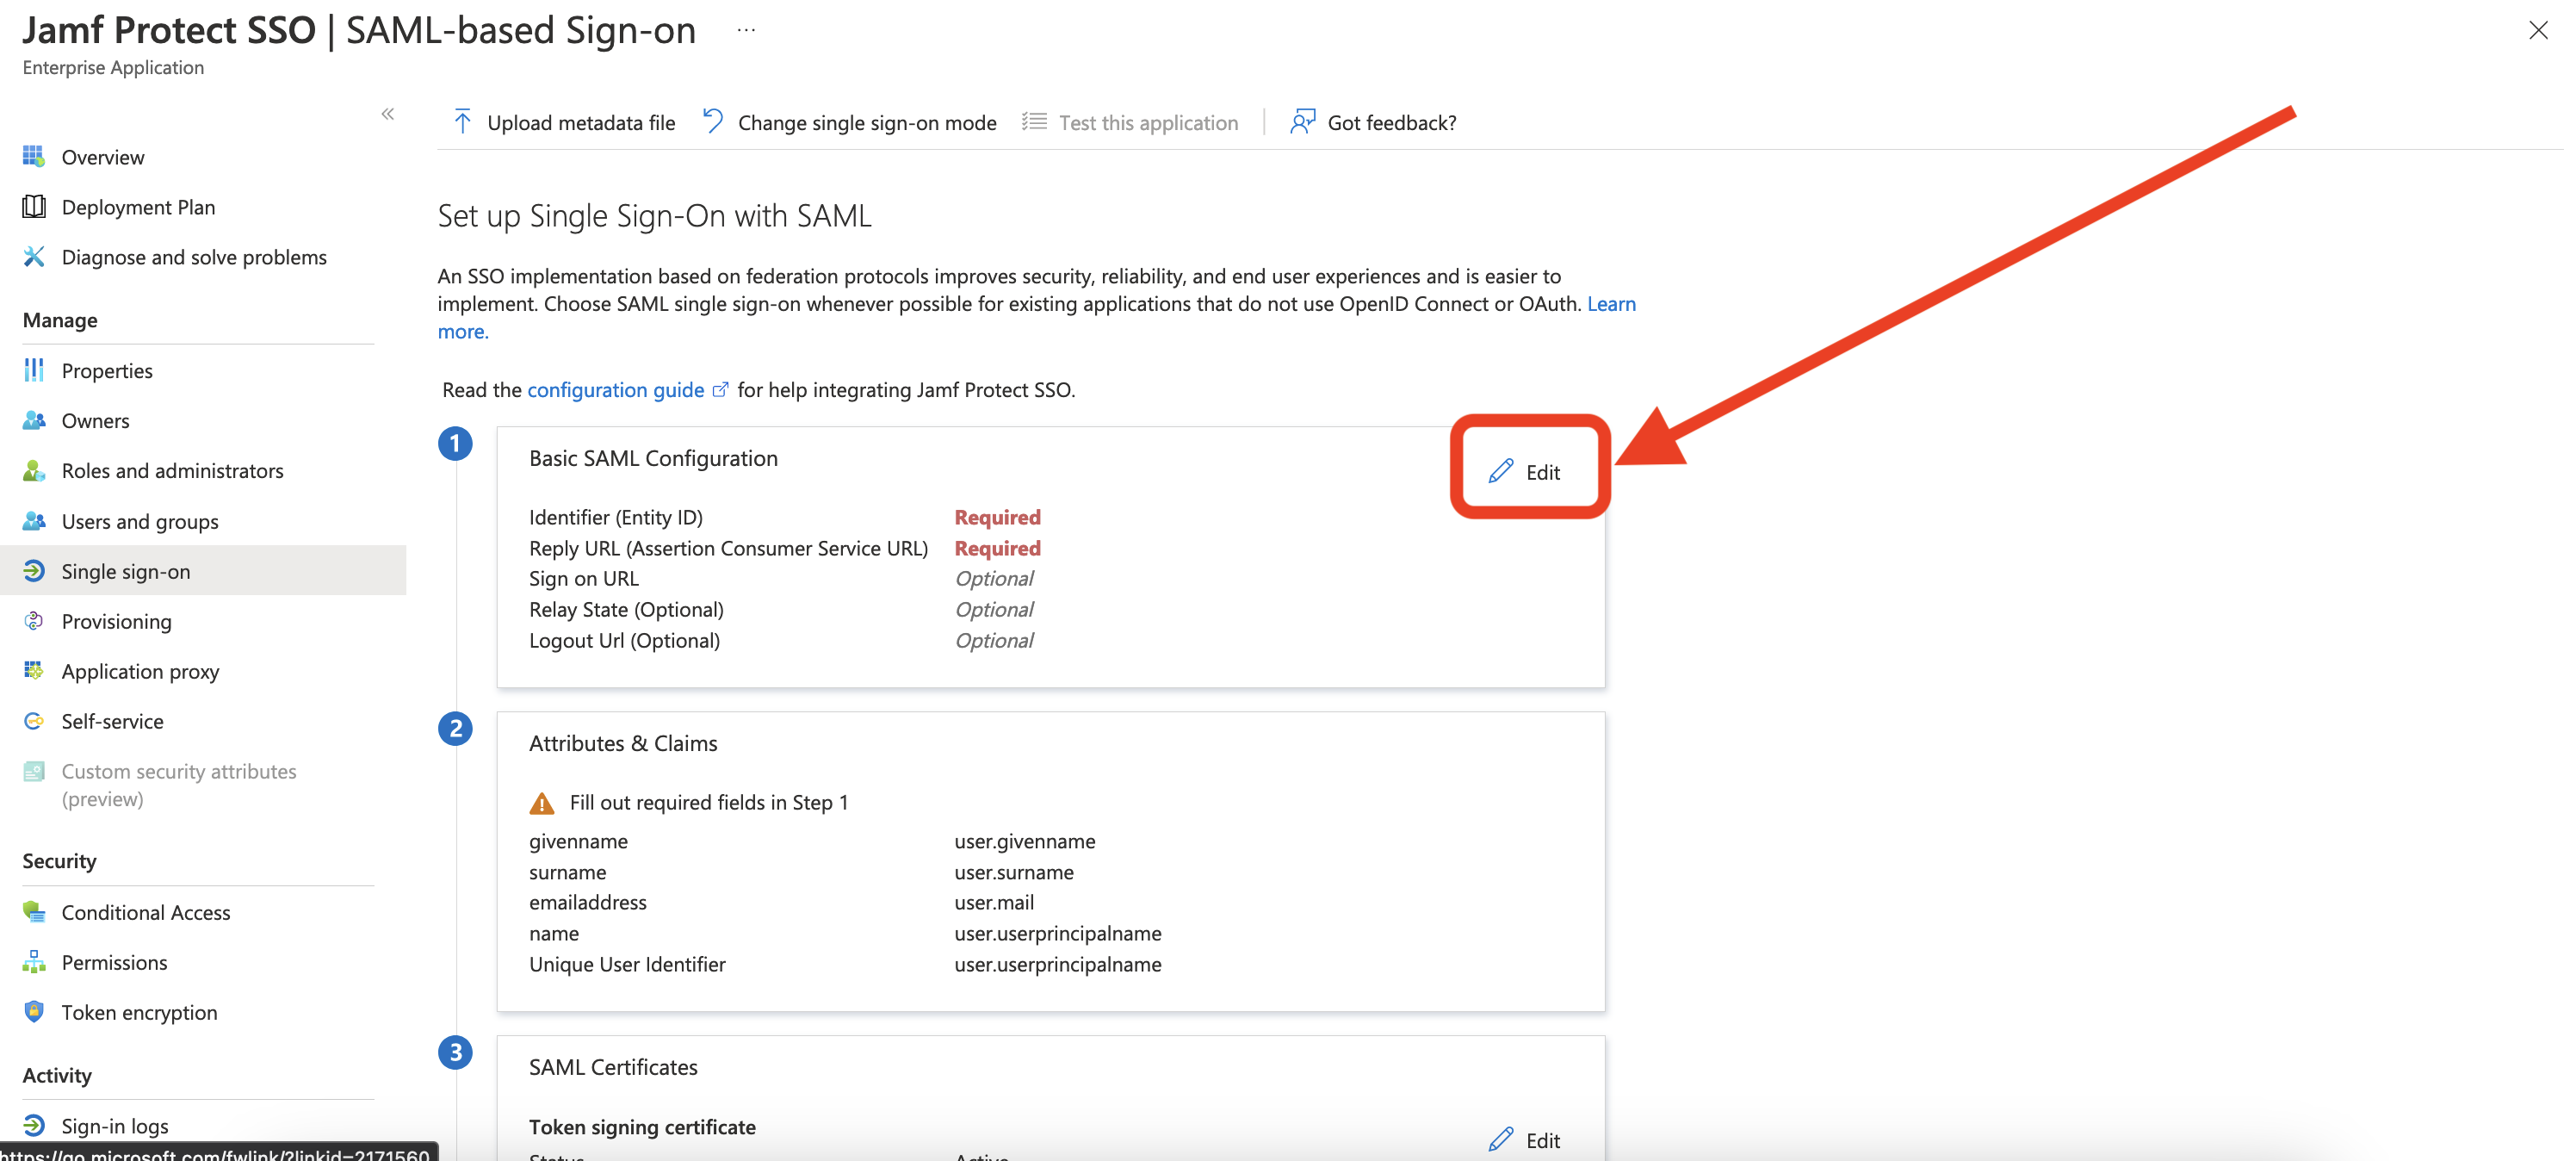
<p>And then hit the <code class="language-plaintext highlighter-rouge">Edit</code> button to configure the app:</p>

<p><img src="/assets/img/screenshot-2023-03-09-at-14.08.32.png" alt="" /></p>

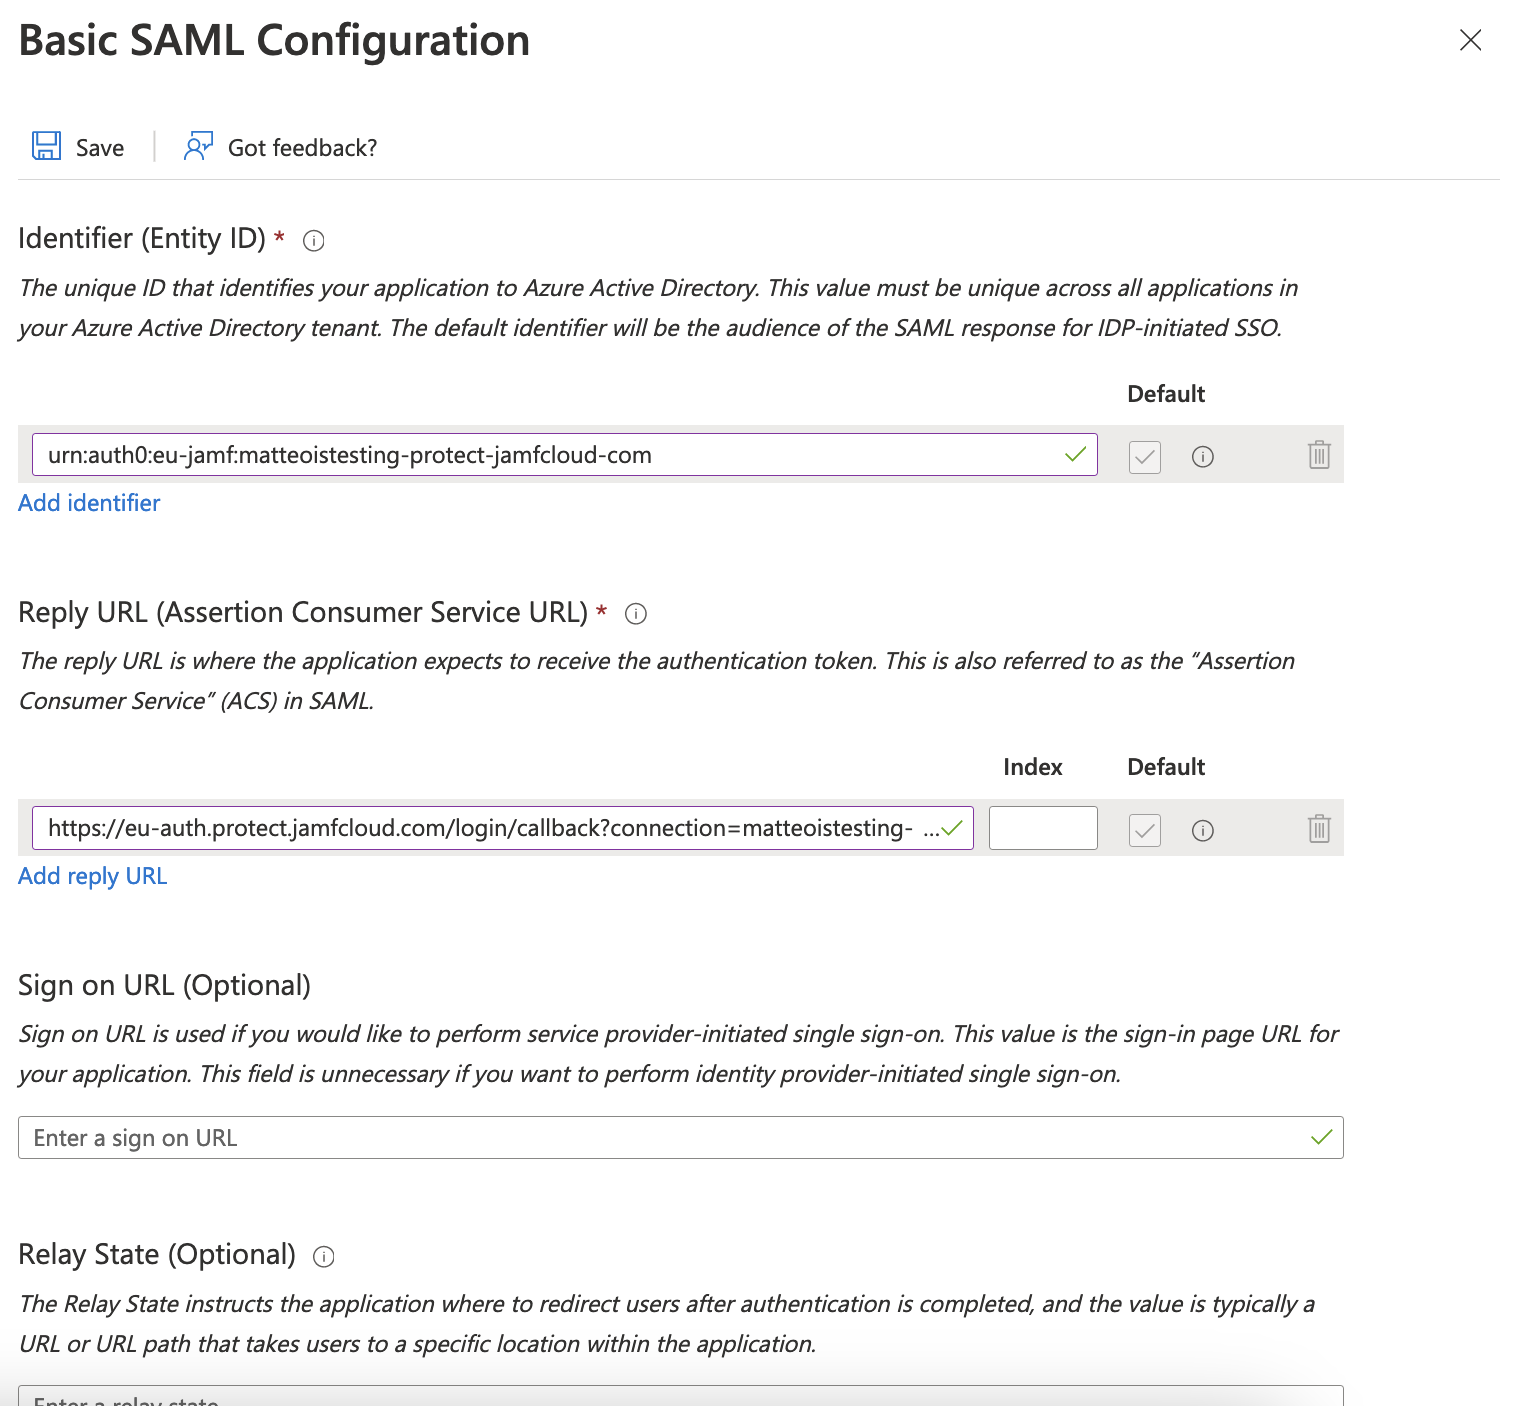
<p>The first field to be configured is the Identifier (or EntityID). 
This will depend based on your tenant.</p>

<p>For example, my tenant is <a href="https://matteoistesting.protect.jamfcloud.com/">https://matteoistesting.protect.jamfcloud.com/</a>
So the <ConnectorName> to replace for Entity ID will be:
`matteoistesting-protect-jamfcloud-com`</ConnectorName></p>

<p>Note the dashes in here, not the dots.</p>

<p>This test tenant I’m using is located in Europe so my Reply URL will be
EU—<code class="language-plaintext highlighter-rouge">[https://eu-auth.protect.jamfcloud.com/login/callback?connection=matteoistesting-protect-jamfcloud-com](https://eu-auth.protect.jamfcloud.com/login/callback?connection=matteoistesting-protect-jamfcloud-com)</code></p>

<p>and my Entity ID:</p>

<p><code class="language-plaintext highlighter-rouge">urn:auth0:eu-jamf:matteoistesting-protect-jamfcloud-com</code></p>

<p><img src="/assets/img/screenshot-2023-03-09-at-14.14.27.png" alt="" /></p>

<p>Hit the <code class="language-plaintext highlighter-rouge">Save</code> button and that’s it for the SAML configuration.</p>

<p>Scroll then down to the SAML Certificates section and download the:</p>

<ul>
  <li>
    <p>Certificate (Base64)</p>
  </li>
  <li>
    <p>Federation Metadata XML</p>
  </li>
</ul>

<p>We will need to provide those to Jamf to enable the integration.</p>

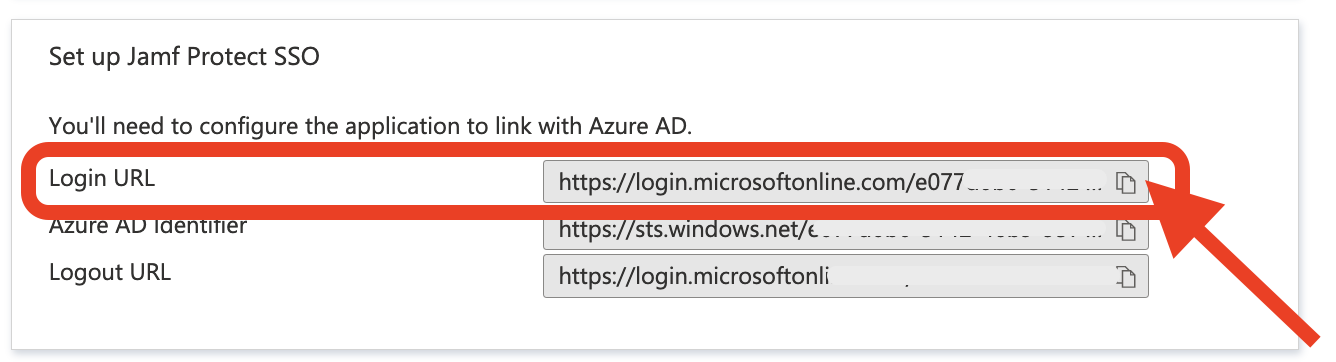
<p>The last piece of information Jamf will need is the Login URL:</p>

<p><img src="/assets/img/screenshot-2023-03-09-at-14.17.44.png" alt="" /></p>

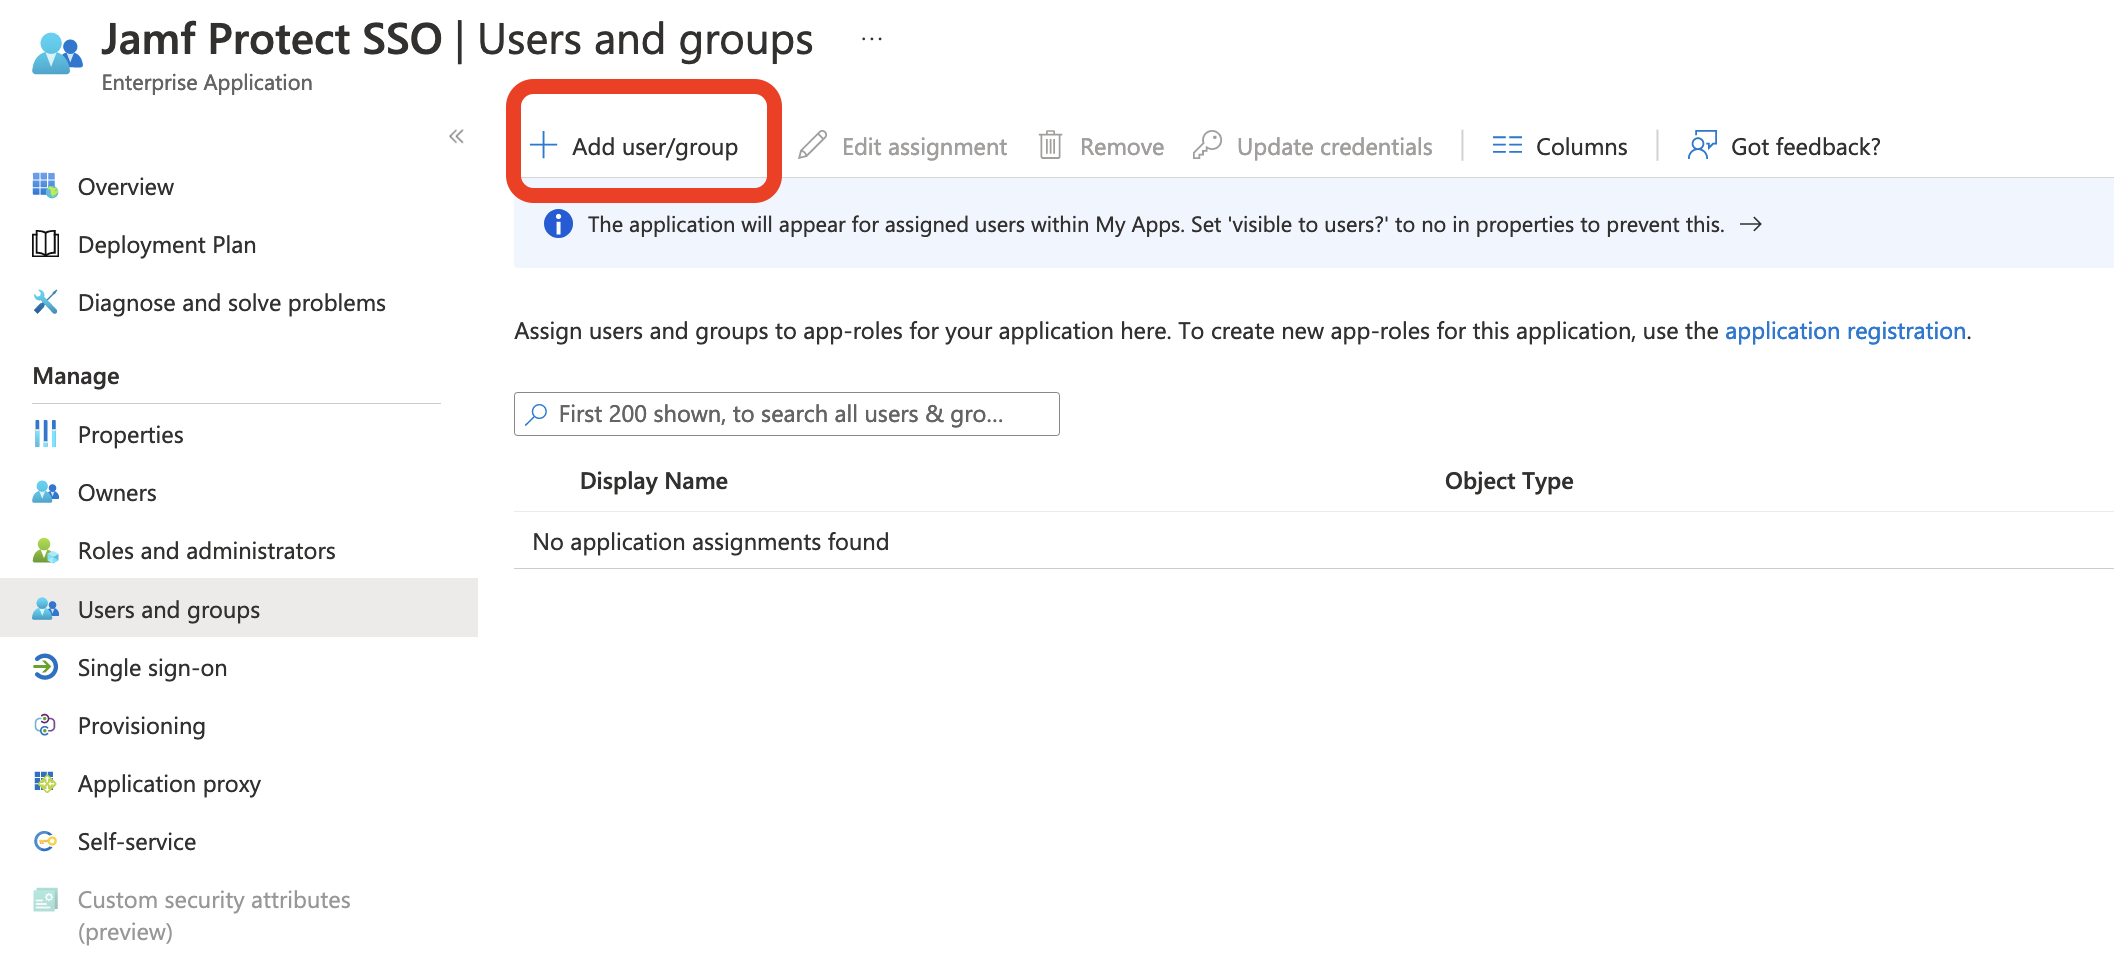
<p>The last step is to assign user and groups to the app. Head to User and Groups, click Add and configure user/groups as needed:</p>

<p><img src="/assets/img/screenshot-2023-03-09-at-14.22.41.png" alt="" /></p>

<p>Once we’ve finished, we can reach out to Jamf and provide:</p>

<ul>
  <li>
    <p>Certificate and Federation XML we downloaded</p>
  </li>
  <li>
    <p>Login URL (as per previous step)</p>
  </li>
</ul>

<p>Once Jamf will confirm the SSO has been setup for our tenant, we should see a new <em>Continue with Microsoft</em>** button to show up under the /login URL of our tenant:</p>

<p><img src="/assets/img/screenshot-2023-03-09-at-14.27.34.png" alt="" /></p>

<p>And that’s pretty much it.
We can click on it and we’ll be redirected to Azure AD tenant for authentication.</p>

<p>Keep in mind, by default Jamf disables IdP initiated logins, for good reasons: <a href="https://auth0.com/docs/authenticate/protocols/saml/saml-sso-integrations/identity-provider-initiated-single-sign-on">https://auth0.com/docs/authenticate/protocols/saml/saml-sso-integrations/identity-provider-initiated-single-sign-on</a></p>

<p>This means we can’t launch Protect console from our AzureAD profile.
If you’re ok with having IdP initiated login enabled, just let Jamf know and they will enable it for you.</p>]]></content><author><name>Matteo Bolognini</name></author><summary type="html"><![CDATA[To begin with, at a super high level, modern IdPs generally support SAML and OIDC (in addition to proprietary standards like ROPC for example), if we want to take a super high level overview of that they are:** SAML 2.0 is XML based and in it’s current version has been around since 2004 OIDC (OpenID Connect) is a newer protocol based on OAuth 2.0 framework and JWT based.]]></summary></entry><entry><title type="html">Tinkering with automation. Respond to an end user disabling Gatekeeper.</title><link href="https://skartek.dev/tinkering-with-automation-respond-to-an-end-user-disabling-gatekeeper/" rel="alternate" type="text/html" title="Tinkering with automation. Respond to an end user disabling Gatekeeper." /><published>2023-02-22T00:00:00+00:00</published><updated>2023-02-22T00:00:00+00:00</updated><id>https://skartek.dev/tinkering-with-automation-respond-to-an-end-user-disabling-gatekeeper</id><content type="html" xml:base="https://skartek.dev/tinkering-with-automation-respond-to-an-end-user-disabling-gatekeeper/"><![CDATA[<p>Way too long ago, I posted my last blog around a POC on how to offer self serviced iOS Inventory Updates to end users with Jamf Pro.</p>

<p>I have been playing since then with few other ideas and thought this one was worth to share.</p>

<p>Disclaimer: this is not nearly as close as a production ready workflow, it’s mainly a personal learning project to familiarize with python, webhooks and, in general, automation.</p>

<p>What’s the problem we’re trying to solve?</p>

<p>End users with admin privileges could potentially disable Gatekeeper. There’s enough “junk” forums on the net suggesting to turn off Gatekeeper as a solution for very suspicious apps.</p>

<p>From Apple’s website:</p>

<p><em>“macOS offers the Gatekeeper technology and runtime protection to help ensure that only trusted software runs on a user’s Mac.”</em>
<a href="https://support.apple.com/en-gb/guide/security/sec5599b66df/web">https://support.apple.com/en-gb/guide/security/sec5599b66df/web</a></p>

<p>We could surely rely on Jamf Pro inventory to track when a user disable Gatekeeper, but that would rely on the device submitting an inventory update, which depending on the configuration chosen by the administrators, sometimes it can take hours/days to have fresh data in.</p>

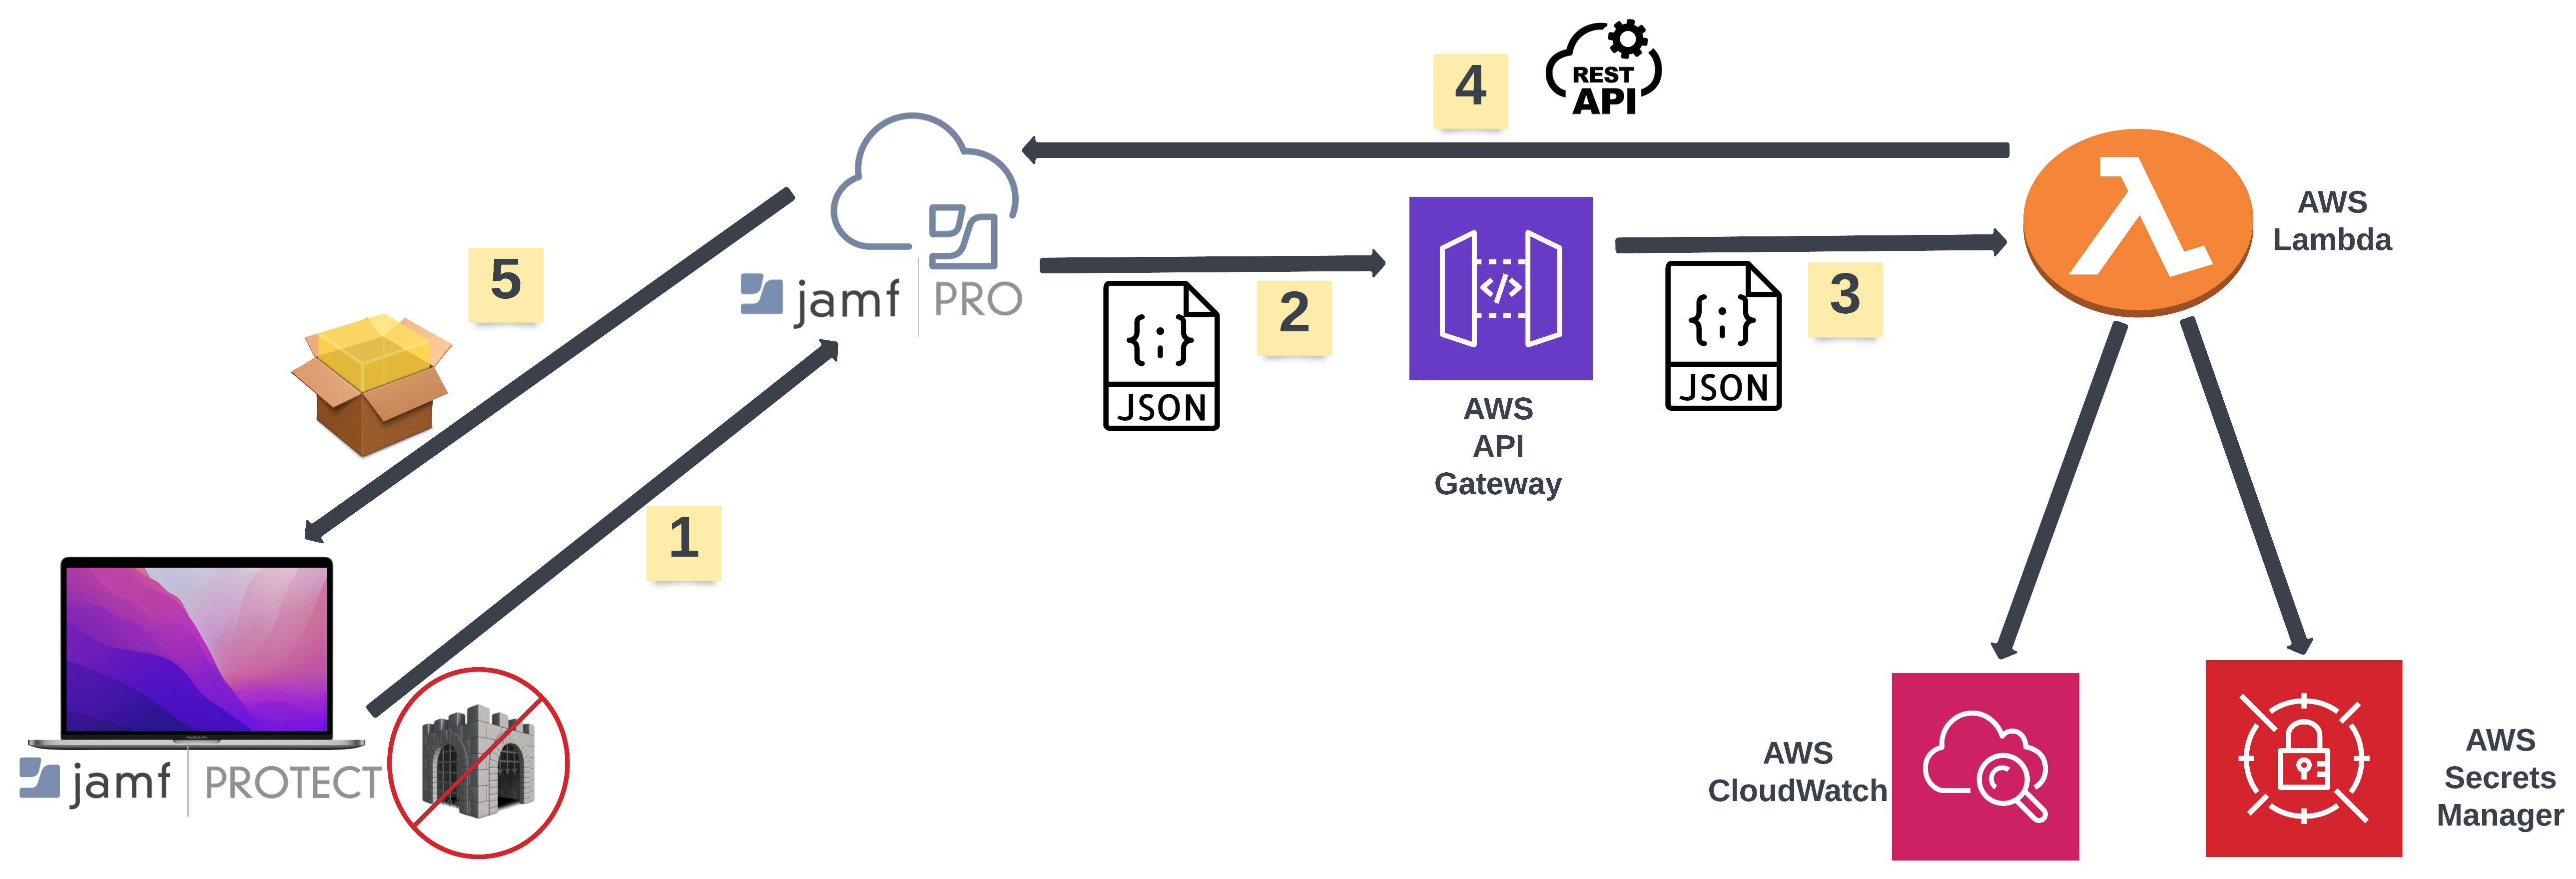
<p>The idea is to leverage Protect “Add to Smart Group” functionality, Jamf Pro webhooks and MDM framework to make the detection and remediation as fast as possible.</p>

<p>How we can work on this.</p>

<p>Let’s start with some diagram to break this down in smaller components.</p>

<p>Key components:</p>

<ul>
  <li>
    <p>Jamf Pro</p>
  </li>
  <li>
    <p>Jamf Protect</p>
  </li>
  <li>
    <p>AWS: API gateway + Lambda + CloudWatch + Secrets Manager</p>
  </li>
</ul>

<p><img src="/assets/img/workflow.png" alt="" /></p>

<ul>
  <li>
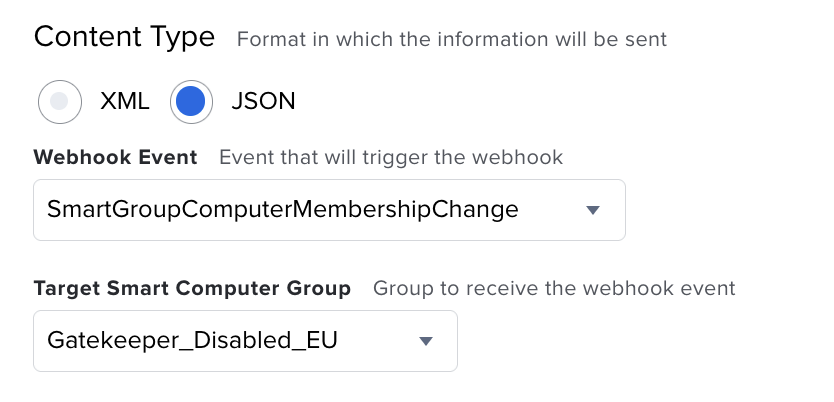
    <p>Jamf Protect will detect that Gatekeper have been disabled (we’ll see later how to) and use the “Add to Smart Group” built in feature to add the device to a Smart Group in Jamf Pro.</p>
  </li>
  <li>
    <p>Jamf Pro will fire off a webhook - <code class="language-plaintext highlighter-rouge">SmartGroupComputerMembershipChange</code> - to the API gatway</p>
  </li>
  <li>
    <p>API gateway passes the content of the webhook (json formatted file) to Lambda.</p>
  </li>
  <li>
    <p>Lambda iterate through the file, determine the event (Gatekeeper disabled) and makes an API call to Jamf Pro.We’ll take advantage of the <code class="language-plaintext highlighter-rouge">/api/v1/deploy-package</code> api endpoint in Jamf Pro.</p>
  </li>
  <li>
    <p>A pkg containing a postinstall script to re-enable Gatekeeper and notify the user is sent to the device.</p>
  </li>
</ul>

<p>What I like about this workflow is that it relies on installing the pkg via MDM, instead of a traditional policy using the jamf binary.</p>

<p>Time to get started then!</p>

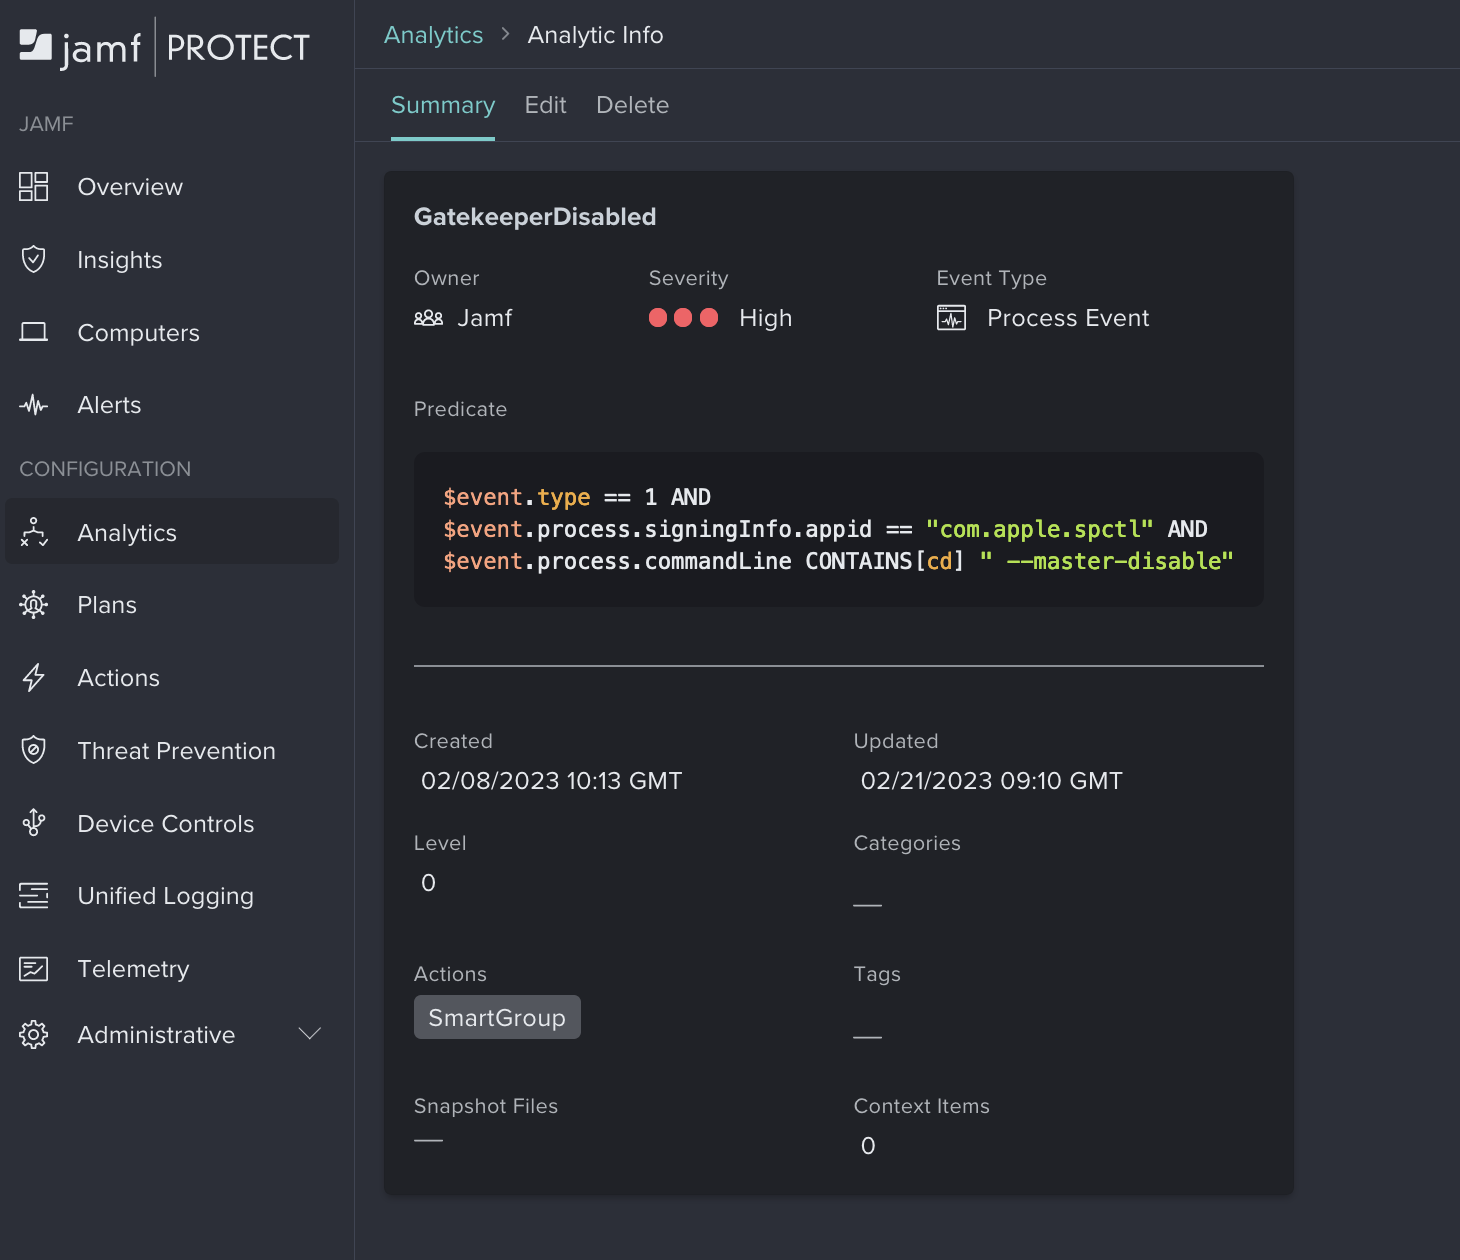
<p>Let’s first build a detection for Jamf Protect to be able to pick up when an admin user disables Gatekeeper.</p>

<p>We will use an Analytic to help with the detection.</p>

<p>To disable Gatekeeper, the <code class="language-plaintext highlighter-rouge">spctl</code> binary can be used, specifically running</p>

<div class="language-plaintext highlighter-rouge"><div class="highlight"><pre class="highlight"><code>spctl --master-disable
</code></pre></div></div>

<p>First, the predicate for our Analytic:</p>

<div class="language-plaintext highlighter-rouge"><div class="highlight"><pre class="highlight"><code>$event.type == 1 AND 
$event.process.signingInfo.appid == "com.apple.spctl" AND 
$event.process.commandLine CONTAINS[cd] " --master-disable"
</code></pre></div></div>

<p>For the <code class="language-plaintext highlighter-rouge">Event Type</code> we’ll choose <code class="language-plaintext highlighter-rouge">Process Event</code>.</p>

<p><img src="/assets/img/screenshot-2023-02-22-at-12.58.12.png" alt="" /></p>

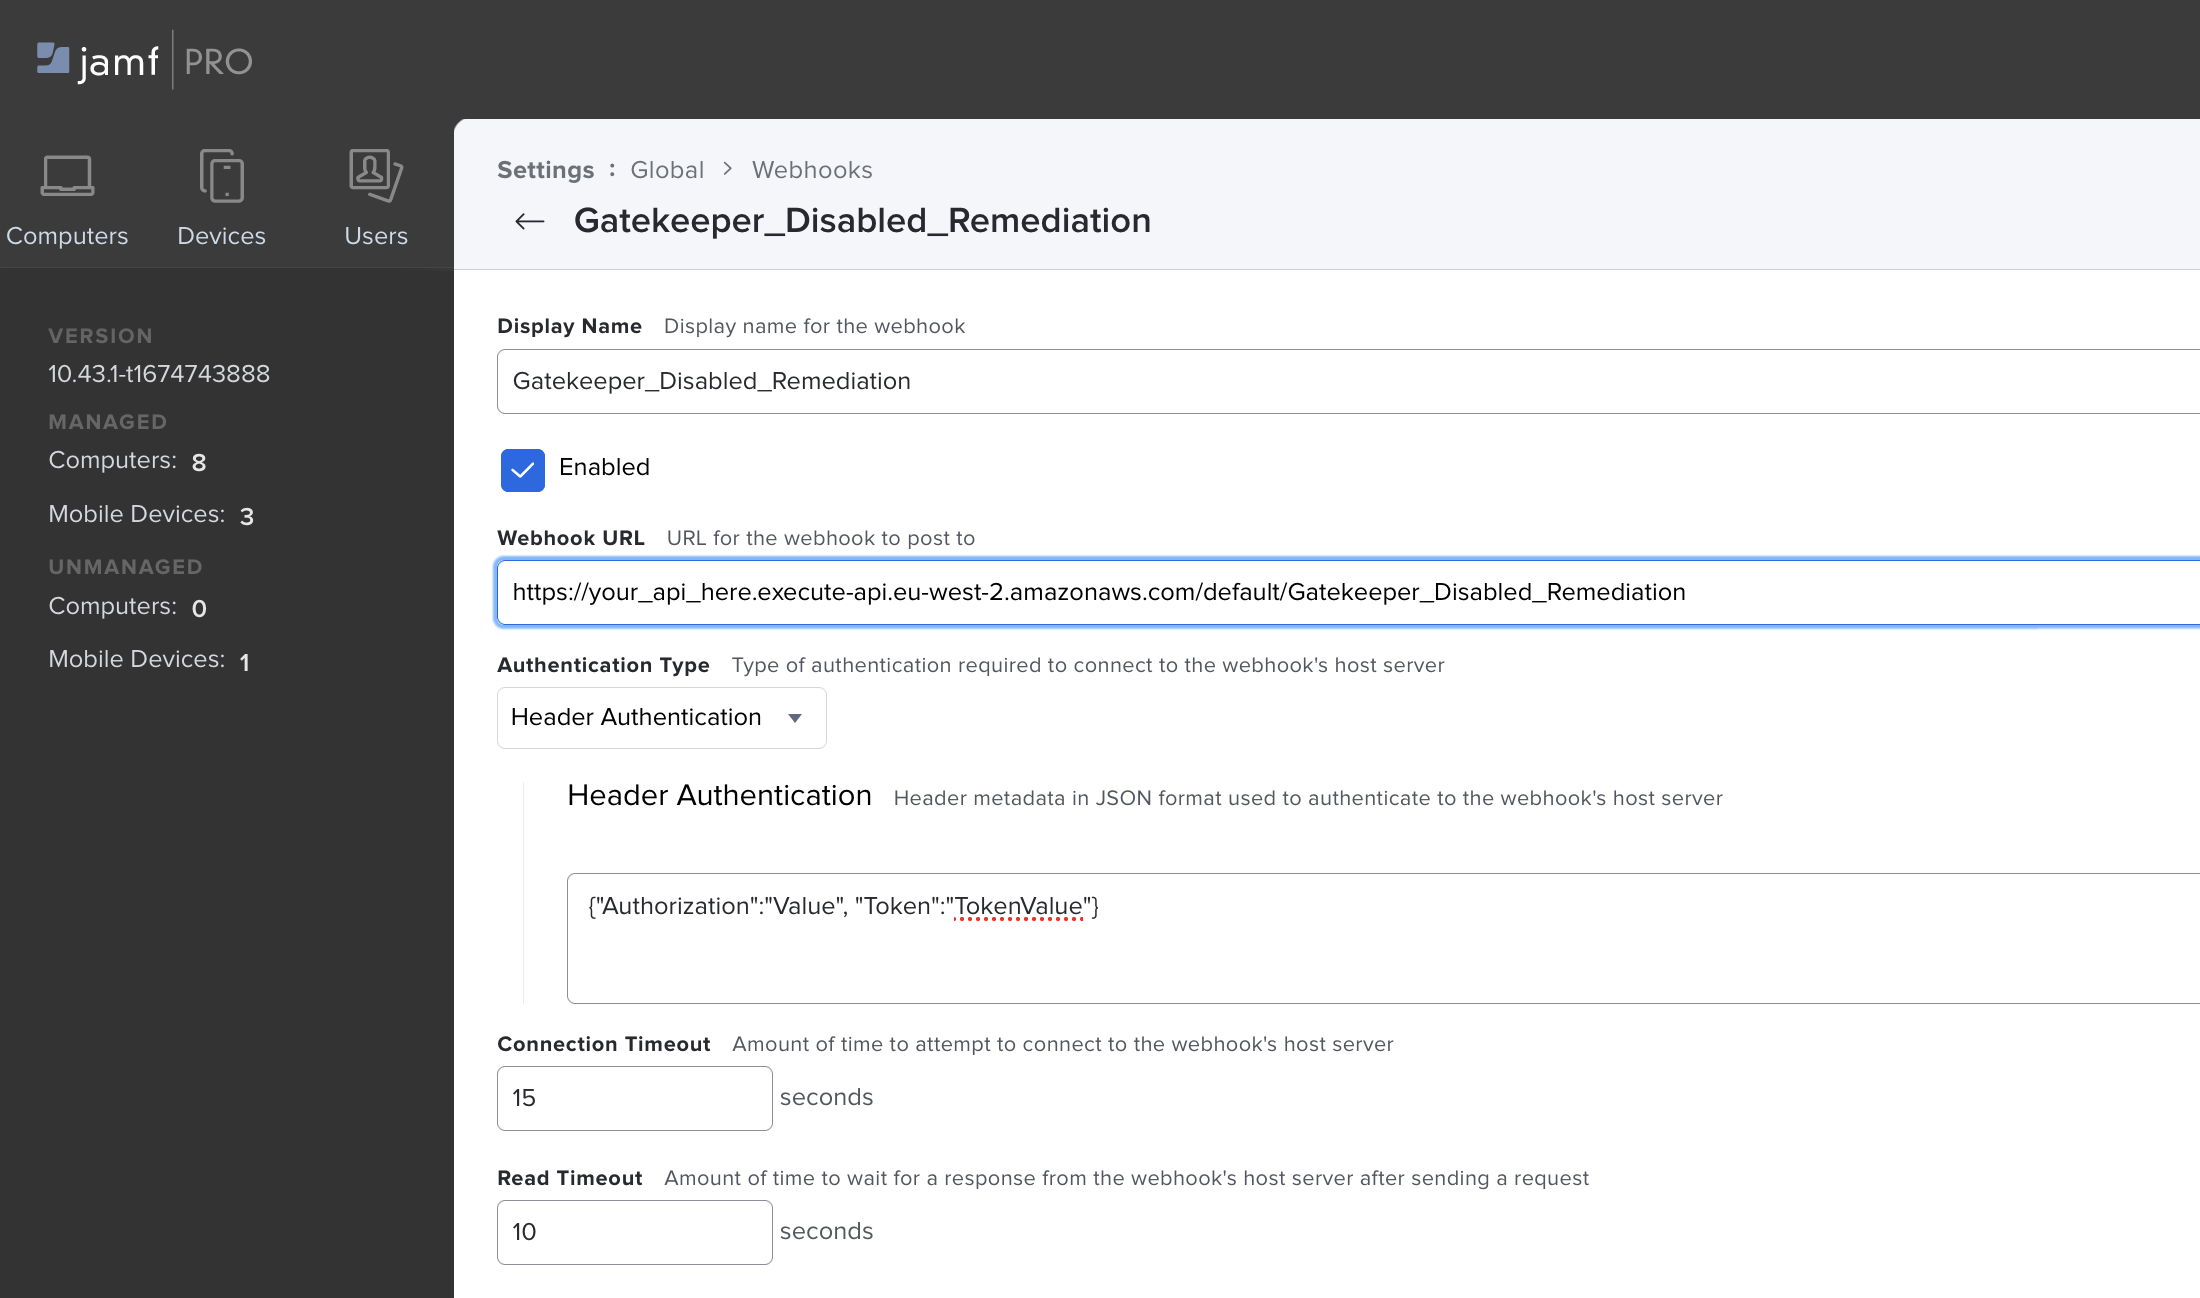
<p>To setup the Smart Group integration in Protect and the equivalent Smart Group in Pro we can just follow the docs: https://learn.jamf.com/en-US/bundle/jamf-protect-documentation/page/Setting_Up_Analytic_Remediation_With_Jamf_Pro.html</p>

<p>Cool, so we now have Protect which is detecting when Gatekeeper is disabled and it’s adding the device to a Smart Group in Pro.</p>

<p>We now need to build out our AWS API gateway and Lambda, you can follow my previous blog post for the details: https://skartek.dev/2022/08/24/a-beginners-approach-to-serverless-and-python-to-solve-real-life-scenarios/</p>

<p>Once setup it should look like:</p>

<p><img src="/assets/img/screenshot-2023-02-22-at-13.03.15.png" alt="" /></p>

<p><img src="/assets/img/screenshot-2023-02-22-at-13.02.40.png" alt="" /></p>

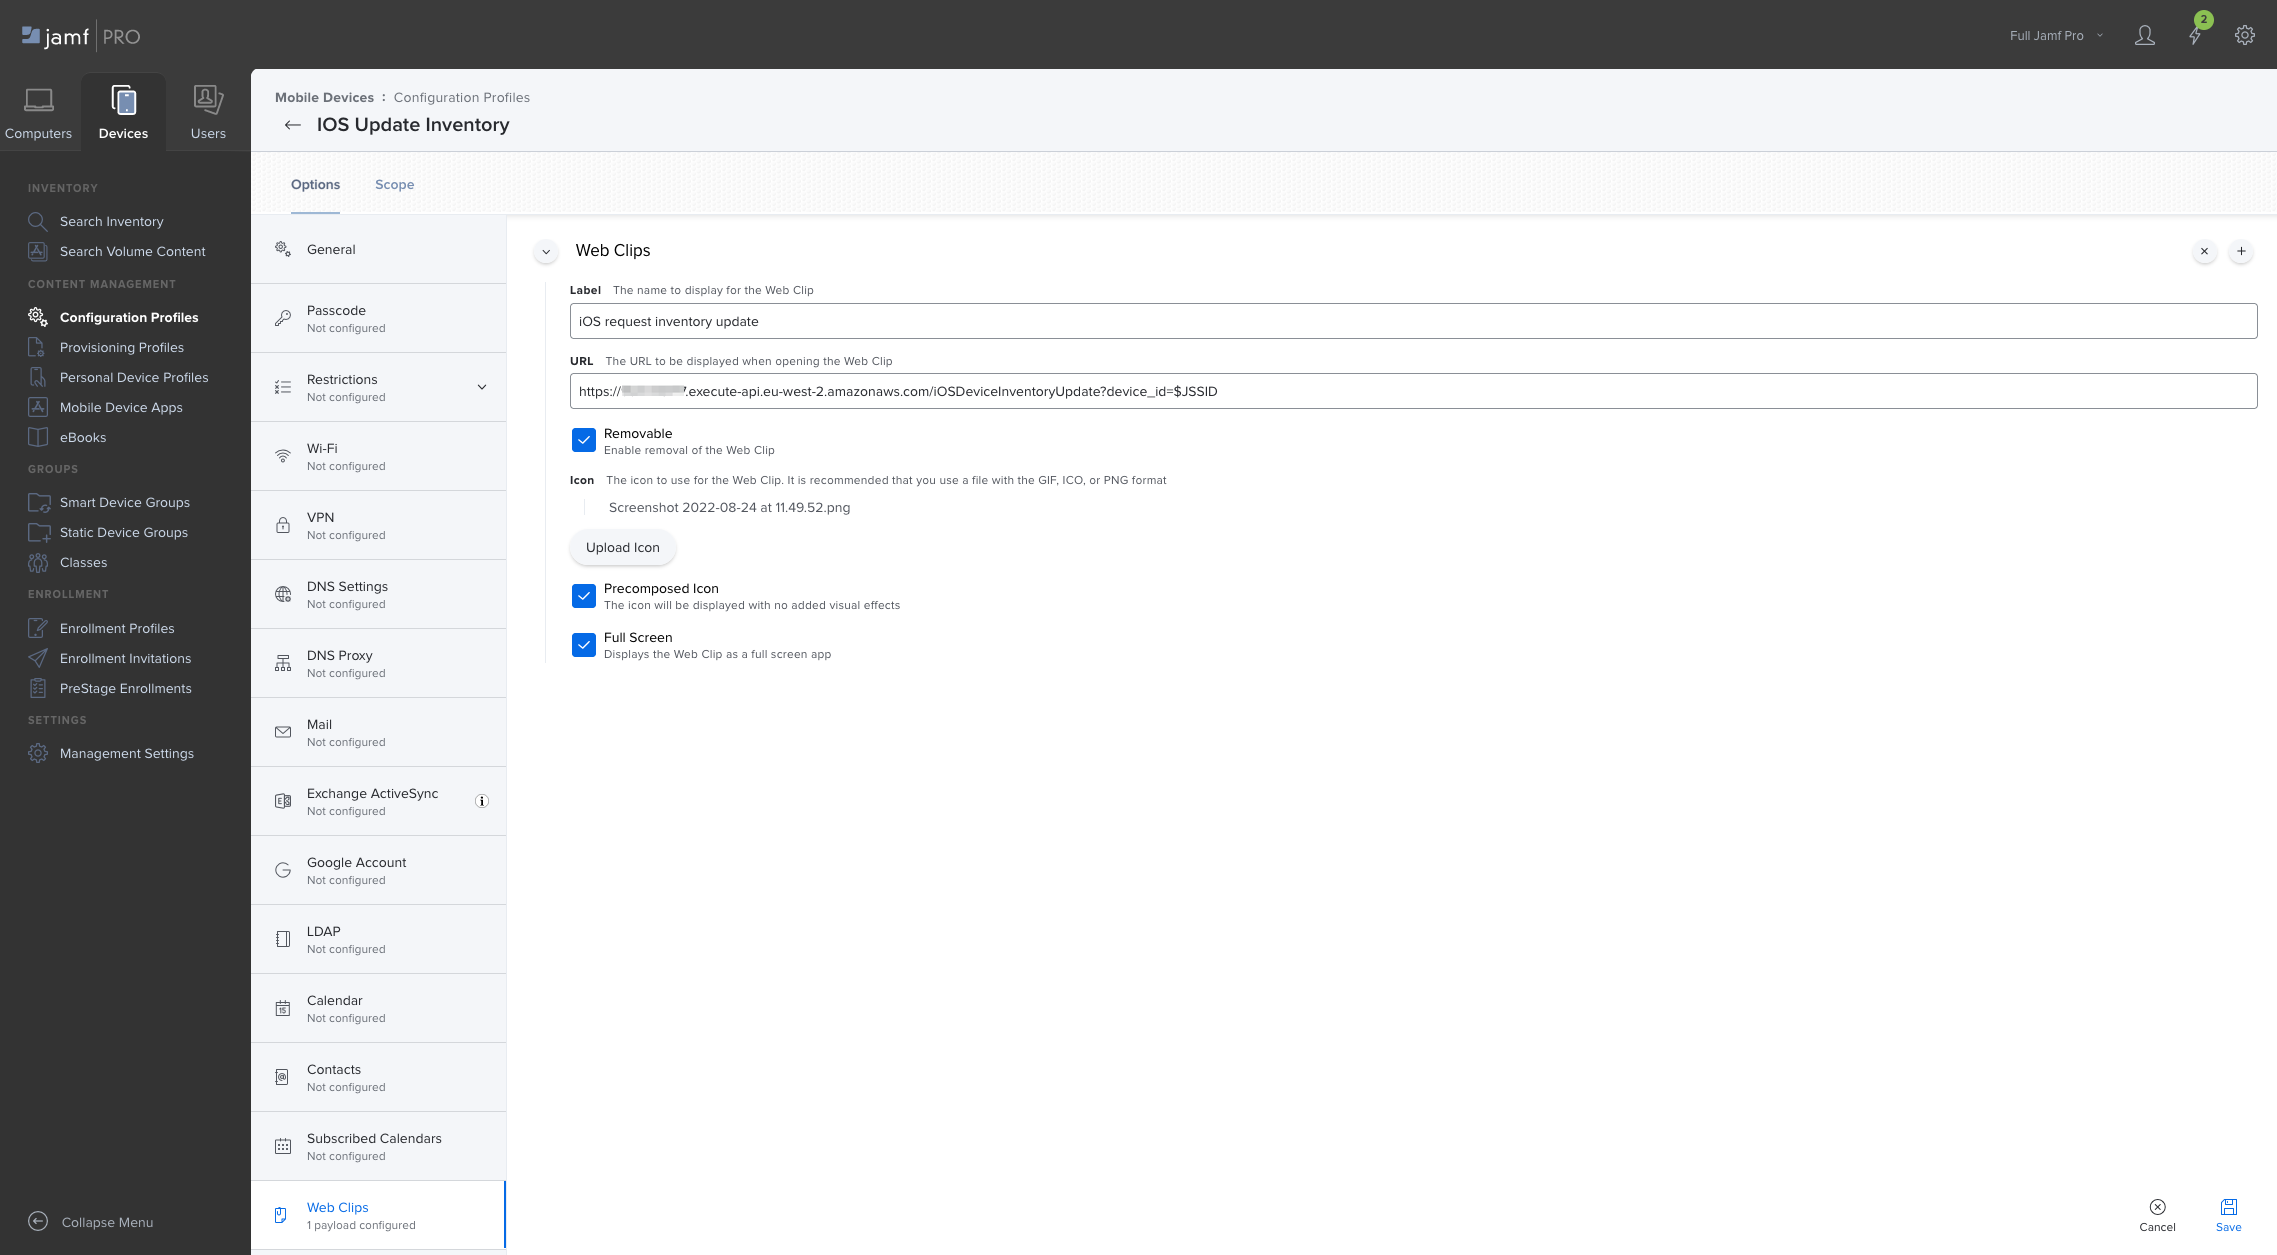
<p>Remember to choose JSON for the content-type as that would help us easily parse in our Lambda which will be written in python.</p>

<p>Once we have our webhook in place, let’s build the actual package that will be installed on the device via MDM.</p>

<p>For the purpose of this exercise I’m keeping it limited to the very basic:
We are going to first check if Gatekeeper have actually been disabled.
We’ll then use <code class="language-plaintext highlighter-rouge">jamfHelper</code> to notify the user they’re not allowed to disable Gatekeeper.
We’ll then remove the “tag” Jamf Protect made for this device, as we’ve now re-enabled gatekeeper by clearing up the <code class="language-plaintext highlighter-rouge">/Library/Application\ Support/JamfProtect/groups/Gatekeeper_Disabled_EU</code>
Finally, we will submit an inventory update to kick the device out of the Smart Group in Jamf Pro as Gatekeeper has now been safely re-enabled.</p>

<div class="language-plaintext highlighter-rouge"><div class="highlight"><pre class="highlight"><code>gatekeeper_status=`/usr/sbin/spctl --status | grep "assessments" | cut -c13-`
if [ $gatekeeper_status = "disabled" ]; then
	/usr/sbin/spctl --master-enable
else
	echo "False Detection"
fi


"/Library/Application Support/JAMF/bin/jamfHelper.app/Contents/MacOS/jamfHelper" -windowType hud -title "Oh... you naughty!" -heading "An attempt to disable Gatekeeper have been detected" -alignHeading natural -description "Disabling Gatekeeper is not allowed!." -alignDescription natural -icon "/System/Library/CoreServices/CoreTypes.bundle/Contents/Resources/AlertStopIcon.icns" -button1 Ok -alignCountdown center -lockHUD

/bin/rm -rf /Library/Application\ Support/JamfProtect/groups/Gatekeeper_Disabled_EU

/bin/sleep 60

/usr/local/bin/jamf recon
</code></pre></div></div>

<p>You can use your preferred tool to build the package.</p>

<p>Now, once you’ve built the package, there’s a few things we’ll need.</p>

<p>To start, in order to send an <code class="language-plaintext highlighter-rouge">InstallEnterpriseApplication</code> MDM command, the pkg needs to be signed.
You can follow the superb article from TTG on how to create a signing certificate and how to sign a package: https://travellingtechguy.blog/signing-packages-and-configuration-profiles-with-the-built-in-jamf-pro-certificate-authority/</p>

<p>Once singed, we need the size in bytes as this will need to be used in the manifest which we’ll use to send the MDM command.</p>

<div class="language-plaintext highlighter-rouge"><div class="highlight"><pre class="highlight"><code>stat -f %z Enable_Gatekeeper.pkg 
11111
</code></pre></div></div>

<p>Lastly, we need to get the MD5 signature of the pkg.</p>

<div class="language-plaintext highlighter-rouge"><div class="highlight"><pre class="highlight"><code>md5 Enable_Gatekeeper.pkg
MD5 (Enable_Gatekeeper.pkg) =
11111111111111111111111111111111
</code></pre></div></div>

<p>We now have to choose where to host this package.
Any HTTPS file share would do, but you could also opt to use an S3 bucket.
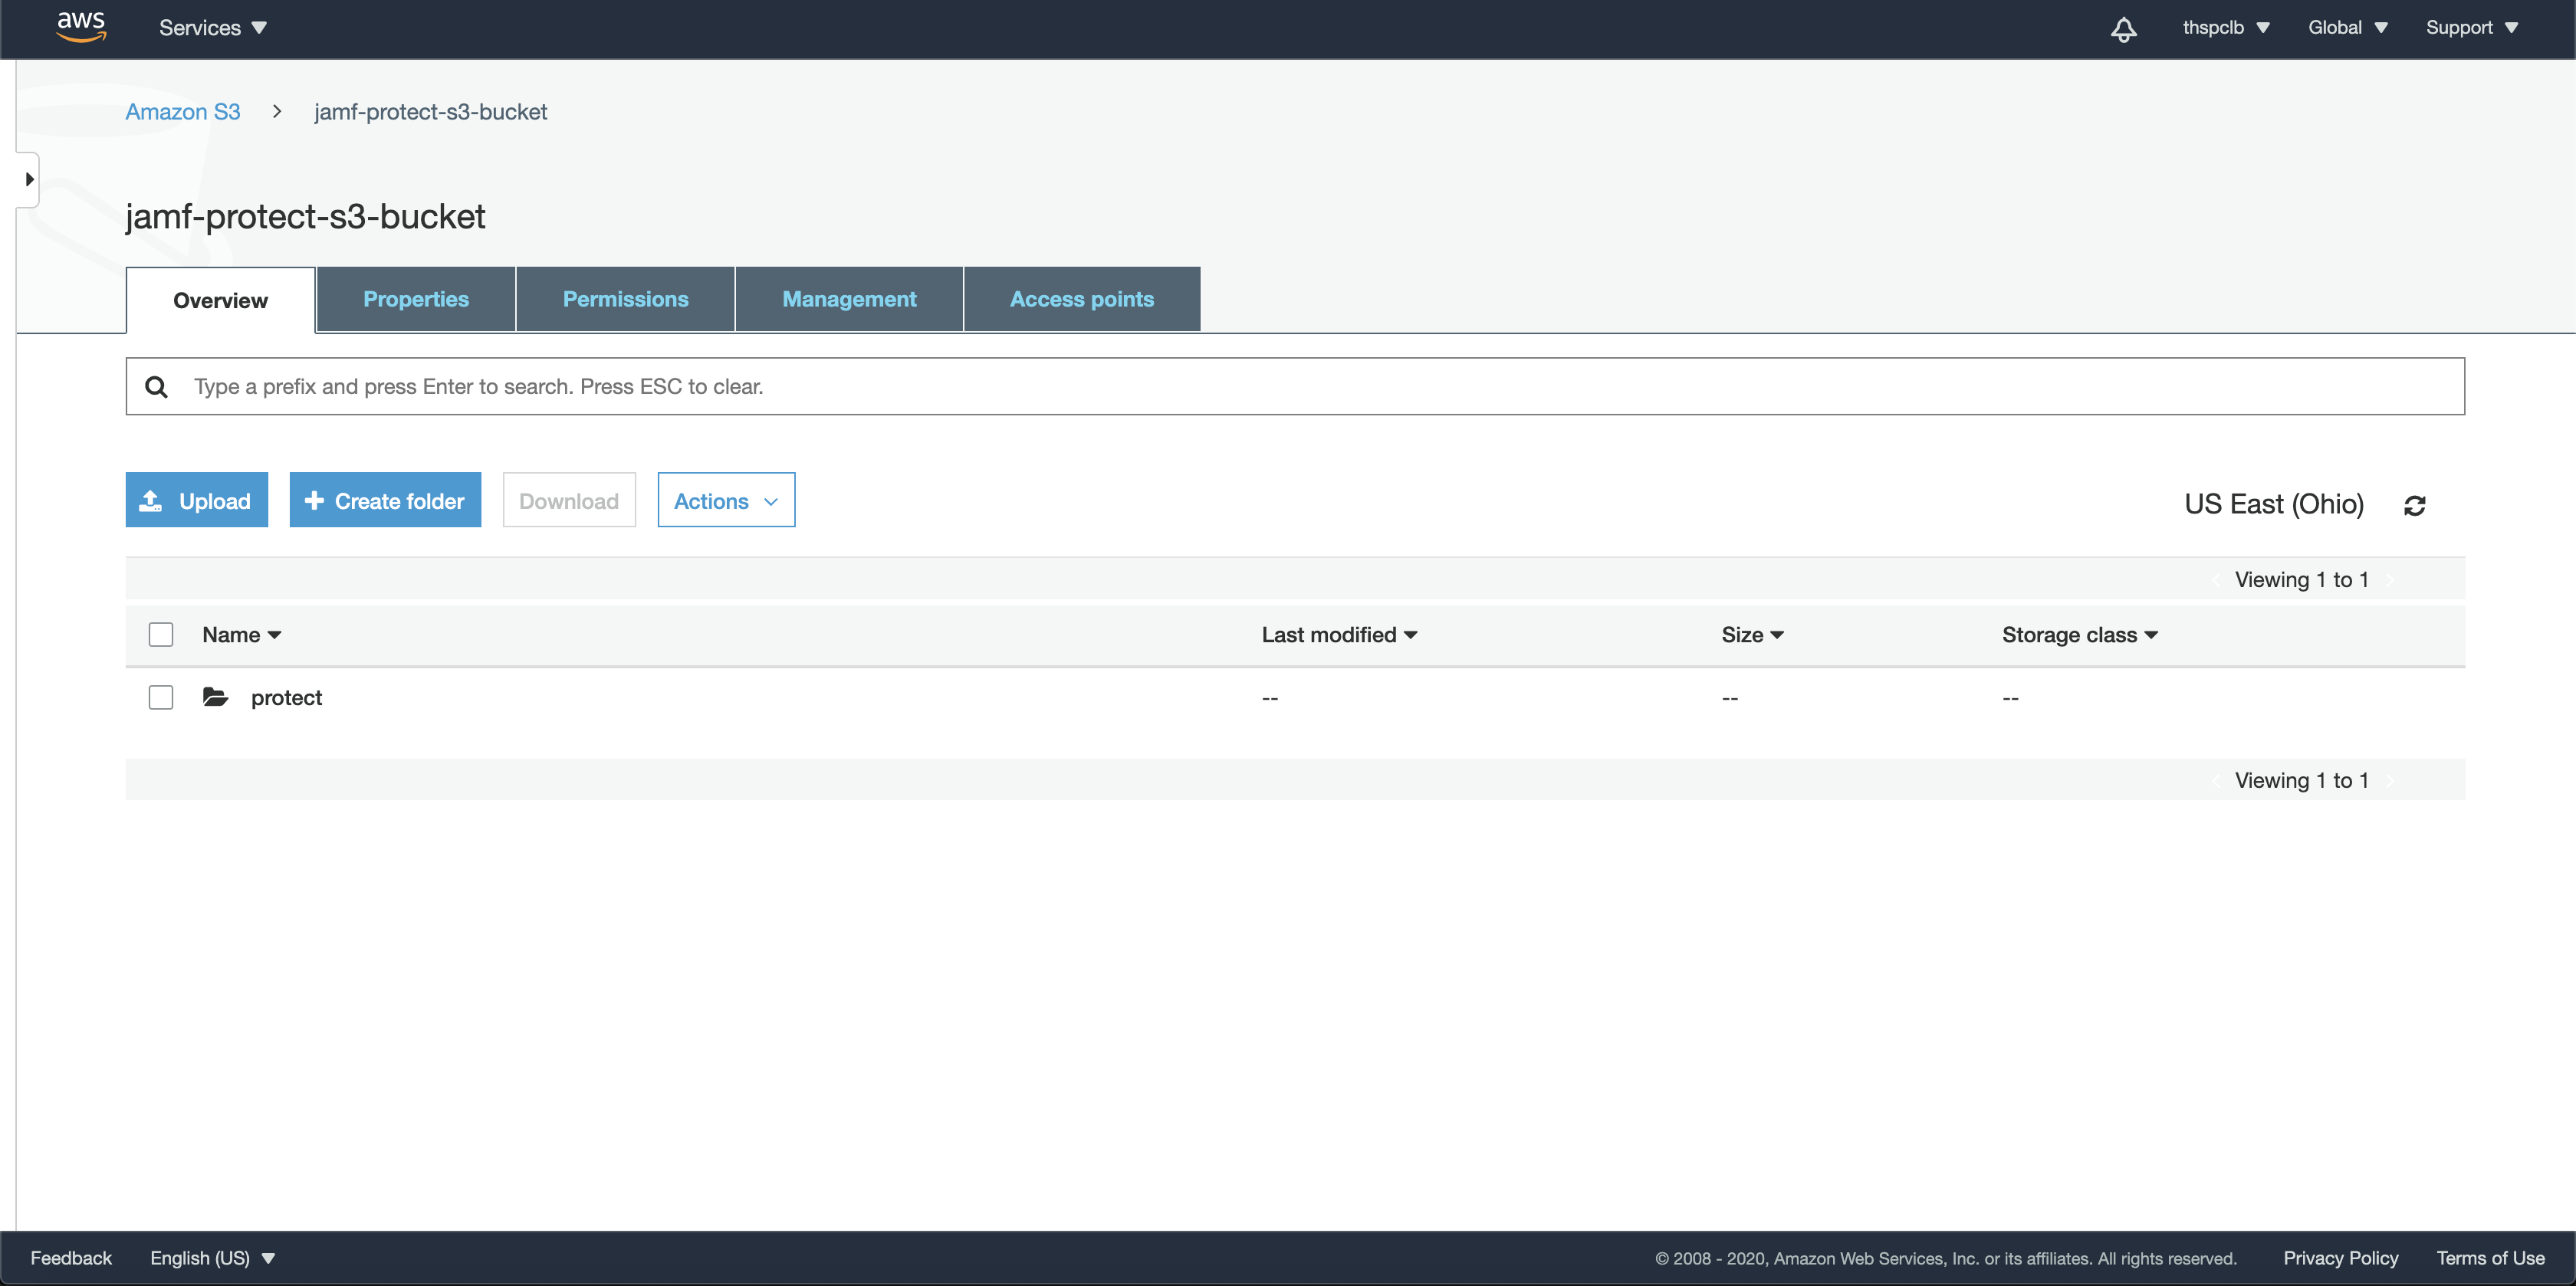
Create an S3 bucket, upload the pkg and then we’ll need to think how to secure it.
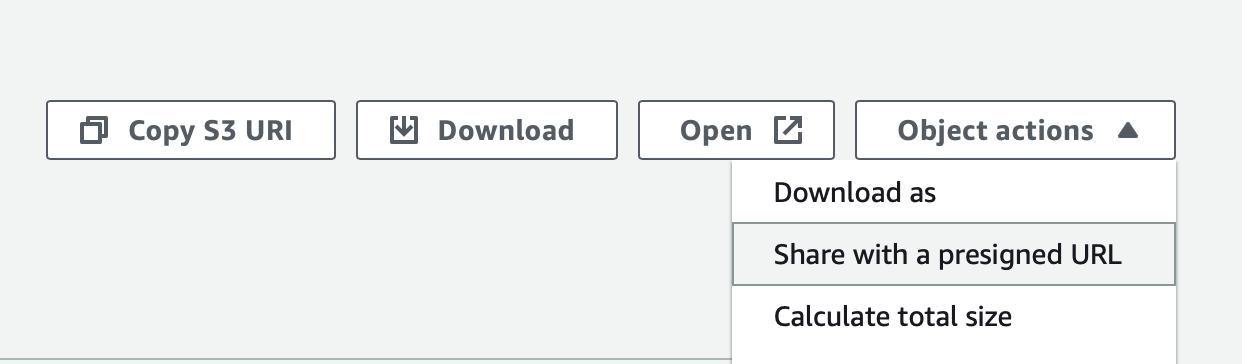
You could either leave the S3 bucket open (won’t recommend) or you could make use of pre-signed URLs (basically URLs with an auth token backed in and you can choose the validity of the token).</p>

<p>For the purpose of this exercise, I’m using a manually generated pre-signed URL, valid for 12 hours.</p>

<p><img src="/assets/img/screenshot-2023-02-22-at-13.16.03.png" alt="" /></p>

<p>In AWS, S3 choose Object actions and Share with a presigned URL.</p>

<p>Time to get started writing the code of our Lambda.</p>

<p>First of all, we need to thing that Jamf Pro will fire the webhook twice.
The webhook is designed to notify of Smart Group membership changes, so it will be fired when the device is added to the Smart Group and also when the device falls out of the Smart Group.</p>

<p>We can build a simple check in our code to identify if the event is device added (and hence action needed) or if it’s being removed (hence remediation has taken place and nothing should be done more.)</p>

<div class="language-plaintext highlighter-rouge"><div class="highlight"><pre class="highlight"><code>output = json.loads(event["body"])
 device_removed = output['event']['groupRemovedDevicesIds']
 device_removed_check = str(device_removed)[1:-1]

 if device_removed_check != "":
 print(f"This webhook have been generated for a device being removed from the Smart Group, nothing to do here. Device ID {device_removed}")
 
 else:
 device_id = output['event']['groupAddedDevicesIds']
</code></pre></div></div>

<p>After this, we will call Secrets Manager to retrieve the Jamf Pro API user/password.</p>

<div class="language-plaintext highlighter-rouge"><div class="highlight"><pre class="highlight"><code>response = client.get_secret_value(
 SecretId='SecretManager_name_here')
 
 secretDict = json.loads(response['SecretString'])
 api_user = secretDict['username']
 api_password = secretDict['password']
</code></pre></div></div>

<p>We can then proceed and get a bearer token from the Jamf Pro API.</p>

<div class="language-plaintext highlighter-rouge"><div class="highlight"><pre class="highlight"><code>token_url = f"{jamf_url}/api/v1/auth/token"
 headers = {"Accept": "application/json"}
 
 resp = requests.post(token_url, auth=(api_user, api_password), headers=headers)
 resp.raise_for_status()
 resp_data = resp.json()
 
 print(f"Access token granted, valid until {resp_data['expires']}.")
 
 data = resp.json()
 token = data["token"]
</code></pre></div></div>

<p>We now need to build the payload, which is actually the manifest.</p>

<div class="language-plaintext highlighter-rouge"><div class="highlight"><pre class="highlight"><code>payload = {
 "manifest": {
 "url": presigned_url,
 "hash": "11111111111111111111",
 "hashType": "MD5",
 "bundleId": "com.jamf.gatekeeper.enable",
 "bundleVersion": "1.0.0",
 "subtitle": "Subtitle",
 "title": "EnableGatekeeper.pkg",
 "sizeInBytes": 11111
 },
 "installAsManaged": False,
 "devices": device_id,
 }
 
 headers={
 "Authorization": f"Bearer {token}",
 "Accept": "application/json"
 }
</code></pre></div></div>

<p>The <code class="language-plaintext highlighter-rouge">hash</code> will be the value we got from the <code class="language-plaintext highlighter-rouge">md5</code> command previously and the <code class="language-plaintext highlighter-rouge">sizeInBytes</code> same for the <code class="language-plaintext highlighter-rouge">stat</code> command.</p>

<p>Lastly, the actual API call:</p>

<div class="language-plaintext highlighter-rouge"><div class="highlight"><pre class="highlight"><code>response = requests.post(url, json=payload, headers=headers)
 print(f"Jamf Pro API call HTTP Status: {response.status_code}")
</code></pre></div></div>

<p>The full script can be found on GitHub:</p>

<p>https://github.com/matteo-bolognini/AWS-Projects/blob/main/Gatekeeper_Disabled_Remediation</p>

<p>That’s pretty much it from the configuration and setup side so, time to test this workflow out and see how it looks like:</p>

<p>https://youtu.be/HD99Y8Q3Mho</p>

<p>Well… that’s a wrap!</p>

<p>See you on the next episode :)</p>]]></content><author><name>Matteo Bolognini</name></author><summary type="html"><![CDATA[Way too long ago, I posted my last blog around a POC on how to offer self serviced iOS Inventory Updates to end users with Jamf Pro.]]></summary></entry><entry><title type="html">A beginners approach to serverless and python to solve real life scenarios.</title><link href="https://skartek.dev/a-beginners-approach-to-serverless-and-python-to-solve-real-life-scenarios/" rel="alternate" type="text/html" title="A beginners approach to serverless and python to solve real life scenarios." /><published>2022-08-24T00:00:00+00:00</published><updated>2022-08-24T00:00:00+00:00</updated><id>https://skartek.dev/a-beginners-approach-to-serverless-and-python-to-solve-real-life-scenarios</id><content type="html" xml:base="https://skartek.dev/a-beginners-approach-to-serverless-and-python-to-solve-real-life-scenarios/"><![CDATA[<p>Lets start with a premise: this post is not about setting up anything even remotely close to be “production-ready”.**This is just me, tinkering with AWS and python.</p>

<p>Lets start with why I’m even writing this post.</p>

<p>A few weeks ago I got faced with an interesting dilemma.</p>

<p>Say that you configure Conditional Access for your Jamf Pro instance and enroll via Company Portal your iOS devices.
You then have a Conditional Access policy to require your iOS devices to be on the latest version.
Example: your CA policy has a pass code policy, or a minimum iOS version.</p>

<p>Scenario: you enroll a device, register via Company Portal and shows the end user get a “Your device is non compliant” message.
The user then takes action (in our example say updating the pass-code to be compliant with minimum requirements, or update iOS version).
Once the user then browse again to any O365 resource or Conditional Access gated resources, will still get a “you’re not compliant” message.</p>

<p>This is because the device inventory in Jamf Pro haven’t been updated, and as consequence, neither the data forwarded from Jamf Pro to Microsoft Endpoint Manager for compliance.</p>

<p>TL;DR
I thought it would be nice to have a way to request an Inventory Update from their iOS devices in a simple and secure way, so enough with the theory, lets move to practice.</p>

<p>From an end user prospective, this will be deployed as a WebClip, via MDM.</p>

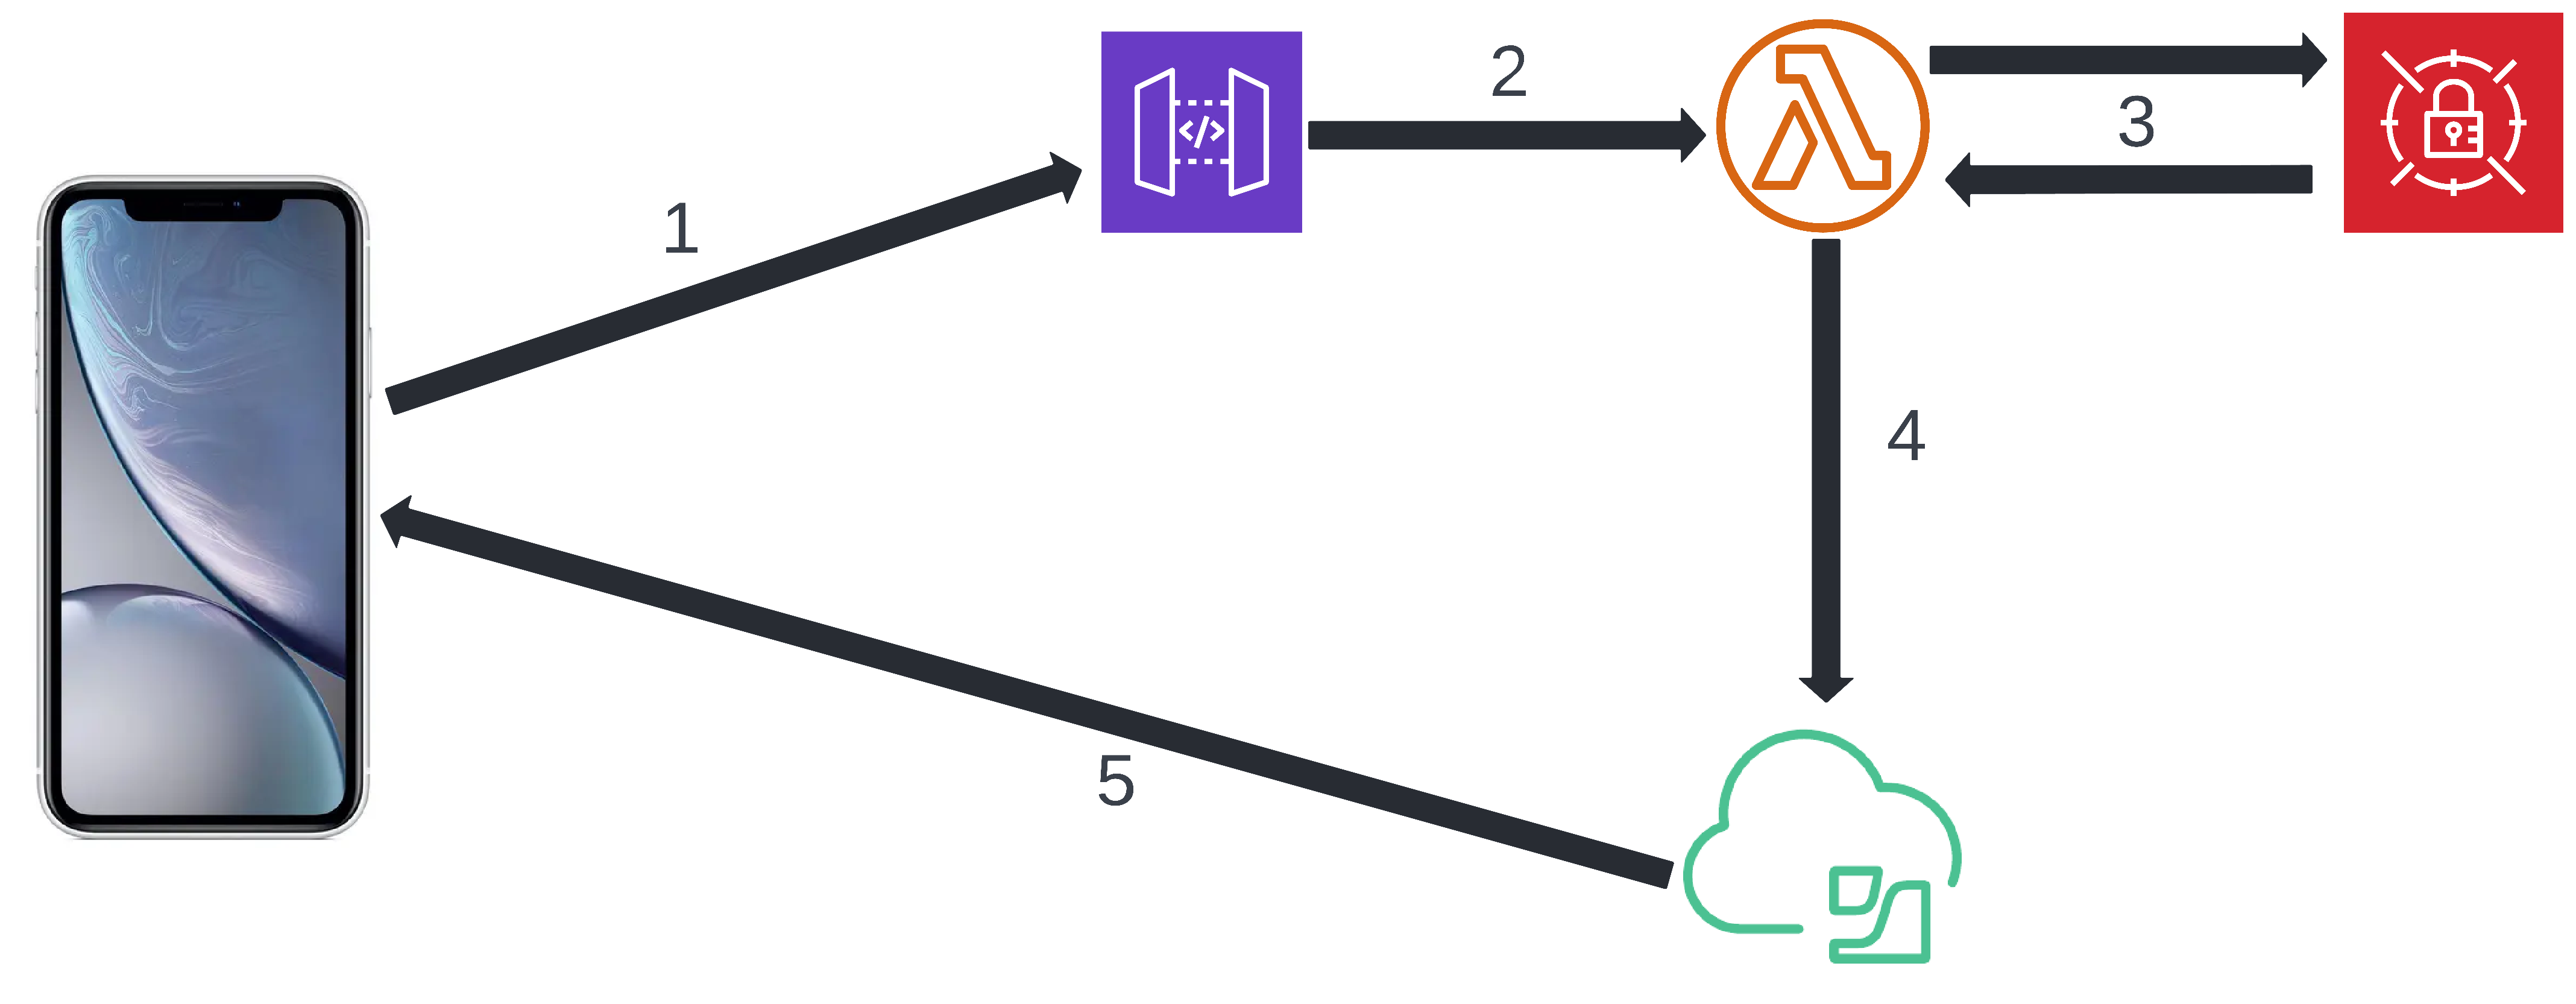
<p>Overview of the general setup below:</p>

<p><img src="/assets/img/blank-diagram4.png" alt="" /></p>

<p>Lets break it down:</p>

<ul>
  <li>User launch the WebClip which makes an HTTP call to AWS API Gateway</li>
  <li>API Gateway invoke a Lambda function</li>
  <li>Lambda grabs the API username and password of a Jamf Pro API account from Secret Manager (data is encrypted at rest and in transit using KMS)</li>
  <li>Lambda send an API call to Jamf Pro to request an UpdateInventory command to be issued for the specific device_id which requested it.</li>
  <li>Jamf Pro receives the API request and send the UpdateInventory command to the device.</li>
</ul>

<p>AWS Console - Lambda - part1<em>**</em>
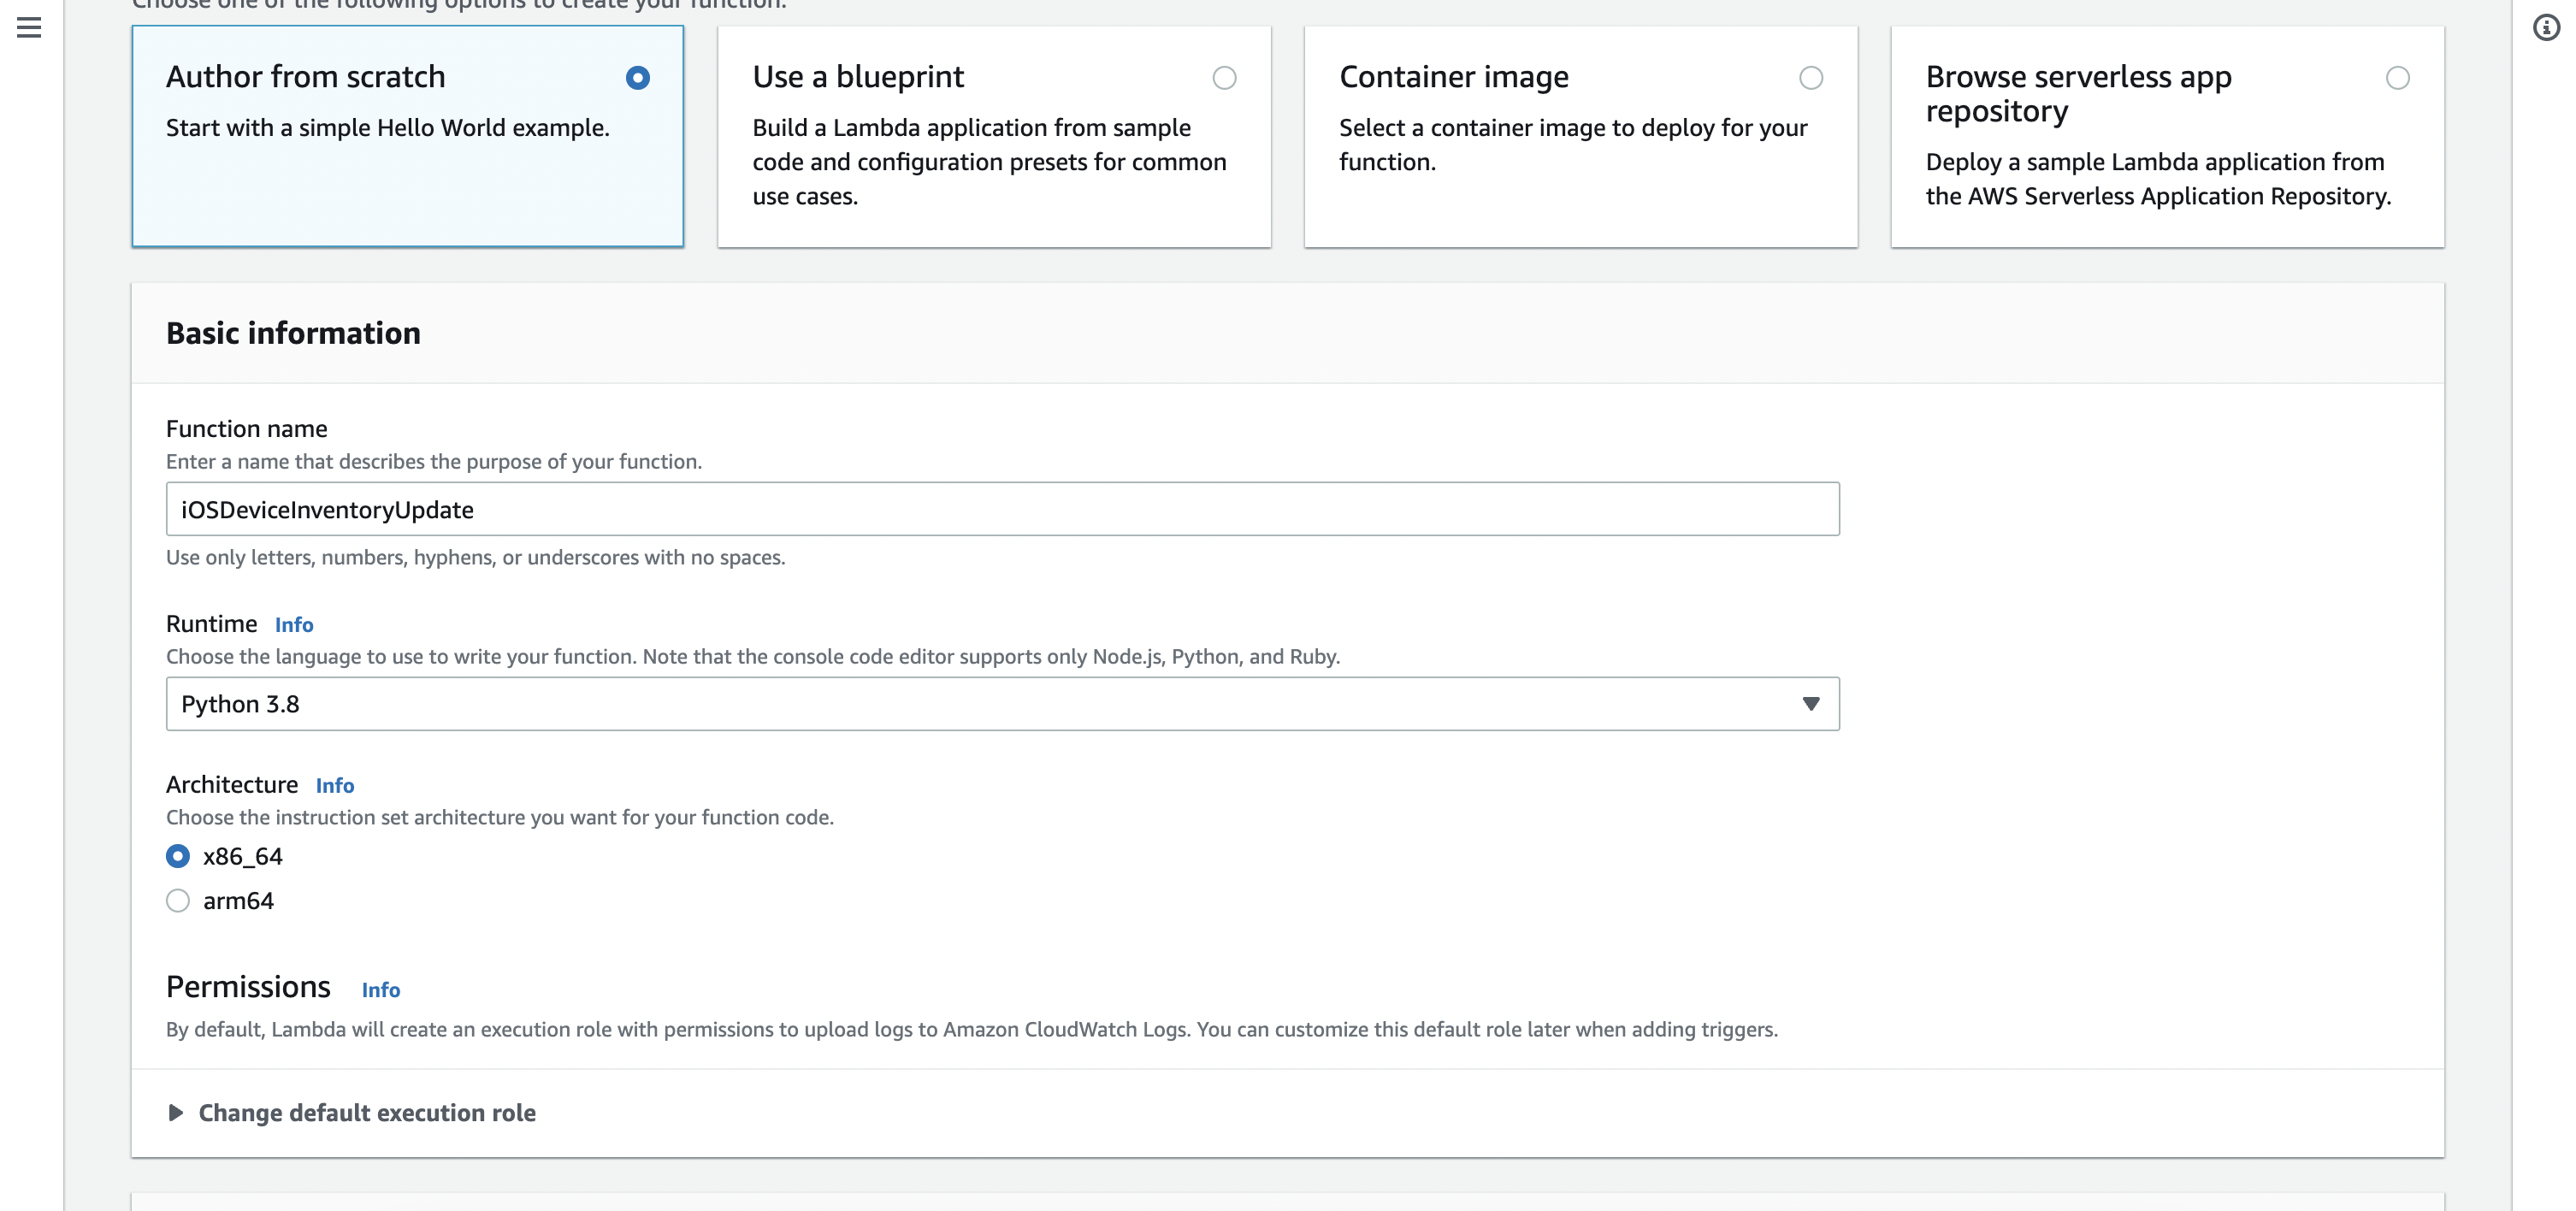
Let’s start creating a Lambda function:</p>

<p><img src="/assets/img/screenshot-2022-08-24-at-12.31.40.png" alt="" /></p>

<p>Select “<em>Author from scratch</em>”, give it a friendly name and choose your runtime, in this case I’ll choose python as it’s the language I’ll use to write the API call for Jamf Pro.</p>

<p>For now, we want to leave this Lambda as is, just create it and we’ll come back to it later to configure it.</p>

<p>AWS Console - S3 bucket**</p>

<p>This step is optional but I think it adds more value to the end user experience to return an image/GIF when they hit the WebClip, without this step we would only be able to return raw/html formatted text.</p>

<p>Go to S3 section and hit Create Bucket:</p>

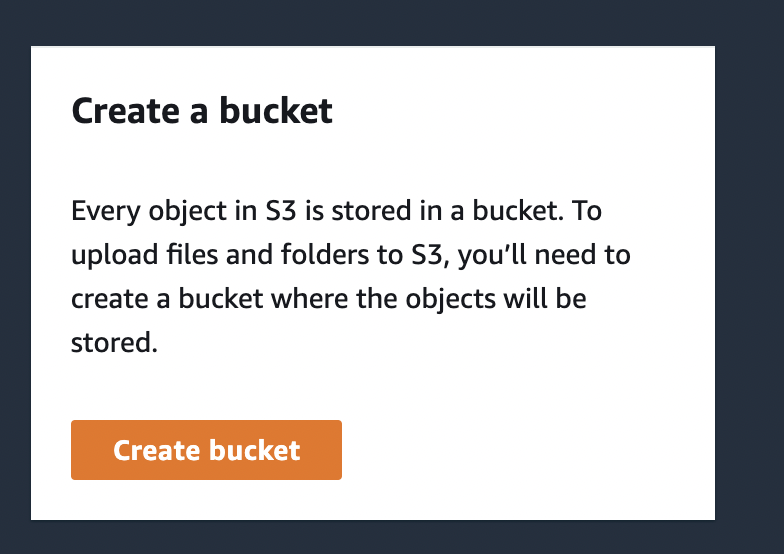
<p><img src="/assets/img/screenshot-2022-08-24-at-13.41.04.png" alt="" /></p>

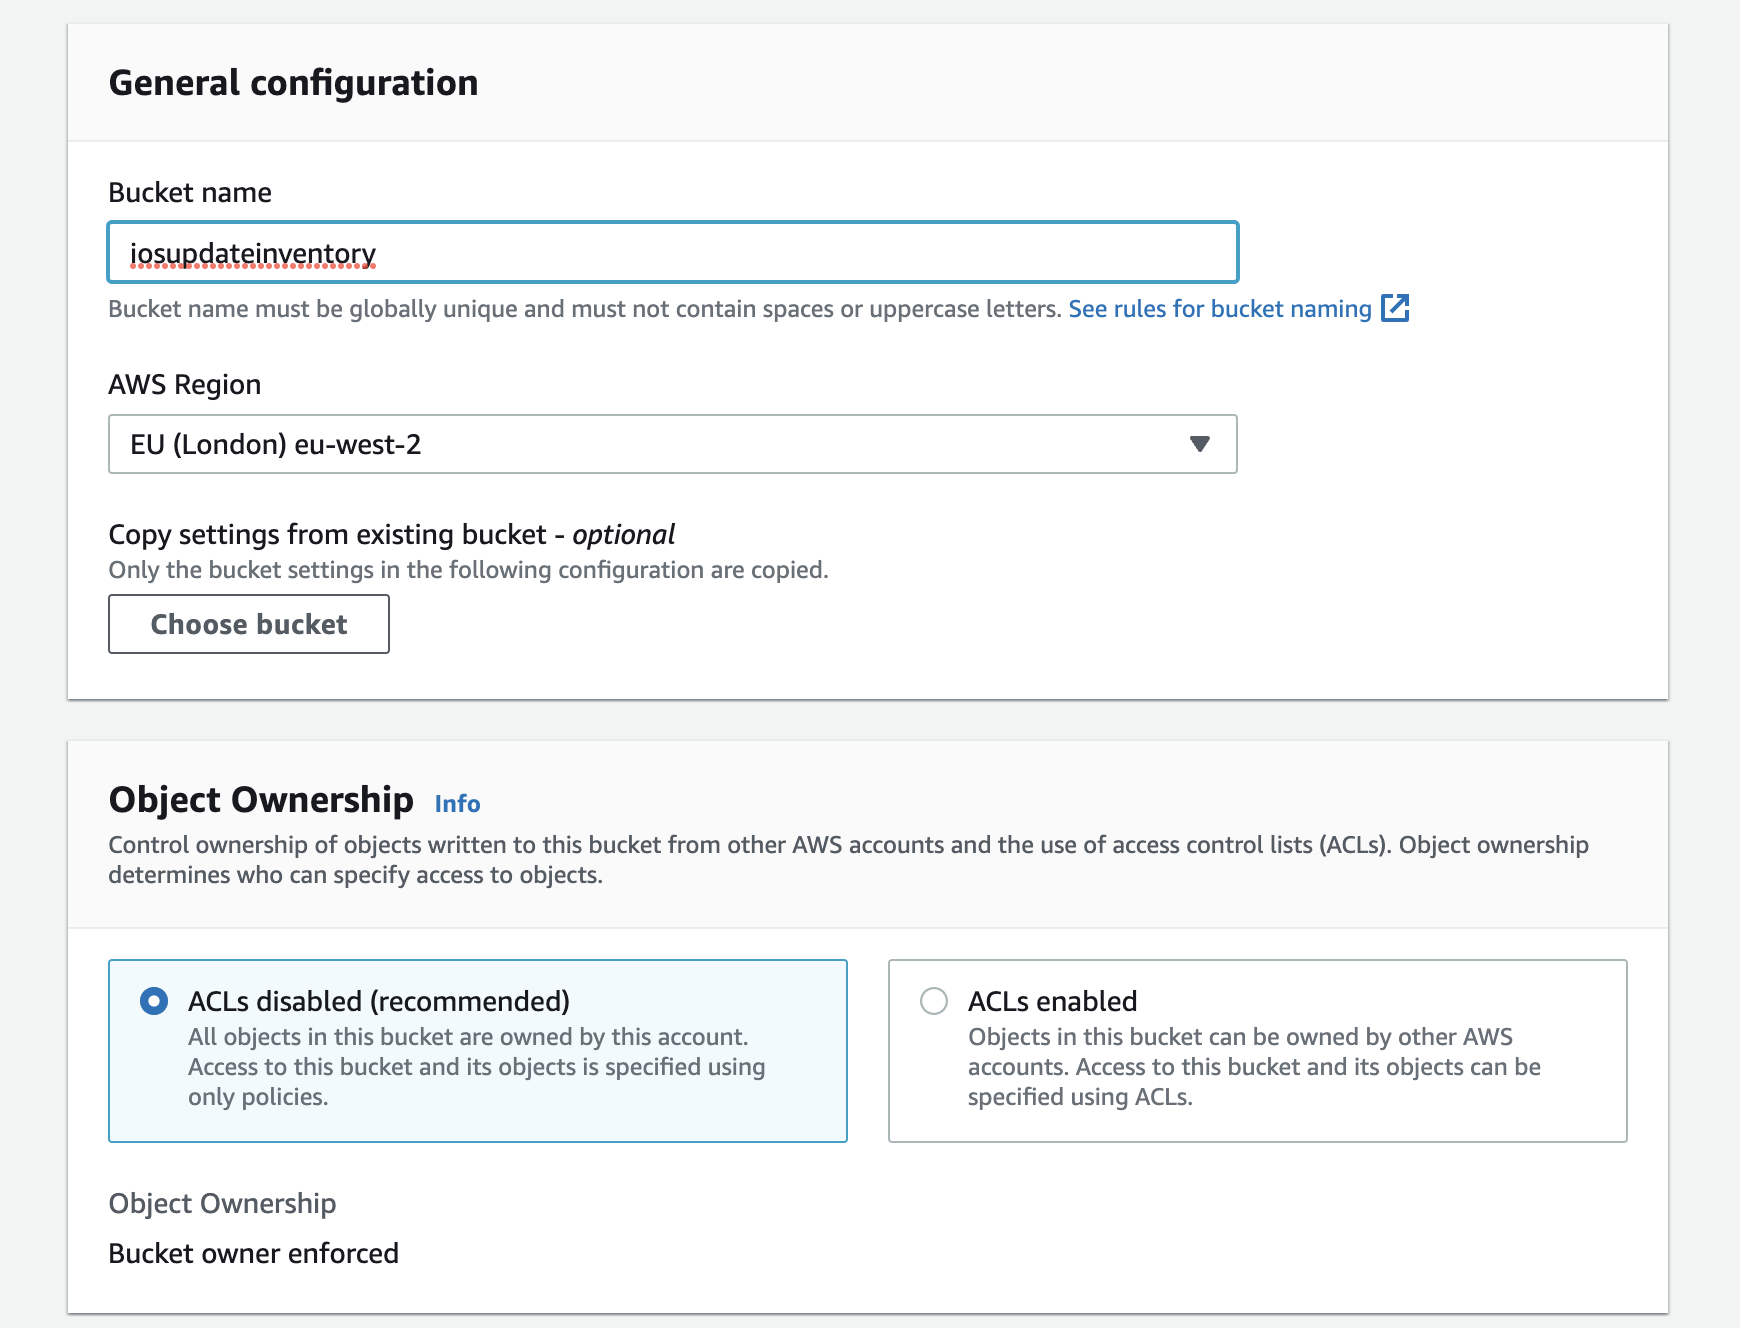
<p>**Give it a friendly name and then for this demo we’re ok keeping the rest of the setup to the default one:</p>

<p><img src="/assets/img/screenshot-2022-08-24-at-13.41.28.png" alt="" /></p>

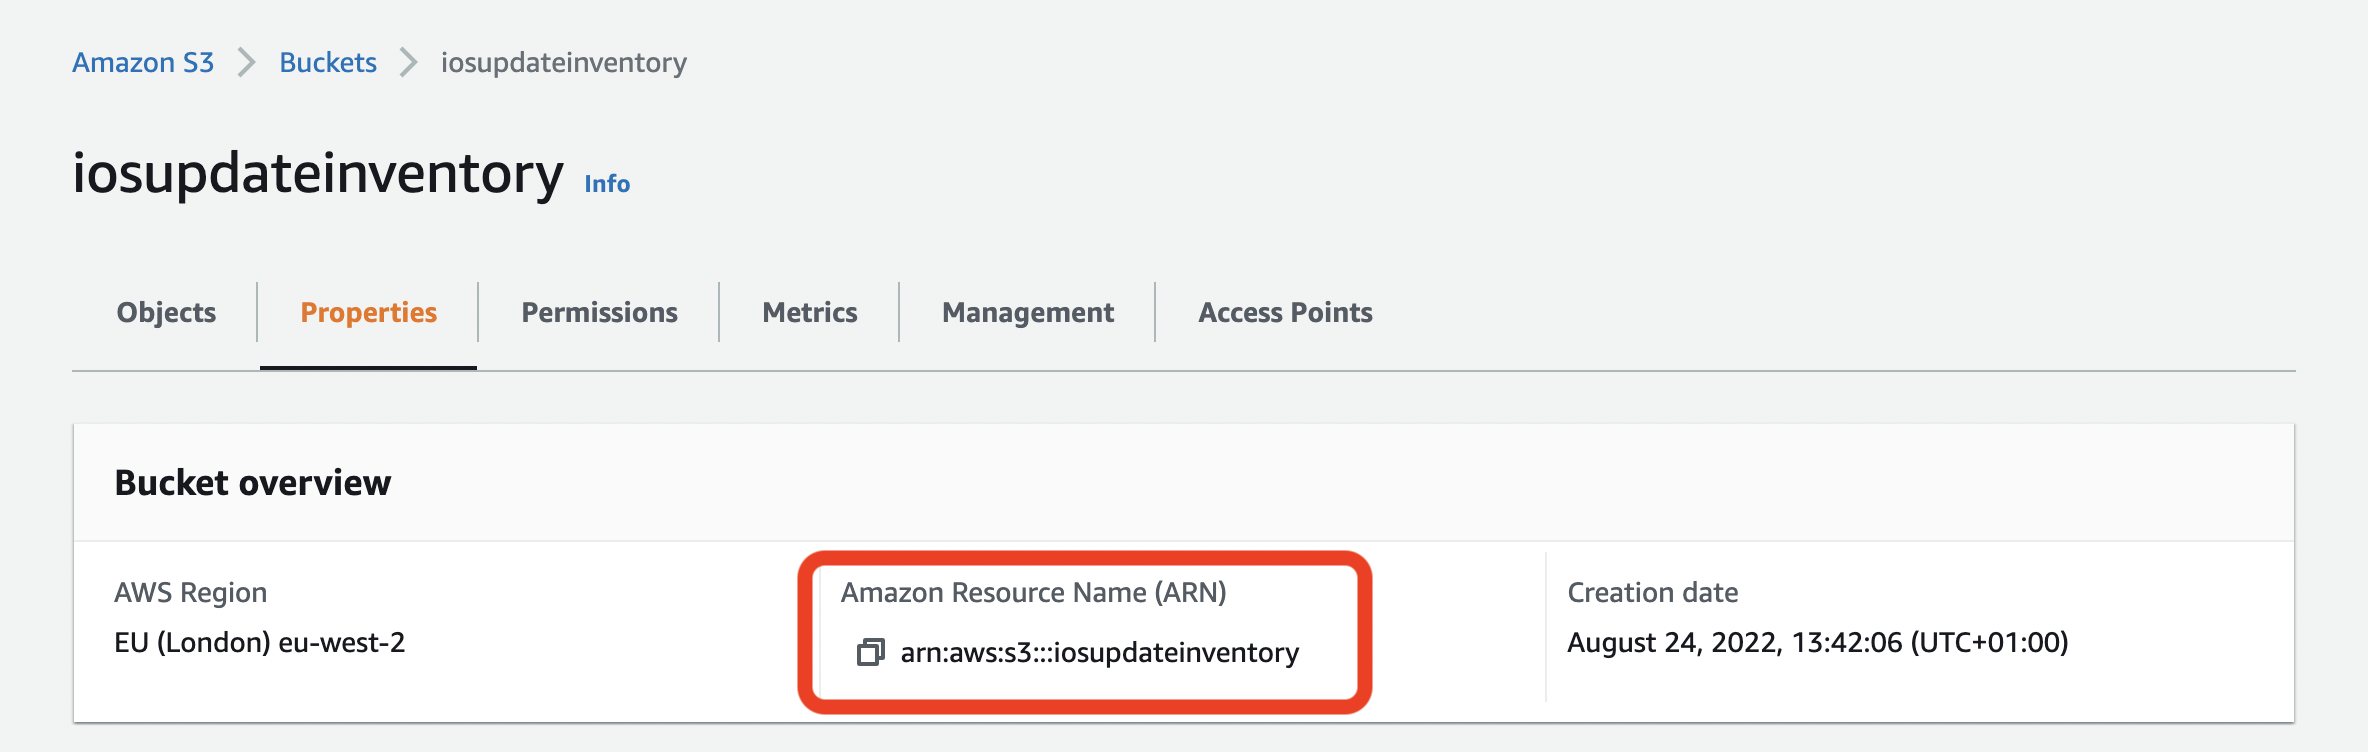
<p>Once the bucket has been created, click on hit and go to Properties and copy the ARN:</p>

<p><img src="/assets/img/screenshot-2022-08-24-at-13.42.45.png" alt="" /></p>

<p>AWS Console - Secret Manager**</p>

<p>The Lambda itself will not be directly exposed to the internet but given it will be invoked by a public API, lets avoid storing username/password in clear text in it.**What we can do, is instead to store them in Secret Manager, where they will be encrypted with KMS.
On execution, Lambda will decrypt those at code level and keep them safe.</p>

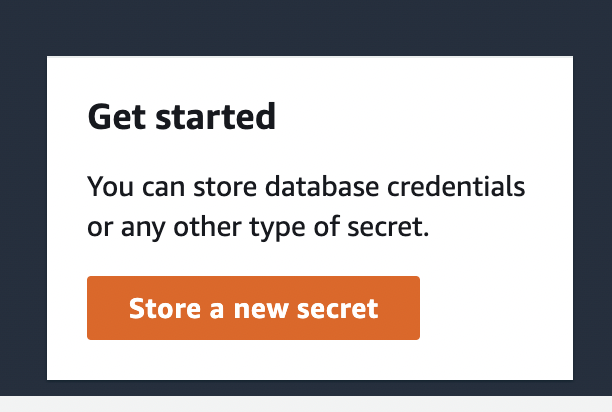
<p>Search for Secret Manager and hit <em>Store a new secret</em>**:</p>

<p><img src="/assets/img/screenshot-2022-08-24-at-13.57.51.png" alt="" /></p>

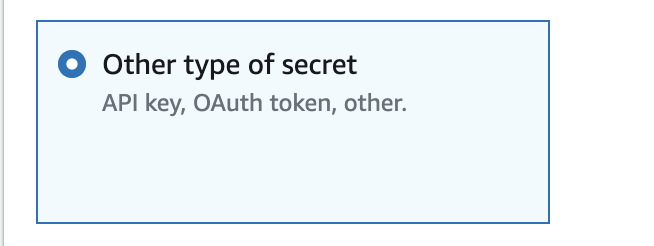
<p>In the secret type choose Other type of secret:</p>

<p><img src="/assets/img/screenshot-2022-08-24-at-13.59.11.png" alt="" /></p>

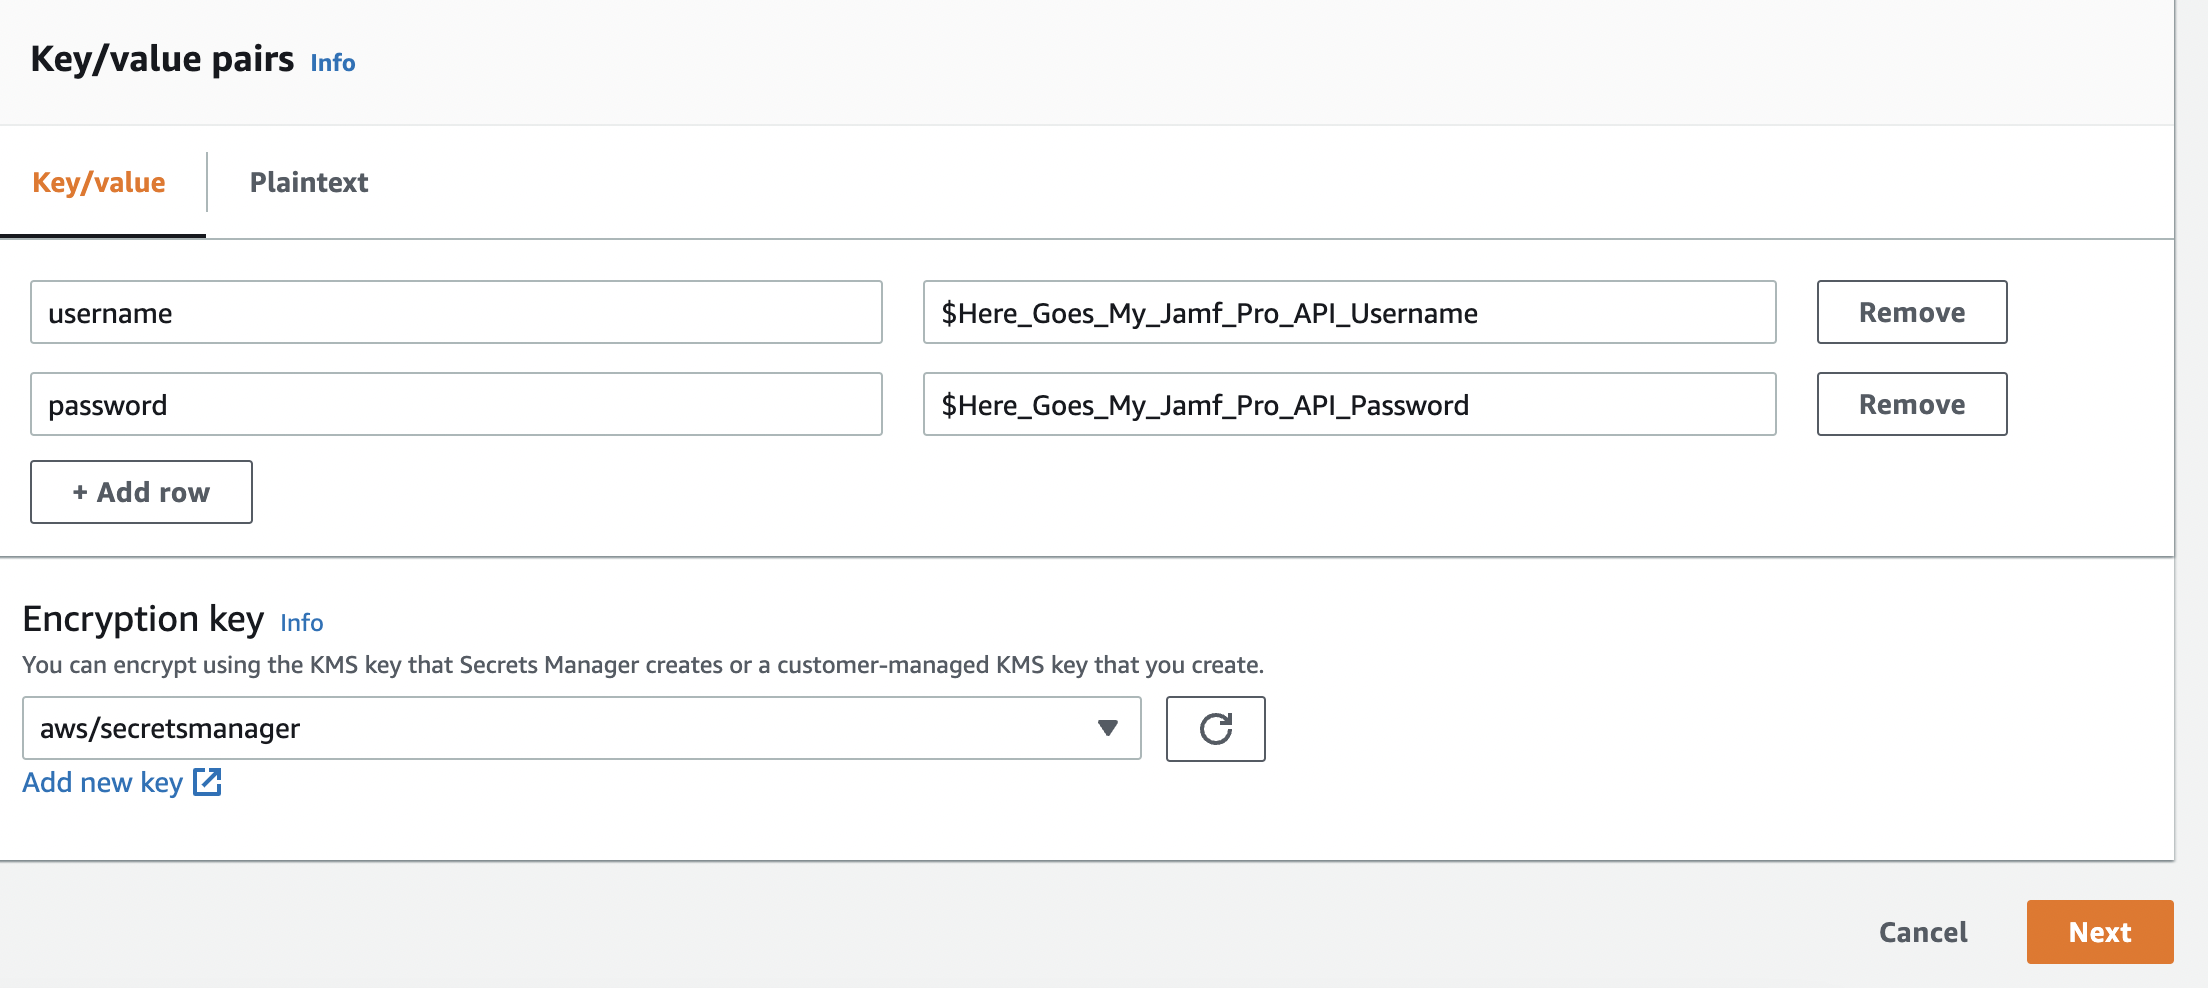
<p>Provide the key/value as:</p>

<p>username</p>

<p>password</p>

<p>and the relatively correspondent values, leave encryption to KMS and hit Next:</p>

<p><img src="/assets/img/screenshot-2022-08-24-at-14.00.20.png" alt="" /></p>

<p>Give it a secret name and keep it saved, we will use this later in the Lambda code.<strong>Save the secret hitting <em>Store Secret</em></strong></p>

<p><strong>AWS Console - IAM</strong>**We now need to grant a few permissions in here.
First, we need to give Lambda permissions to read the username/password from Secret Manager.
We also need to allow the Lambda to read the images/gif we’re storing on the S3 bucket.
Lastly, we want to make sure our Lambda has permissions to log into CloudWatch.
If when you created the Lambda function you didn’t specify an execution role, AWS would have created an IAM role for you and defaulted to grant CloudWatch permissions.</p>

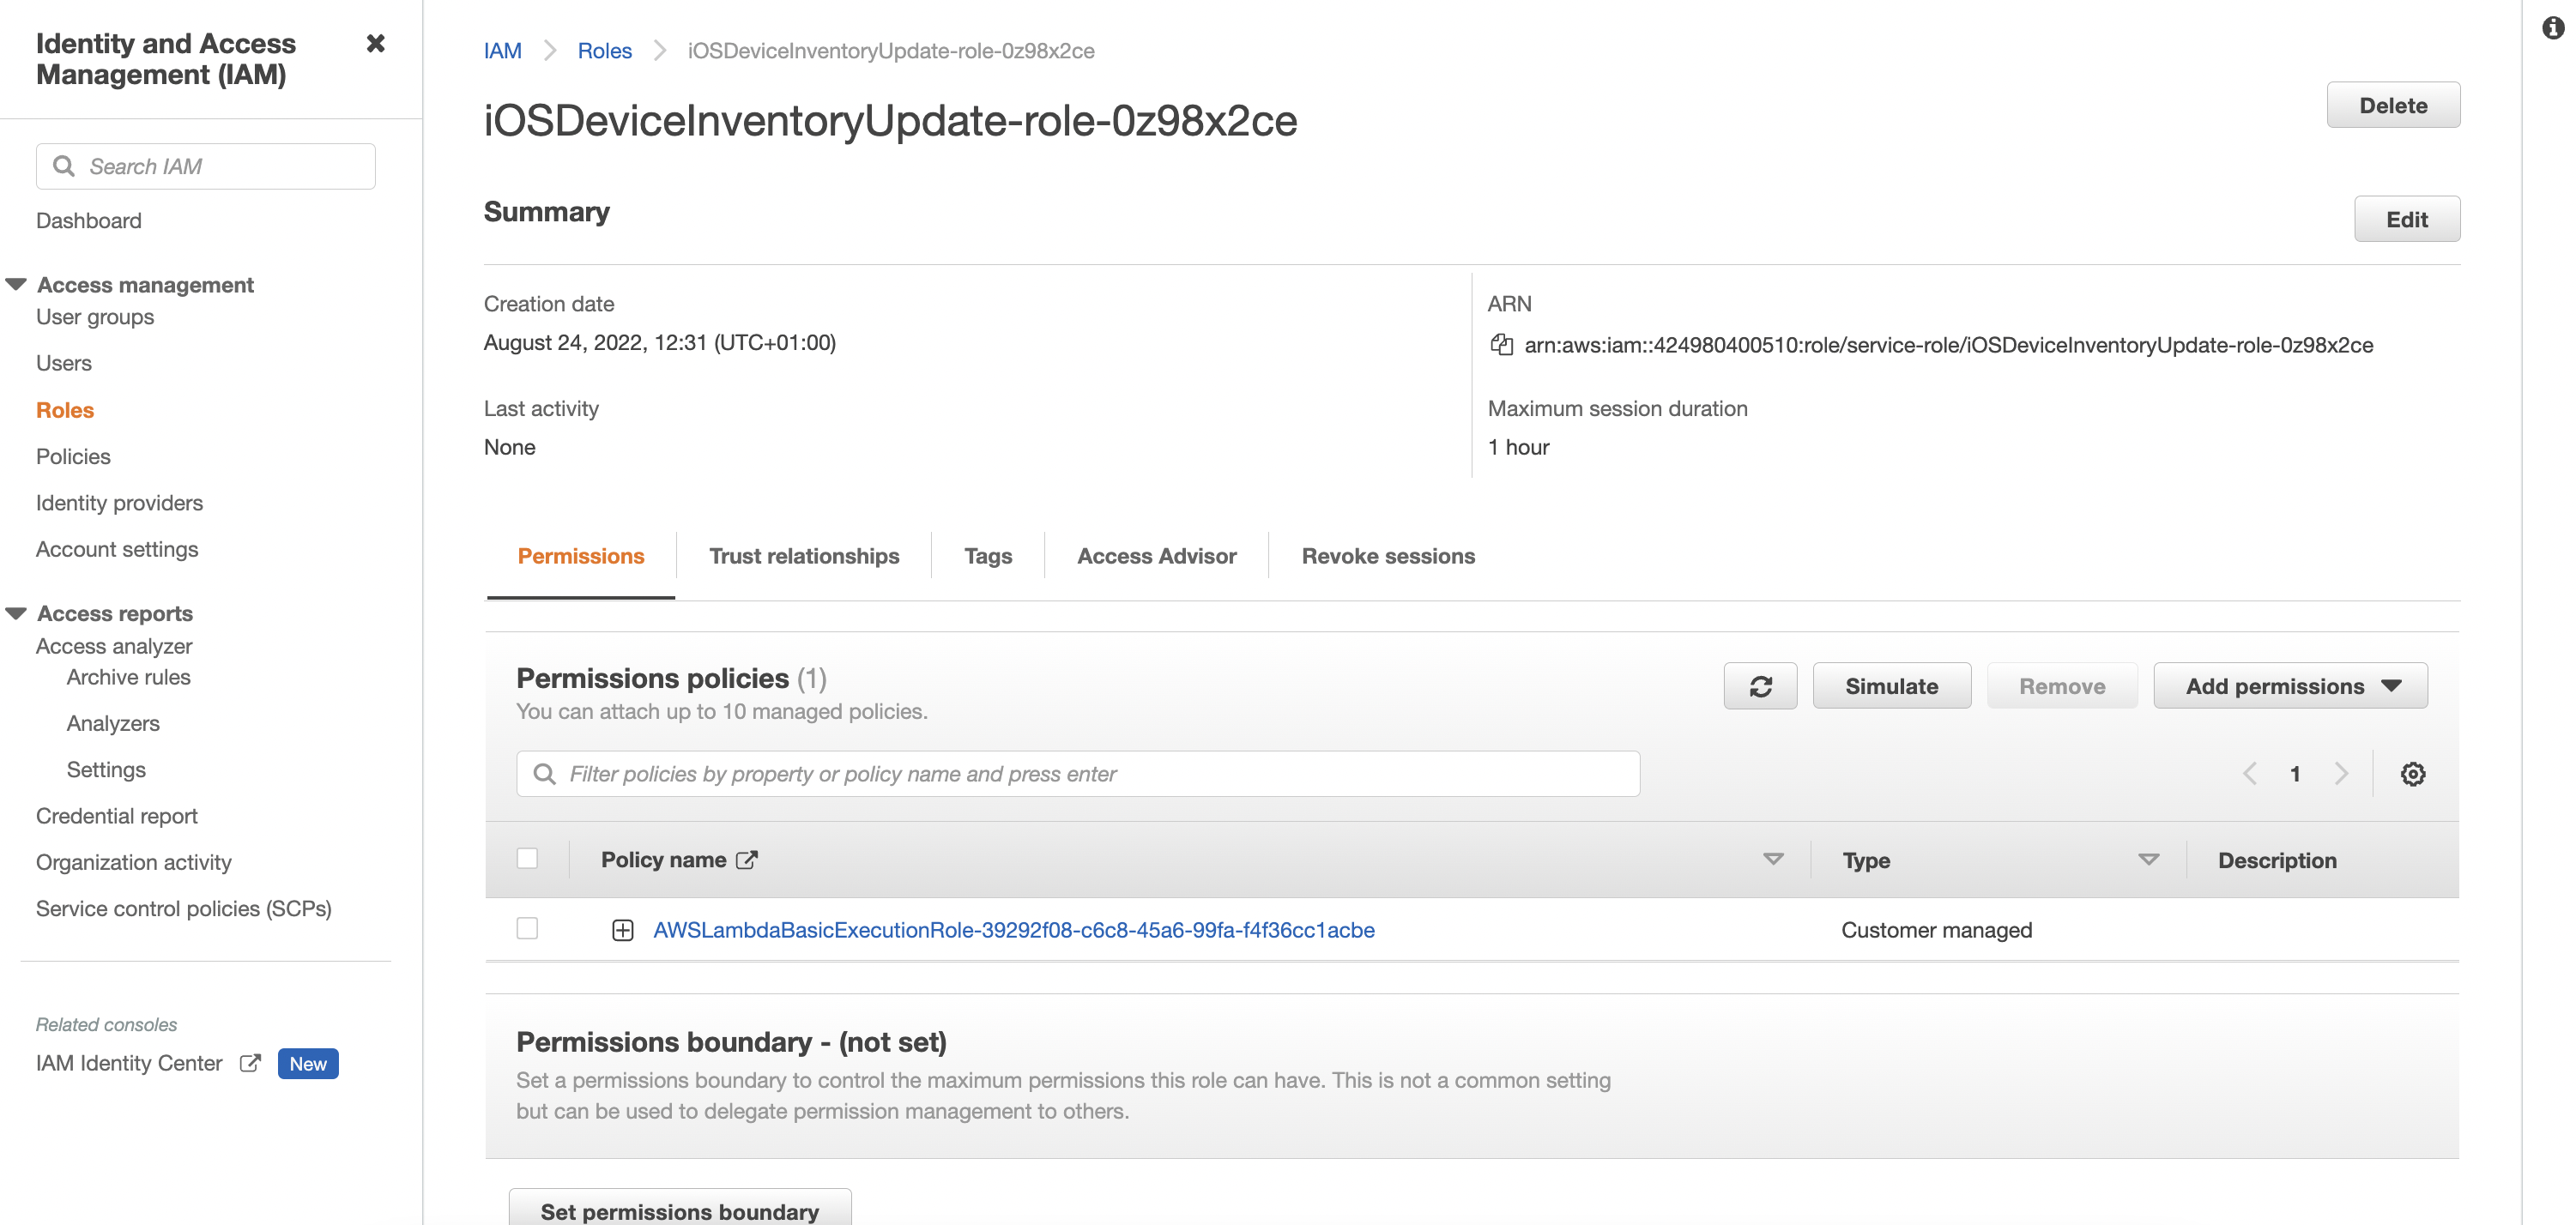
<p>You can check in AWS Console &gt; IAM &gt; Roles you should find an IAM role with a name starting with the name of your Lambda function:</p>

<p><img src="/assets/img/screenshot-2022-08-24-at-13.46.48.png" alt="" /></p>

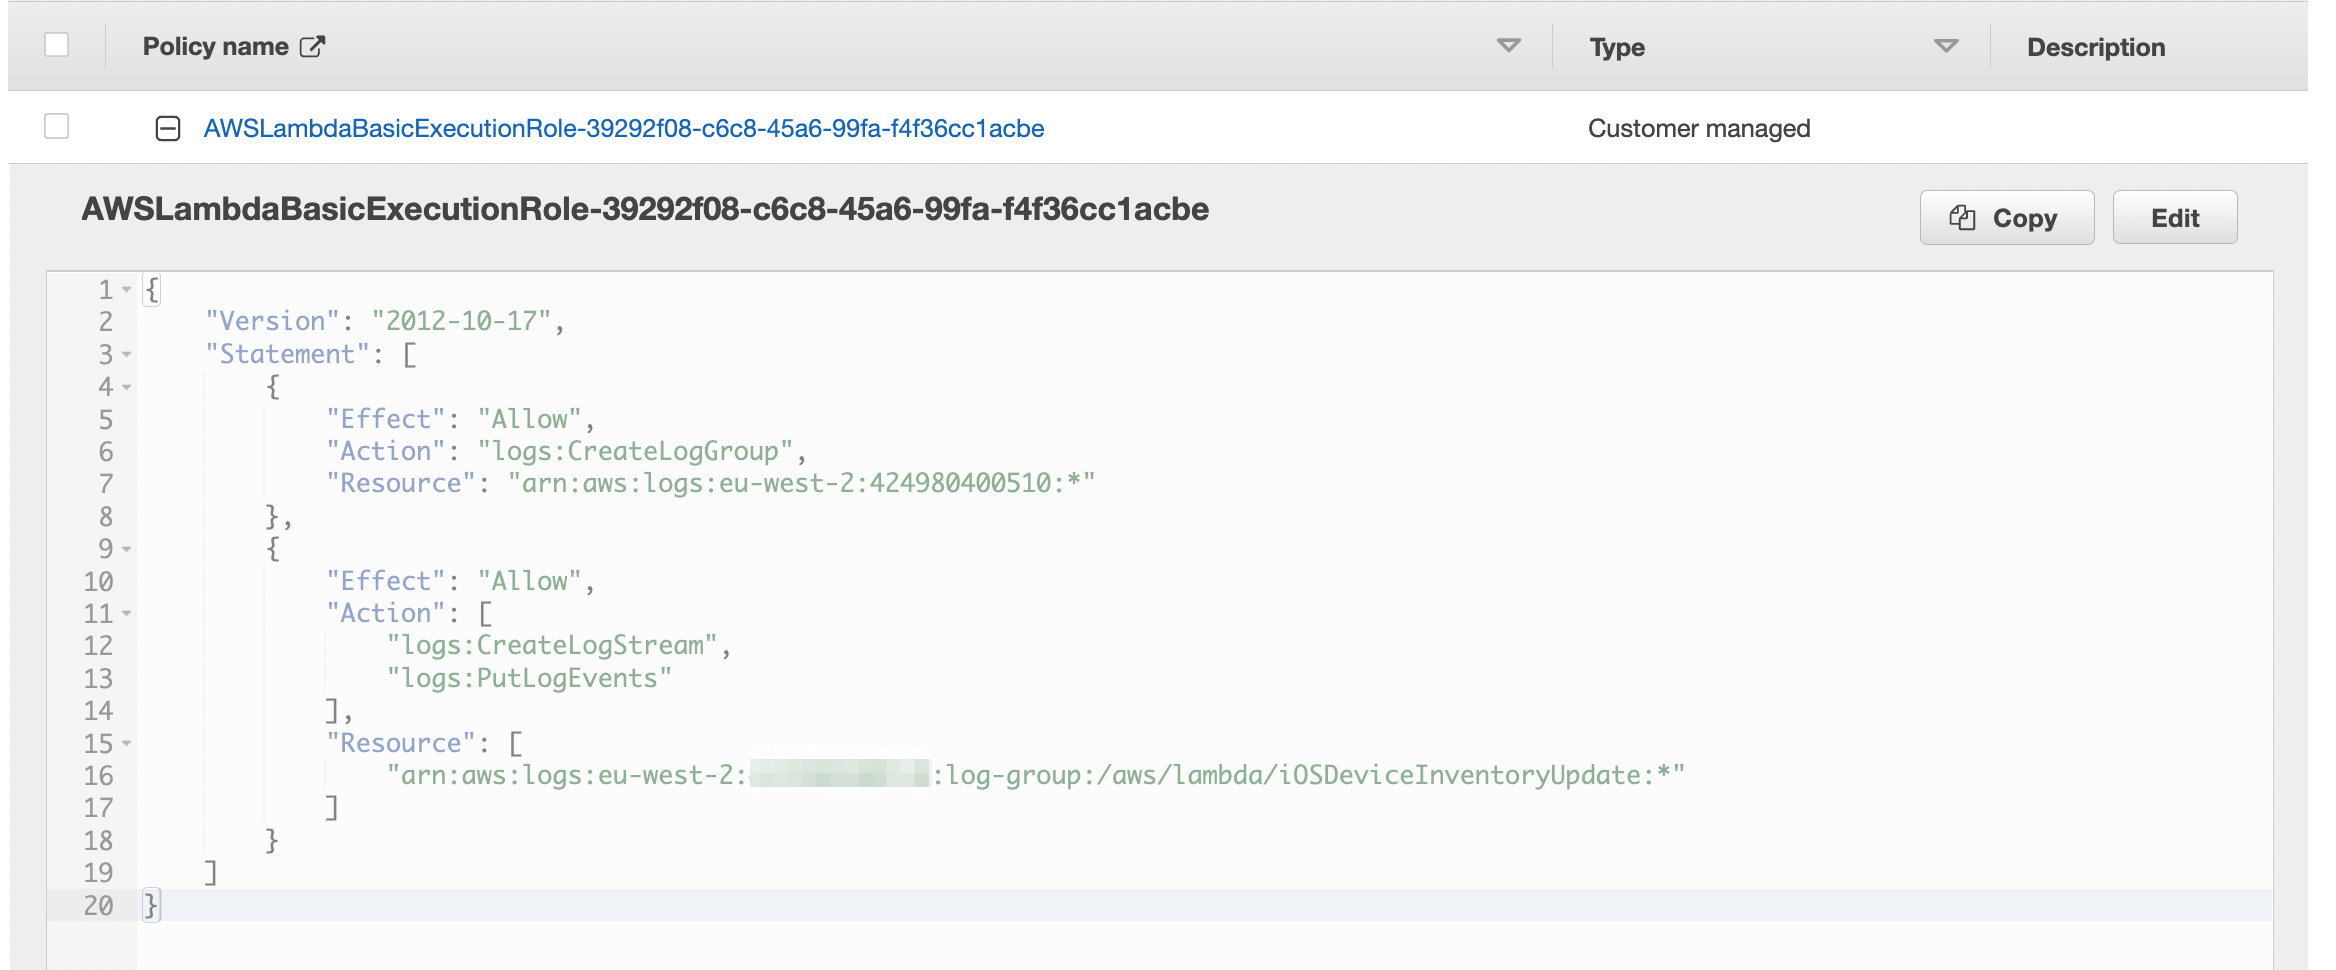
<p>If you expand the generated policy, it should include CloudWatch permissions:</p>

<p><img src="/assets/img/1-2.png" alt="" /></p>

<p>We can now create 2 new policies to grant permission respectively for S3:</p>

<div class="language-plaintext highlighter-rouge"><div class="highlight"><pre class="highlight"><code>{
 "Version": "2012-10-17",
 "Statement": &amp;#091;
 {
 "Effect": "Allow",
 "Action": &amp;#091;
 "s3:GetObject"
 ],
 "Resource": "arn:aws:s3_bucket_here"
 }
 ]
}
</code></pre></div></div>

<p>And for retrieving data from Secret Manager:</p>

<div class="language-plaintext highlighter-rouge"><div class="highlight"><pre class="highlight"><code>{
 "Version": "2012-10-17",
 "Statement": &amp;#091;
 {
 "Sid": "AllowLambdafucntionReadSecretManager" 
 "Effect": "Allow",
 "Action": &amp;#091;
 "secretsmanager:GetSecretValue",
 ],
 "Resource": &amp;#091;
 "arn:ARN_of_Secret_Manager_Secret_here"
 ]
 }
 ]
}
</code></pre></div></div>

<p>In both cases replace Resource with the correct ARN of your bucket and secret.</p>

<p>Next we can either create a new IAM role, assign those permissions and run the Lambda with it, or, for simplicity as this is just a demo, I’ll just edit the execution IAM role that was automatically created.
Go to the role, click Add permissions and attach the 2 policies we just created.</p>

<p>AWS Console - API Gateway**</p>

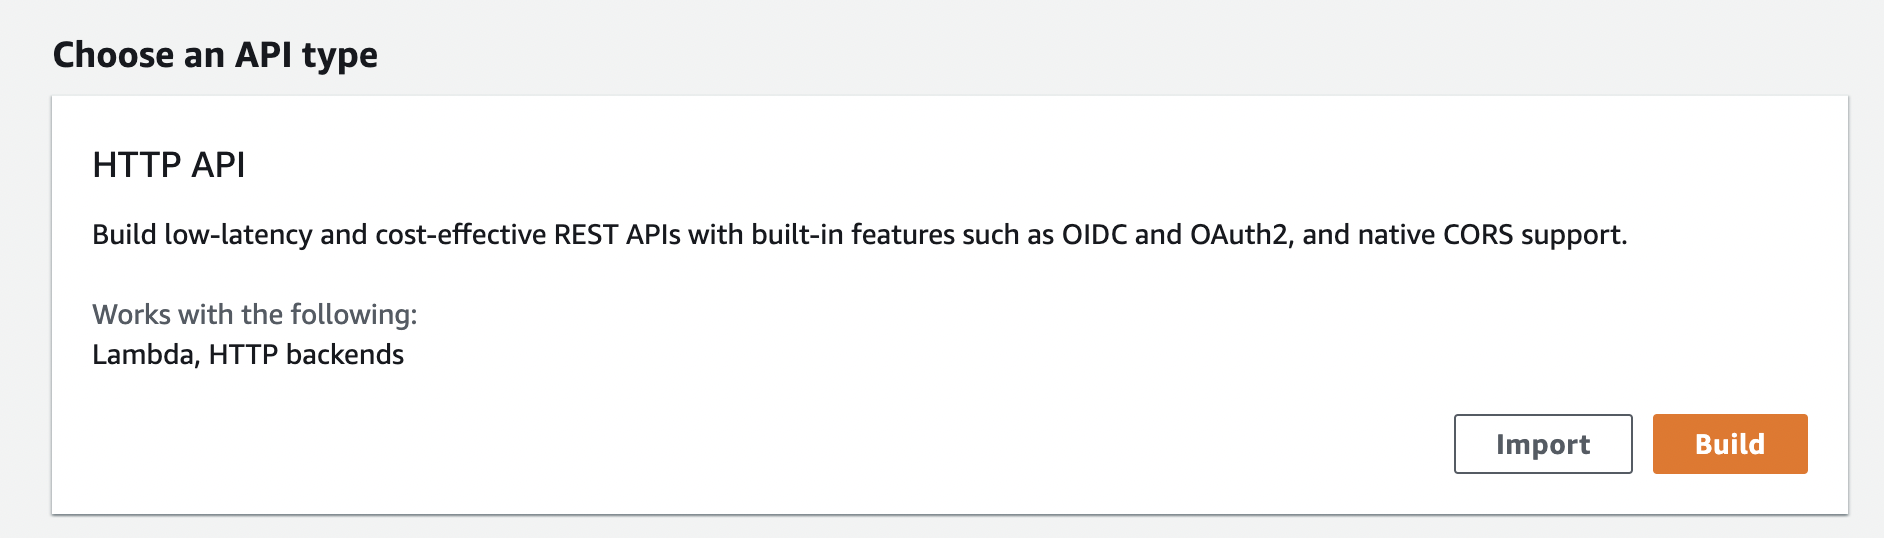
<p>We’ll build a simple HTTP API Gateway:</p>

<p><img src="/assets/img/screenshot-2022-08-24-at-12.31.04.png" alt="" /></p>

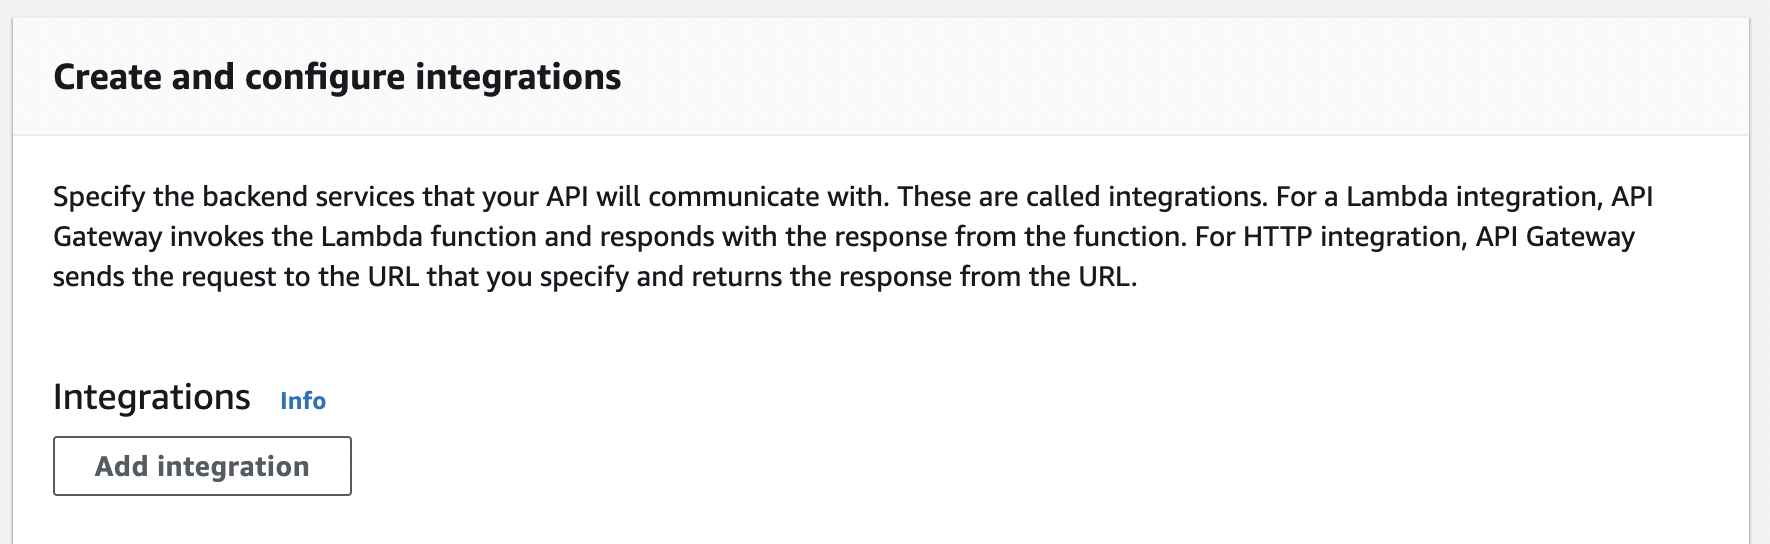
<p>Click on Add integration:</p>

<p><img src="/assets/img/screenshot-2022-08-24-at-14.10.53.png" alt="" /></p>

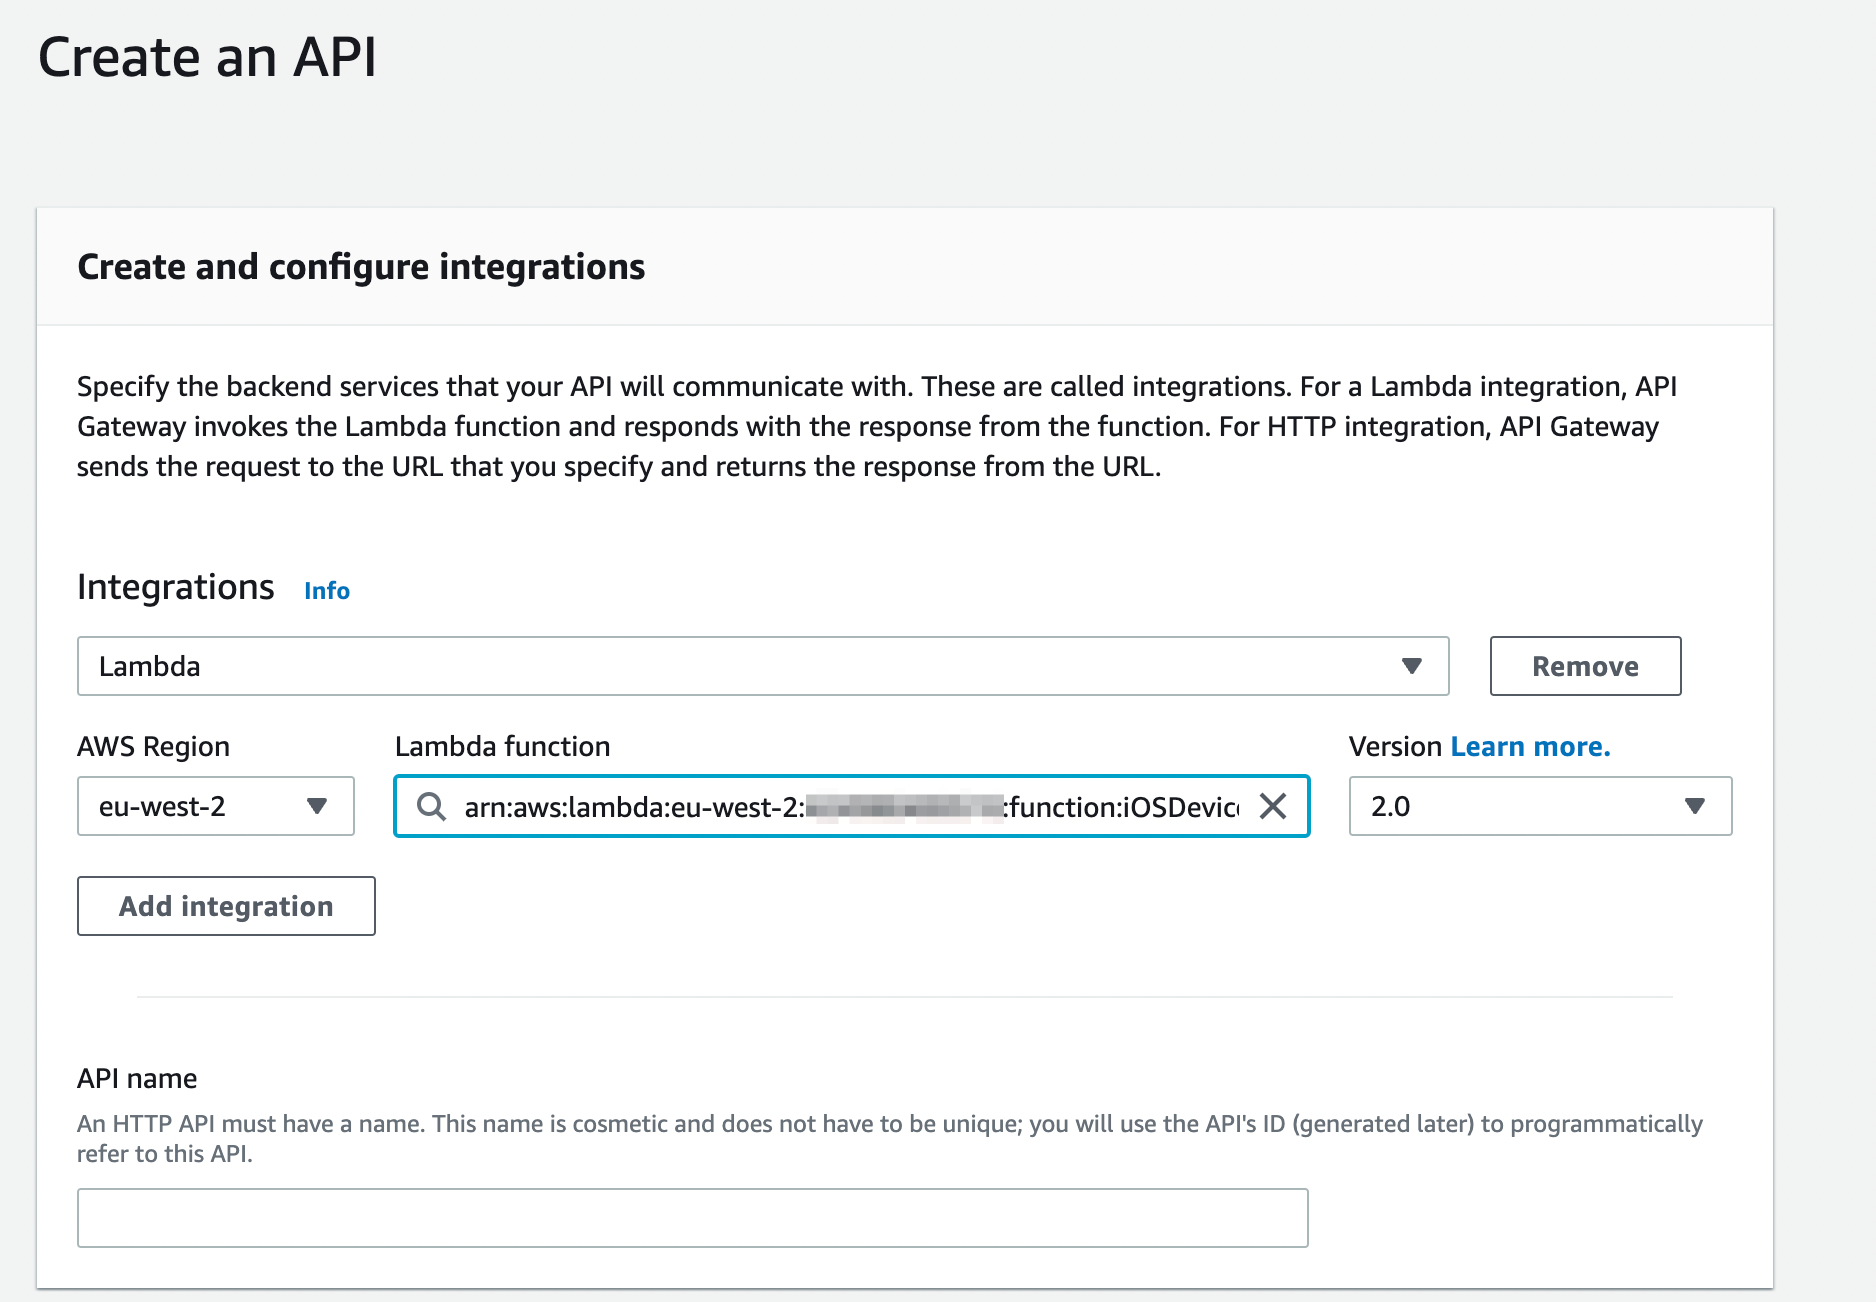
<p>Select Lambda and pick the Lambda function we’ve created before:</p>

<p><img src="/assets/img/2-2.png" alt="" /></p>

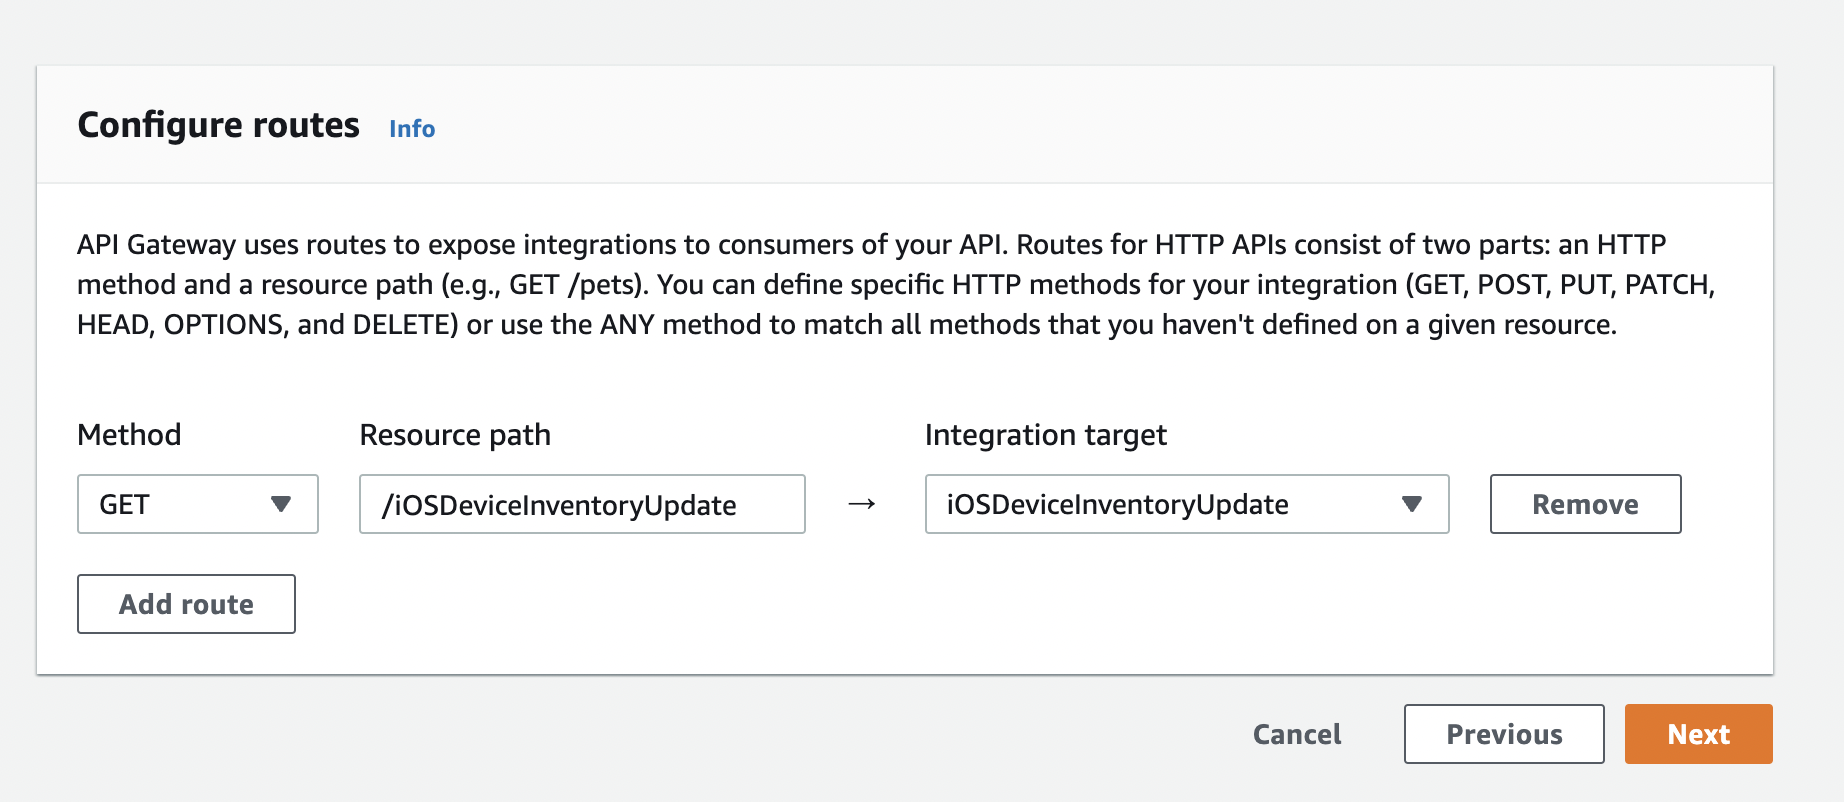
<p>Set the method type to GET:</p>

<p><img src="/assets/img/screenshot-2022-08-24-at-14.12.55.png" alt="" /></p>

<p>Given this API Gateway will be called via an iOS WebClip, the only HTTP method we have available is GET.</p>

<p>Click on Next on the next steps and complete the API Gateway setup.</p>

<p>Once its done, you should see an invoke ULR similar to this:</p>

<p><img src="/assets/img/3-3.png" alt="" /></p>

<p>Save the invoke URL as we’ll be using that in the WebClip.</p>

<p><strong>AWS Console - Lambda - part2</strong></p>

<p>It’s time now to finally configure the Lambda function.<strong>A side note, we need the requests module which by default is not included in python 3.8 or later shipped with the AWS SKD.
I found this blog post helpful to get <em>requests</em></strong> available: https://medium.com/@cziegler_99189/using-the-requests-library-in-aws-lambda-with-screenshots-fa36c4630d82</p>

<p>We can now copy and paste in the python code for our lambda:</p>

<div class="language-plaintext highlighter-rouge"><div class="highlight"><pre class="highlight"><code>import requests
import json
import boto3
import base64
s3 = boto3.client('s3')

def lambda_handler(event, context):

 #Define the Jamf Pro URL
 jamf_url = "https://myinstance.jamfcloud.com"
 
 #Define the S3 bucket name(bucket) and filename(key)
 S3_Bucket = "mybucket"
 S3_Key = "myimage.png"
 SecretManagerId = "mysecret"
 ErrorText = "We hit a snag! Please open a ticket to HelpDesk"
 
 #######################################################################################
 ################################# DO NOT MODIFY BELOW #################################
 #######################################################################################
 
 #Extract the device id from the API call HTTP header
 jss_id = event['queryStringParameters']['device_id']
 
 #Invoke Secrets Manager to obtain Jamf Pro API username and password
 client = boto3.client("secretsmanager")
 response = client.get_secret_value(SecretId = (SecretManagerId))
 secretDict = json.loads(response["SecretString"])
 jamf_api_username = secretDict["username"]
 jamf_api_password = secretDict["password"]
 
 #Invoke Jamf Pro API /token enpoint
 token_url = f"{jamf_url}/api/v1/auth/token"
 headers = {"Accept": "application/json"}
 resp = requests.post(token_url, auth=(jamf_api_username, jamf_api_password), headers=headers)
 resp.raise_for_status()
 resp_data = resp.json()
 print(f"Jamf Pro Access Token granted, valid until {resp_data['expires']}.")
 data = resp.json()
 token = data["token"]
 
 jamf_pro_resp = requests.post(
 f"{jamf_url}/JSSResource/mobiledevicecommands/command/UpdateInventory/id/{jss_id}",
 headers={"Authorization": f"Bearer {token}", "Accept": "application/json"},
 )
 
 if jamf_pro_resp.status_code != 401:
 response = s3.get_object(
 Bucket = (S3_Bucket),
 Key = (S3_Key),
 )
 image = response['Body'].read()
 return {
 'headers': { "Content-Type": "image/png" },
 'statusCode': 200,
 'body': base64.b64encode(image).decode('utf-8'),
 'isBase64Encoded': True
 
 }
 print(f"Inventory Update successfully requested - HTTP response: {jamf_pro_resp.status_code}")
 else:
 return {
 'headers': { "Content-type": "text/html" },
 'statusCode': 200,
 'body': "&lt;h1&gt;(ErrorText)&lt;/h1&gt;",
 
 } 
 print(f"Check your credentials &lt;POST failed&gt; Jamf Pro API HTTP response: {jamf_pro_resp.status_code}")

</code></pre></div></div>

<p>Edit the script line 9 to 17 and provide the details of your environment.</p>

<p>At this point, we’re done with the AWS config, all what’s left is to create and deploy the WebClip via Jamf Pro.</p>

<p>Create a Configuration Profile for Mobile Devices.</p>

<p>Within the URL field we will provide the API Gateway URL constructed this way:</p>

<div class="language-plaintext highlighter-rouge"><div class="highlight"><pre class="highlight"><code>https:&amp;#047;&amp;#047;your_unique_identifier.execute-api.eu-central-1.amazonaws.com/yourAPIGatewayName?device_id=$JSSID
</code></pre></div></div>

<p>We are adding the</p>

<div class="language-plaintext highlighter-rouge"><div class="highlight"><pre class="highlight"><code>?device_id=$JSSID
</code></pre></div></div>

<p>so that when the Configuration Profile is deployed, Jamf Pro will insert each device_id into the URL.
The device_id is then fetch in Lambda.</p>

<p>The Config Profile should then look like this:</p>

<p><img src="/assets/img/10-4.png" alt="" /></p>

<p>Scope as needed and Save.</p>

<p>Now let’s wrap it up and see if it works:</p>

<p>https://youtu.be/l_By0cFaMrI</p>

<p>Not the most elegant notification in the WebClip but for this demo would suffice.
We can see the Update Inventory command being issued successfully.</p>

<p>Well, that’s a wrap!</p>]]></content><author><name>Matteo Bolognini</name></author><summary type="html"><![CDATA[Lets start with a premise: this post is not about setting up anything even remotely close to be “production-ready”.**This is just me, tinkering with AWS and python.]]></summary></entry><entry><title type="html">Google Workspace SSO for Jamf Protect</title><link href="https://skartek.dev/google-workspace-sso-for-jamf-protect/" rel="alternate" type="text/html" title="Google Workspace SSO for Jamf Protect" /><published>2022-08-22T00:00:00+00:00</published><updated>2022-08-22T00:00:00+00:00</updated><id>https://skartek.dev/google-workspace-sso-for-jamf-protect</id><content type="html" xml:base="https://skartek.dev/google-workspace-sso-for-jamf-protect/"><![CDATA[<p>This will be a quick post to help navigate Google Workspace to setup a SAML app to be used with Jamf Protect to enable SSO on the tenant.</p>

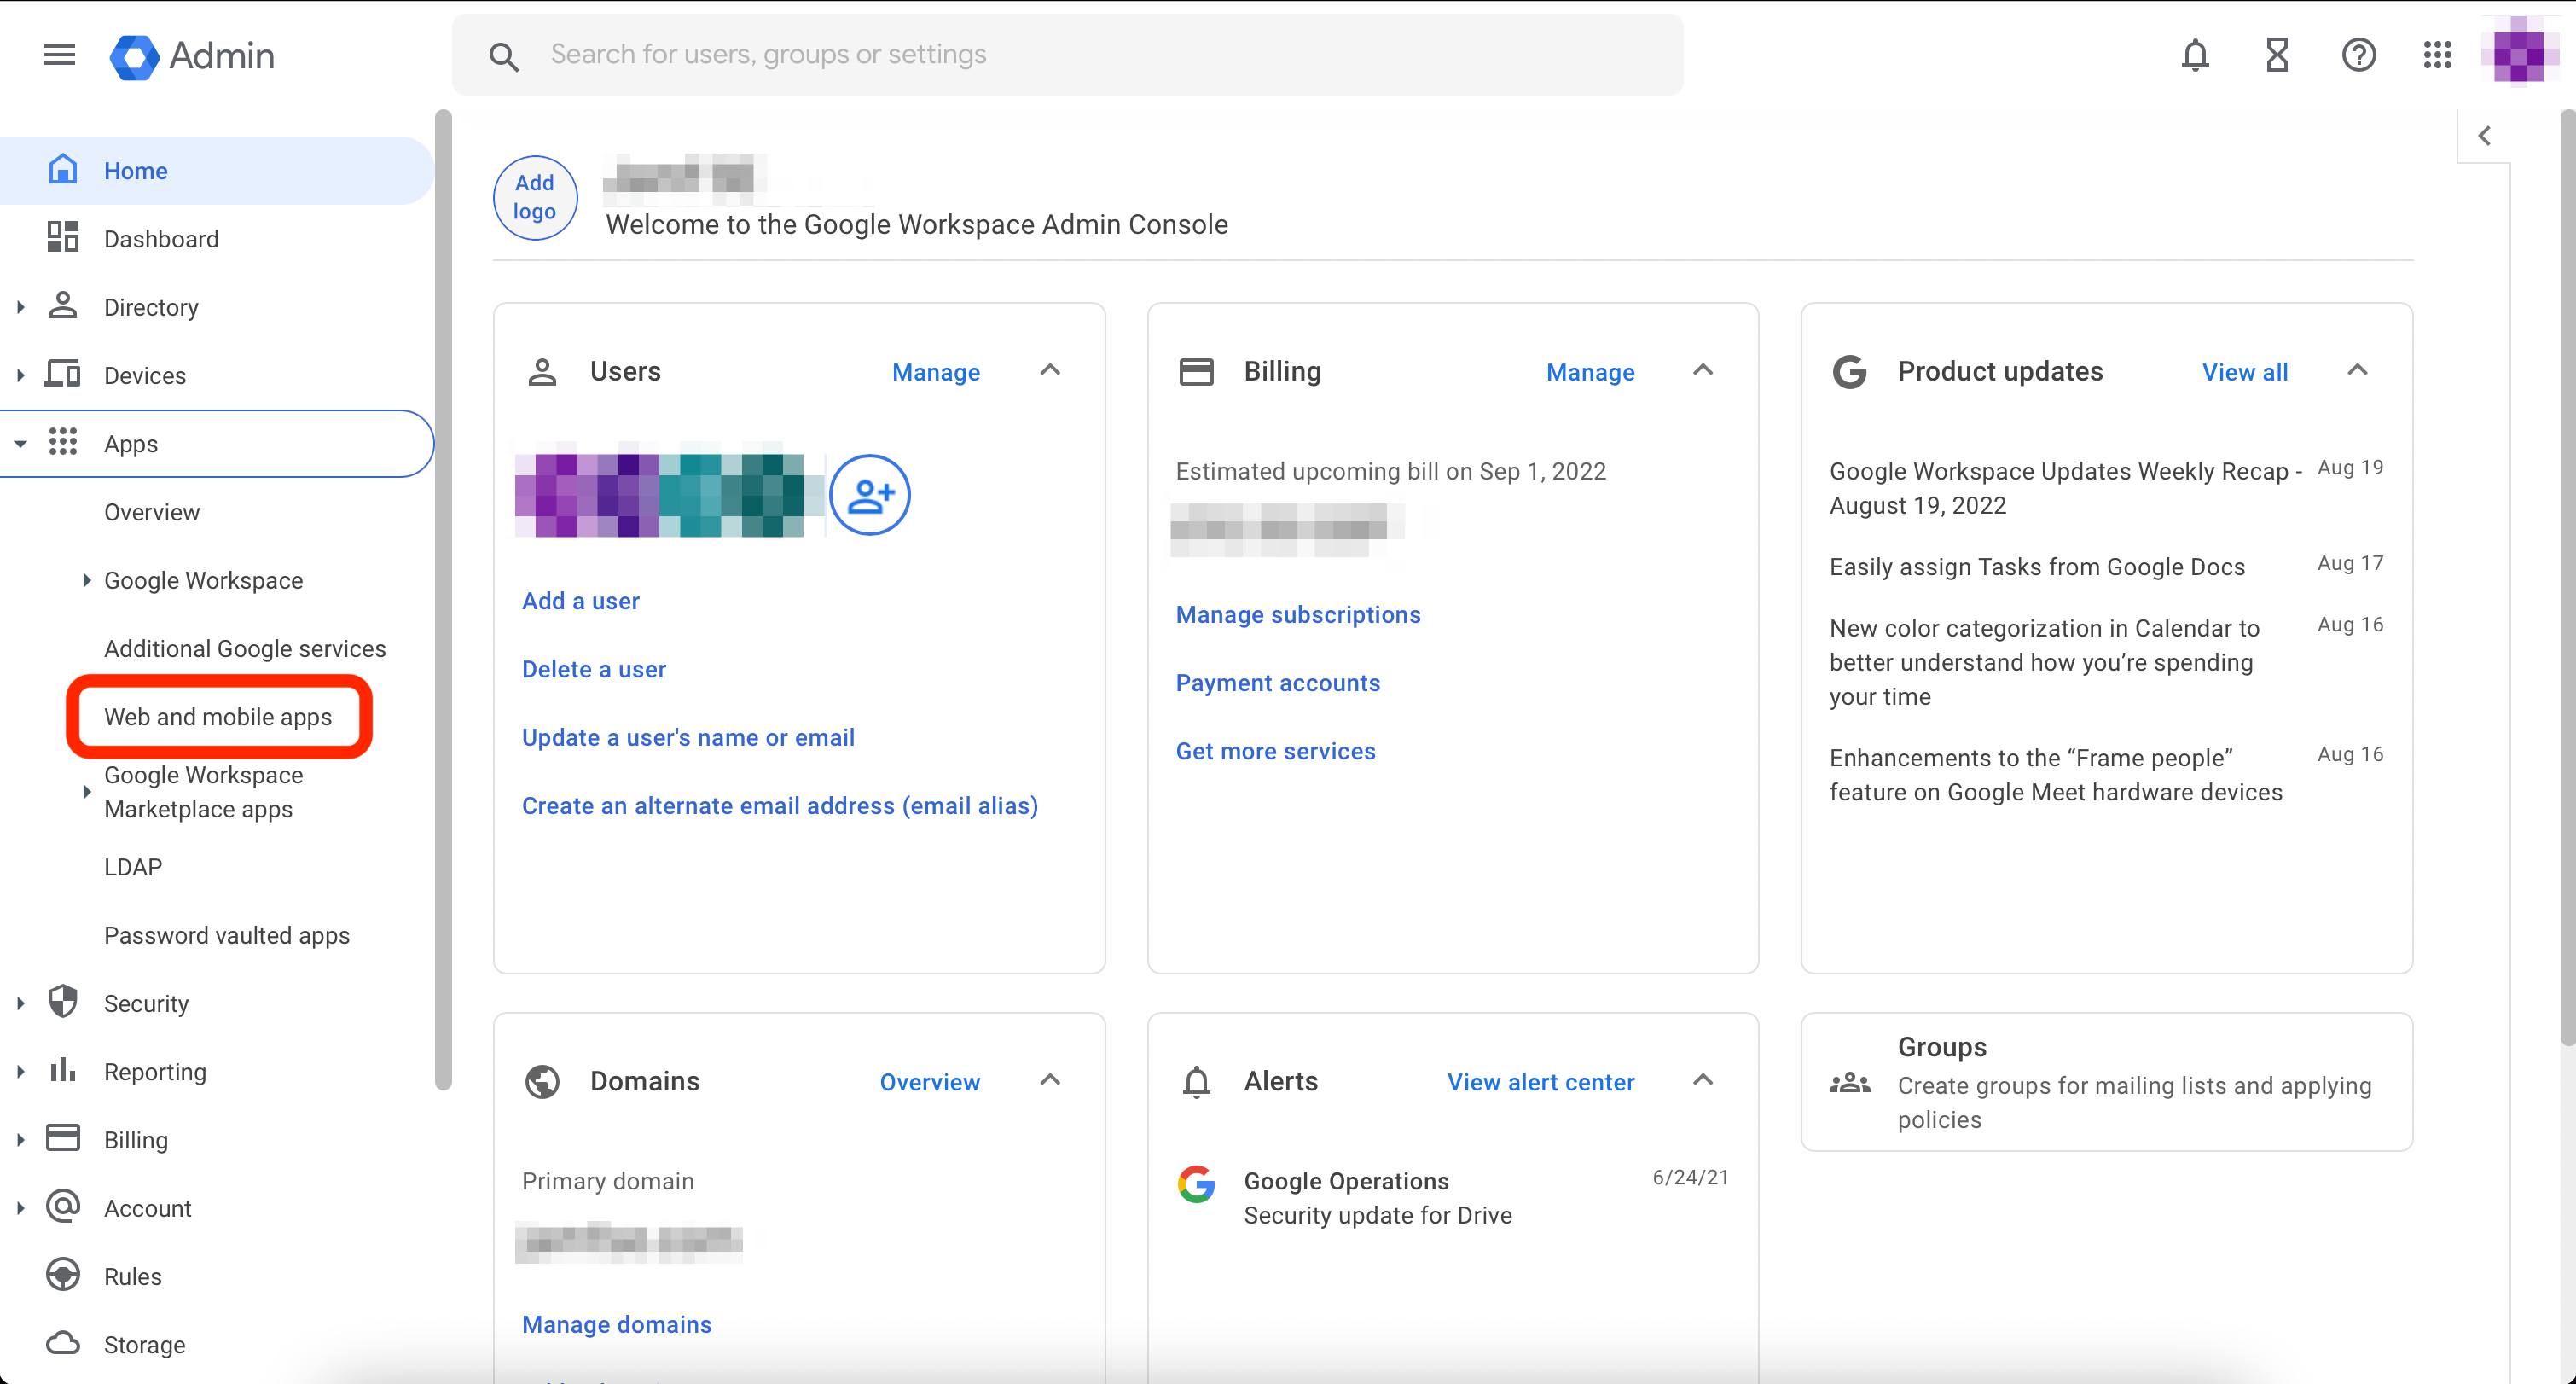
<p>First, let’s login to <a href="https://admin.google.com">https://admin.google.com </a>and expand the <strong><em>Apps</em></strong> section and locate and open <strong><em>Web and mobile apps</em></strong>:</p>

<p><img src="/assets/img/1-1.png" alt="" /></p>

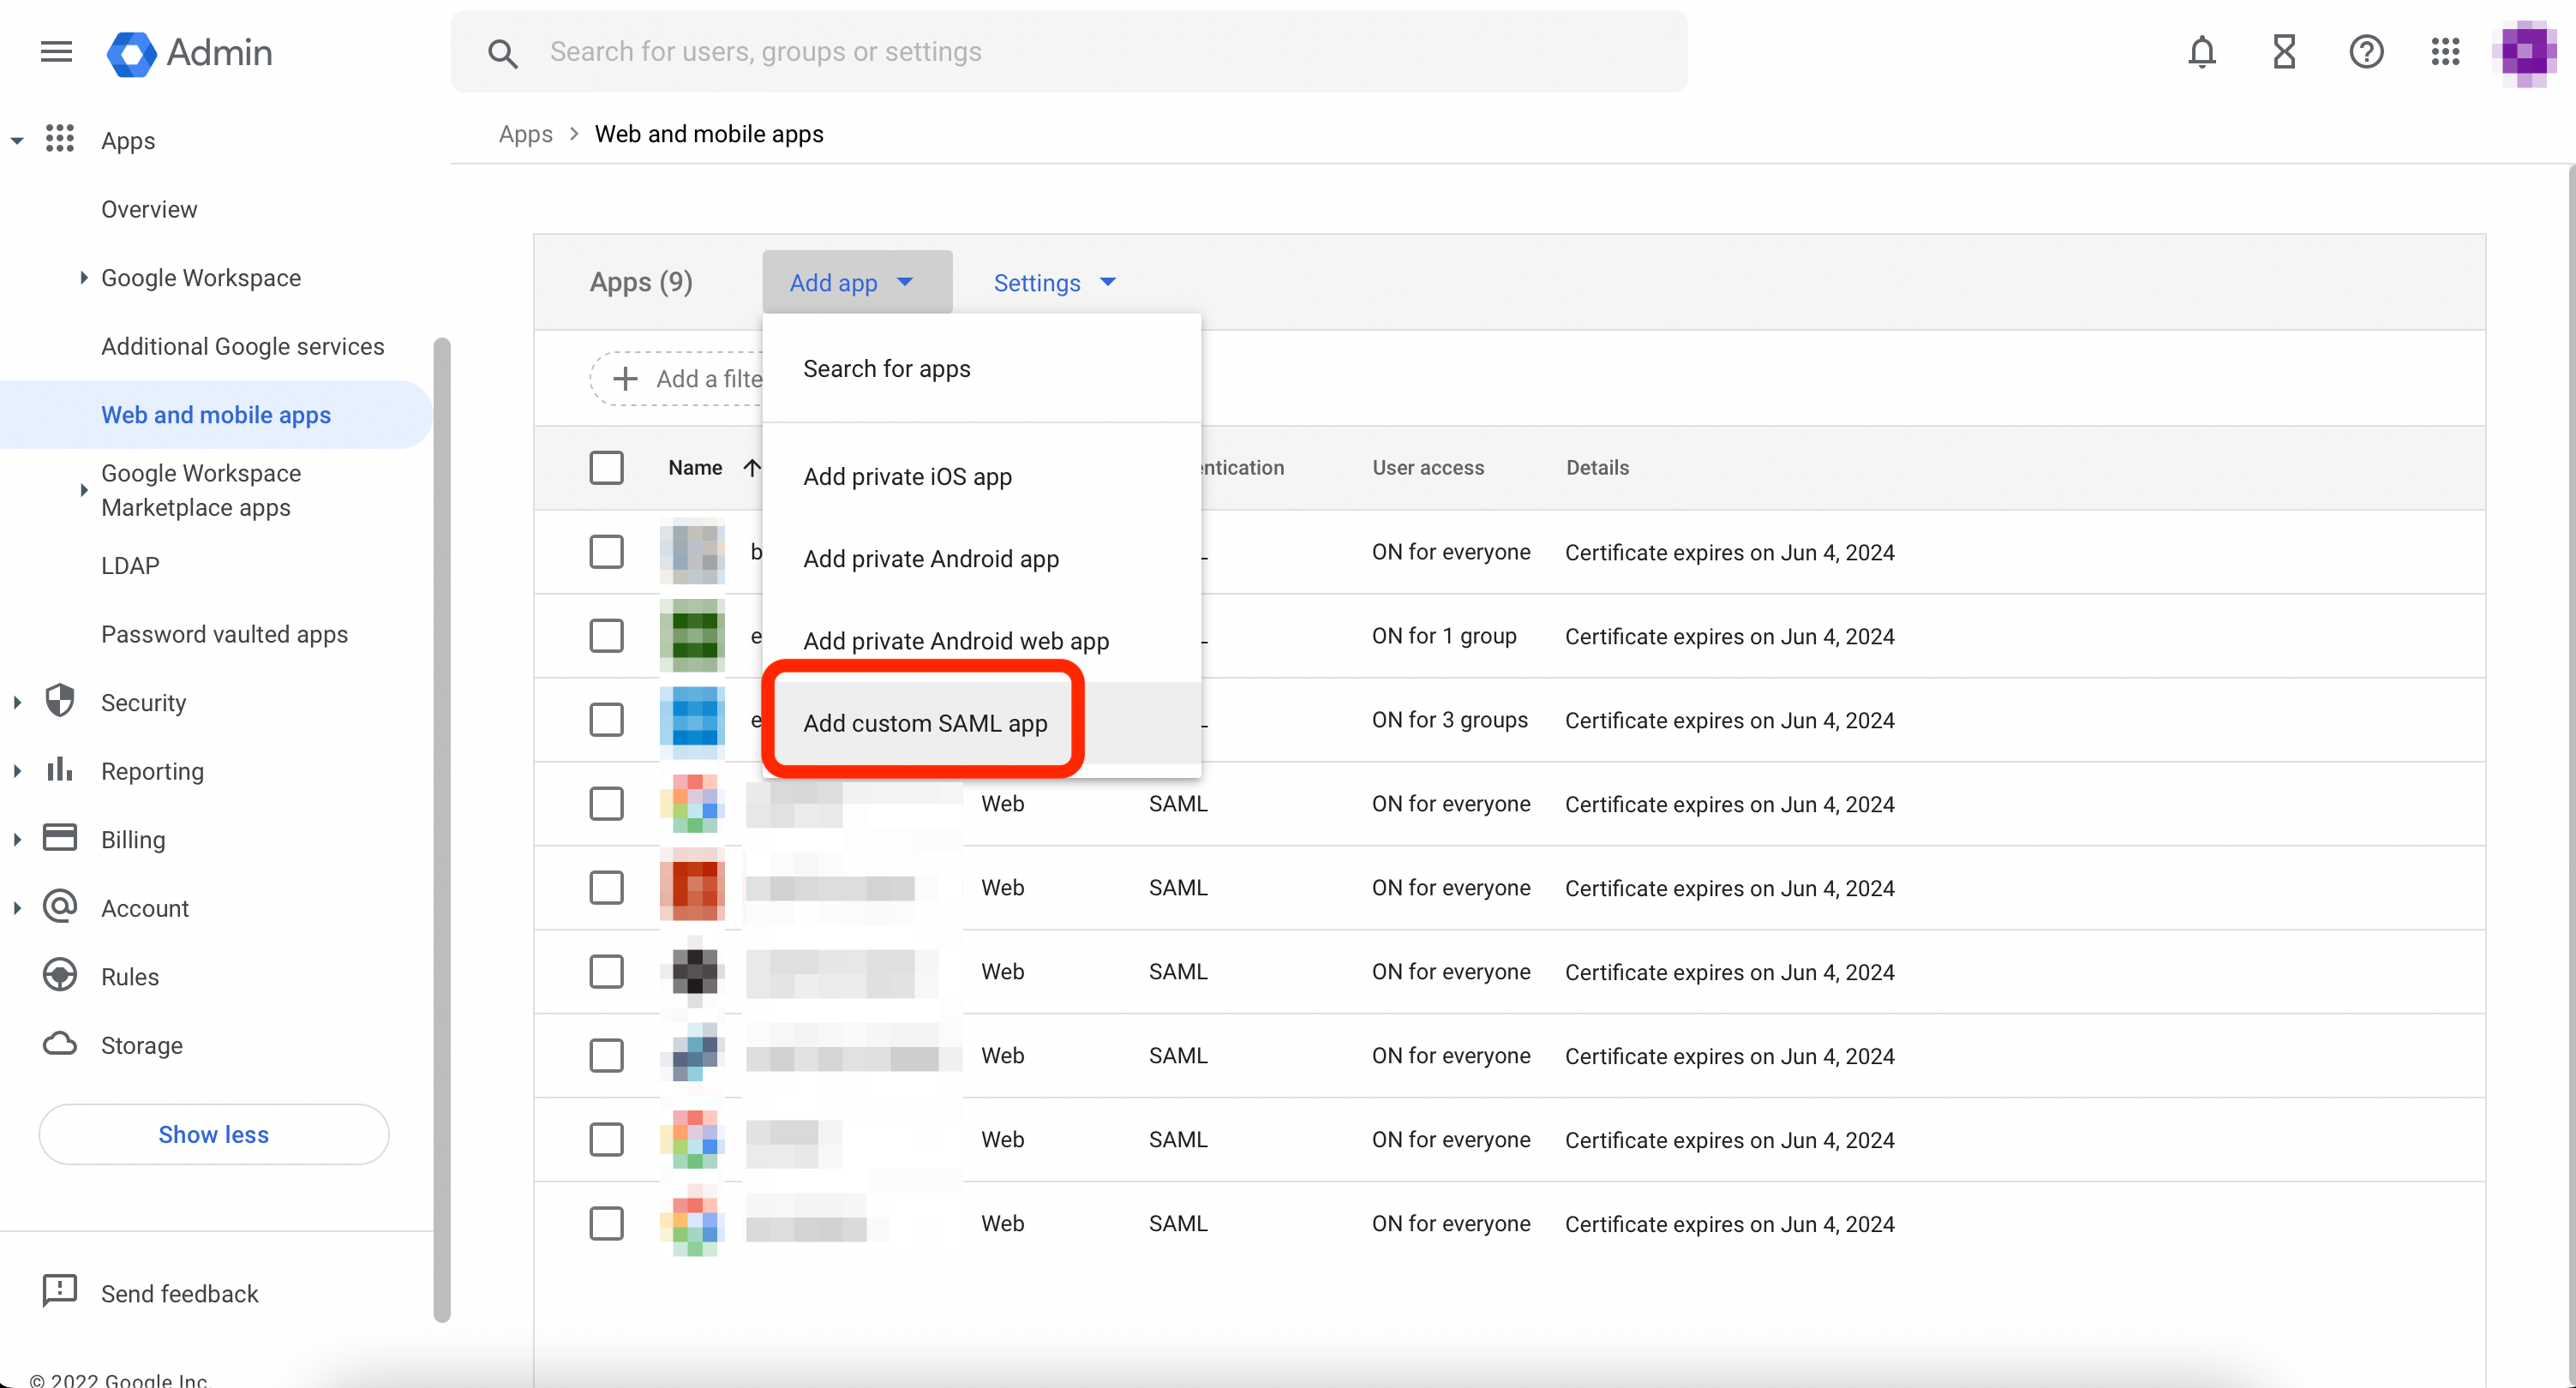
<p><strong>Next we want to select <em>Add app</em></strong> and then <strong><em>Add a custom SAML app</em></strong>:</p>

<p><img src="/assets/img/2-1.png" alt="" /></p>

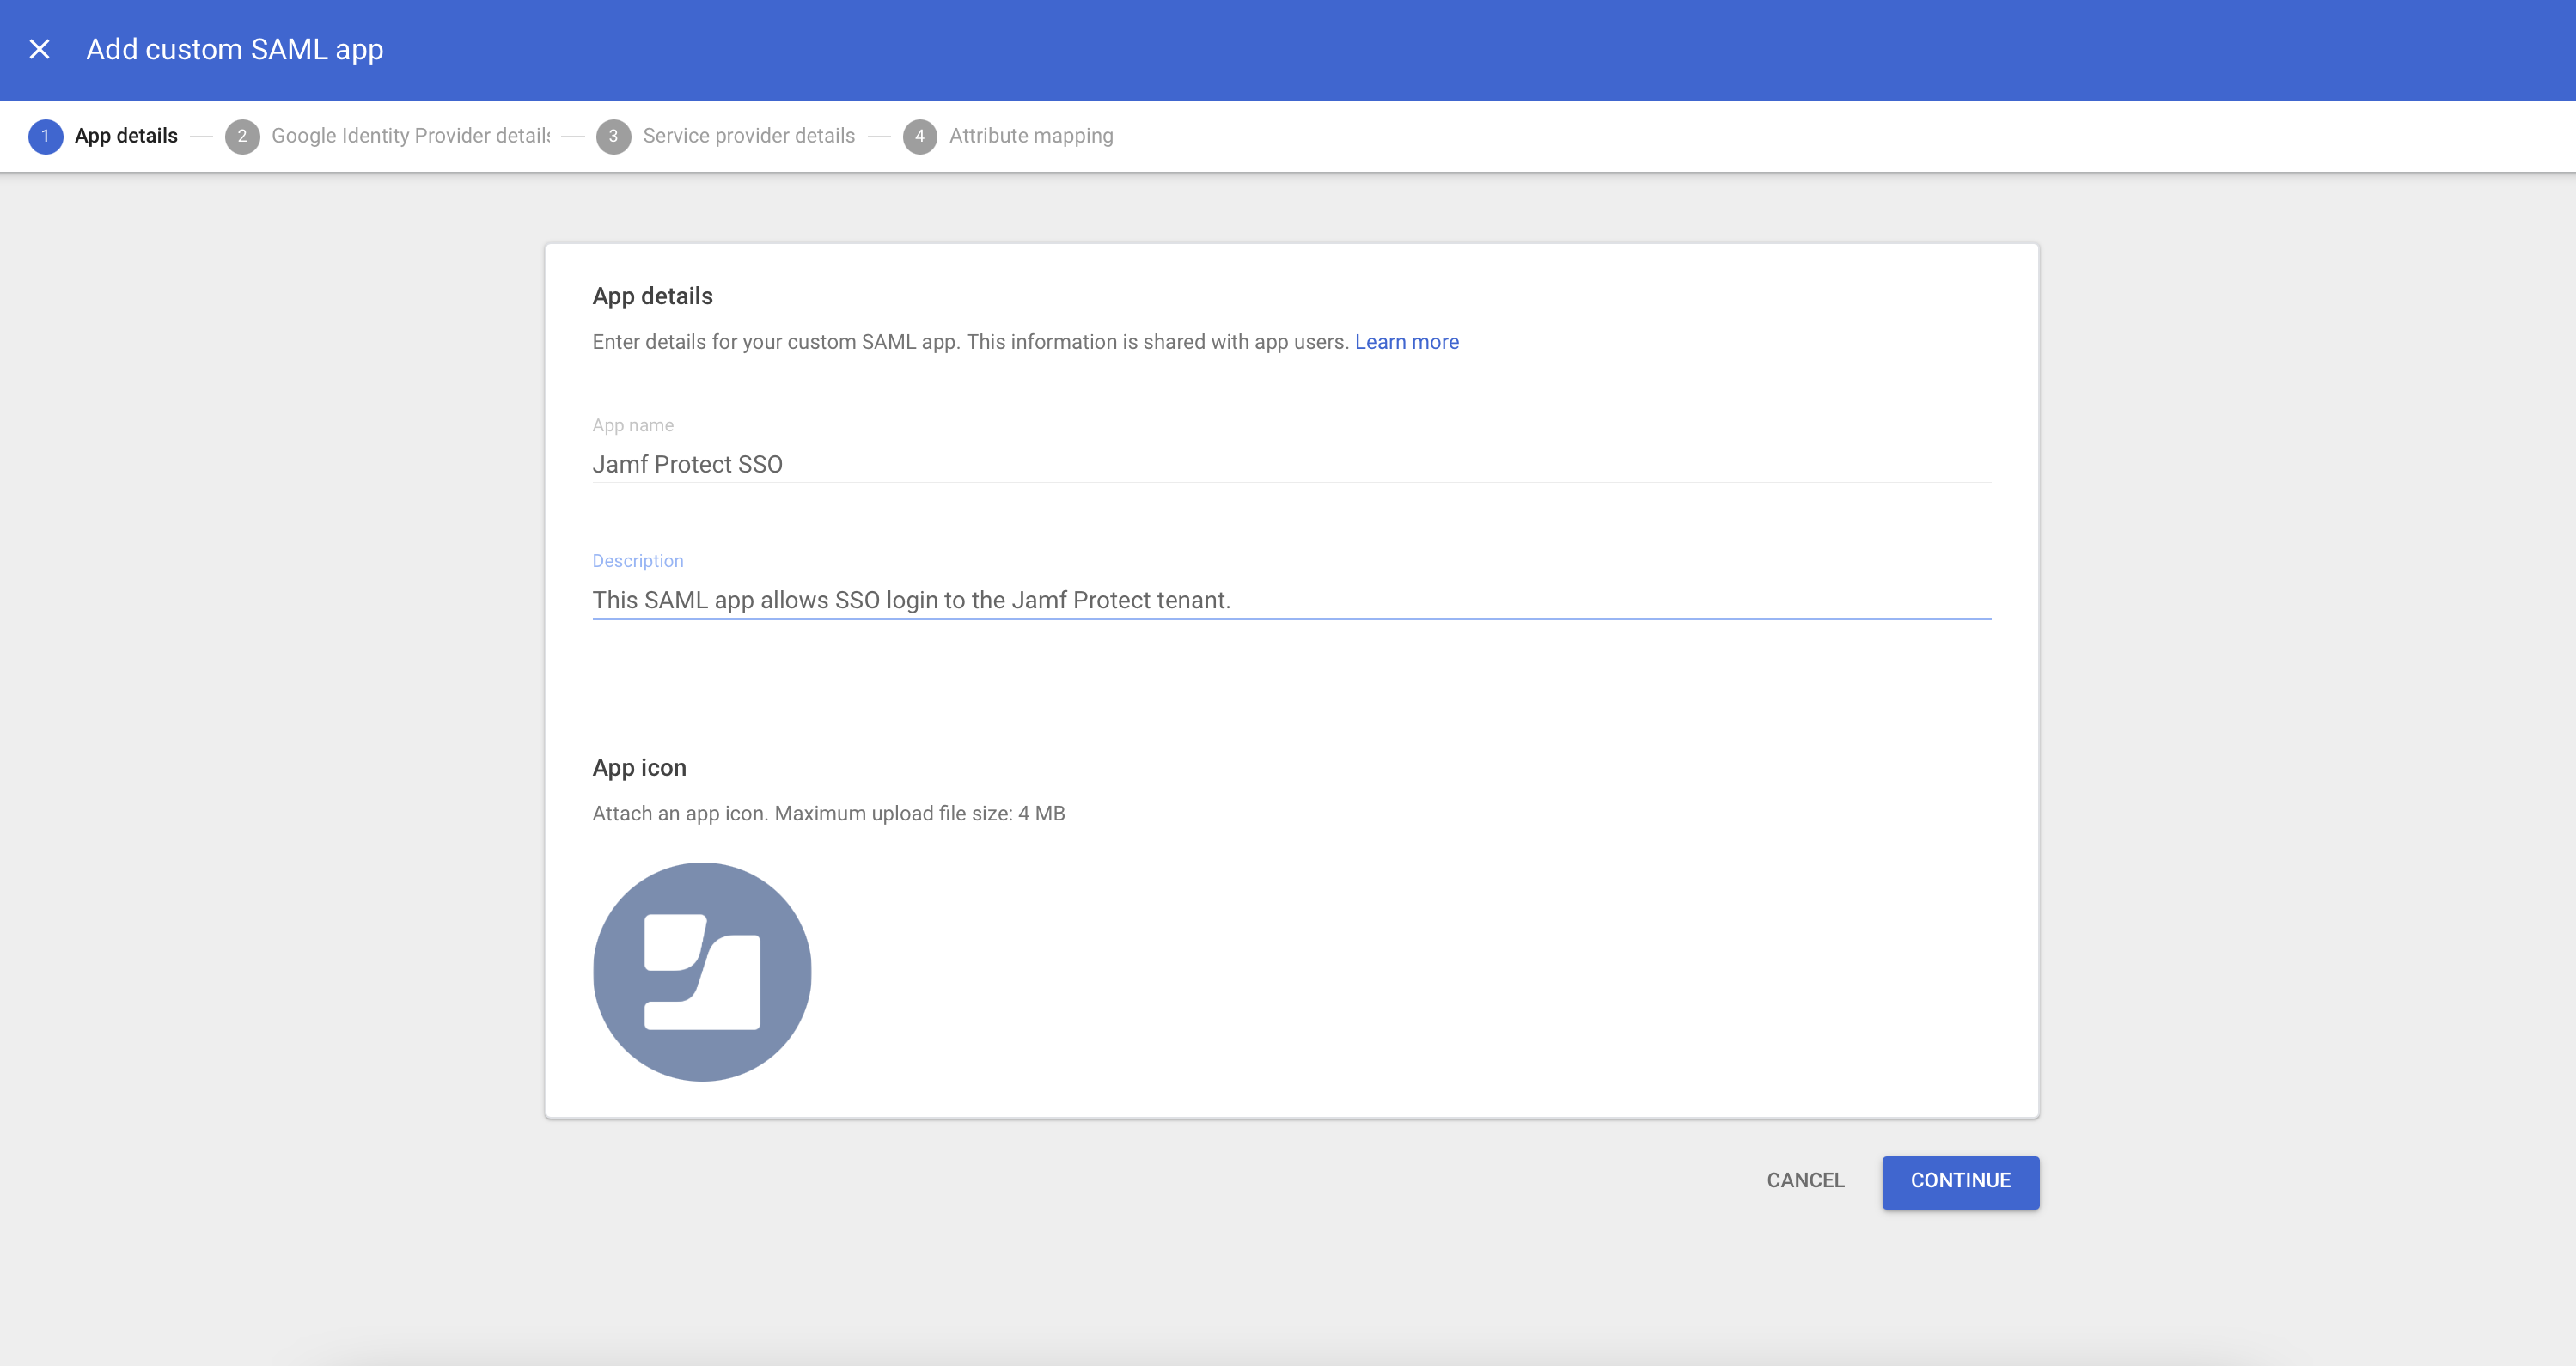
<p>**We can now start configuring our SAML app.
Lets give it an App name, that would be the display name of the app, eventually a description to help keep track of what this SAML app is linked to, and an icon (optional):</p>

<p><img src="/assets/img/3-2.png" alt="" /></p>

<p>We can then hit Continue and move to the next page.</p>

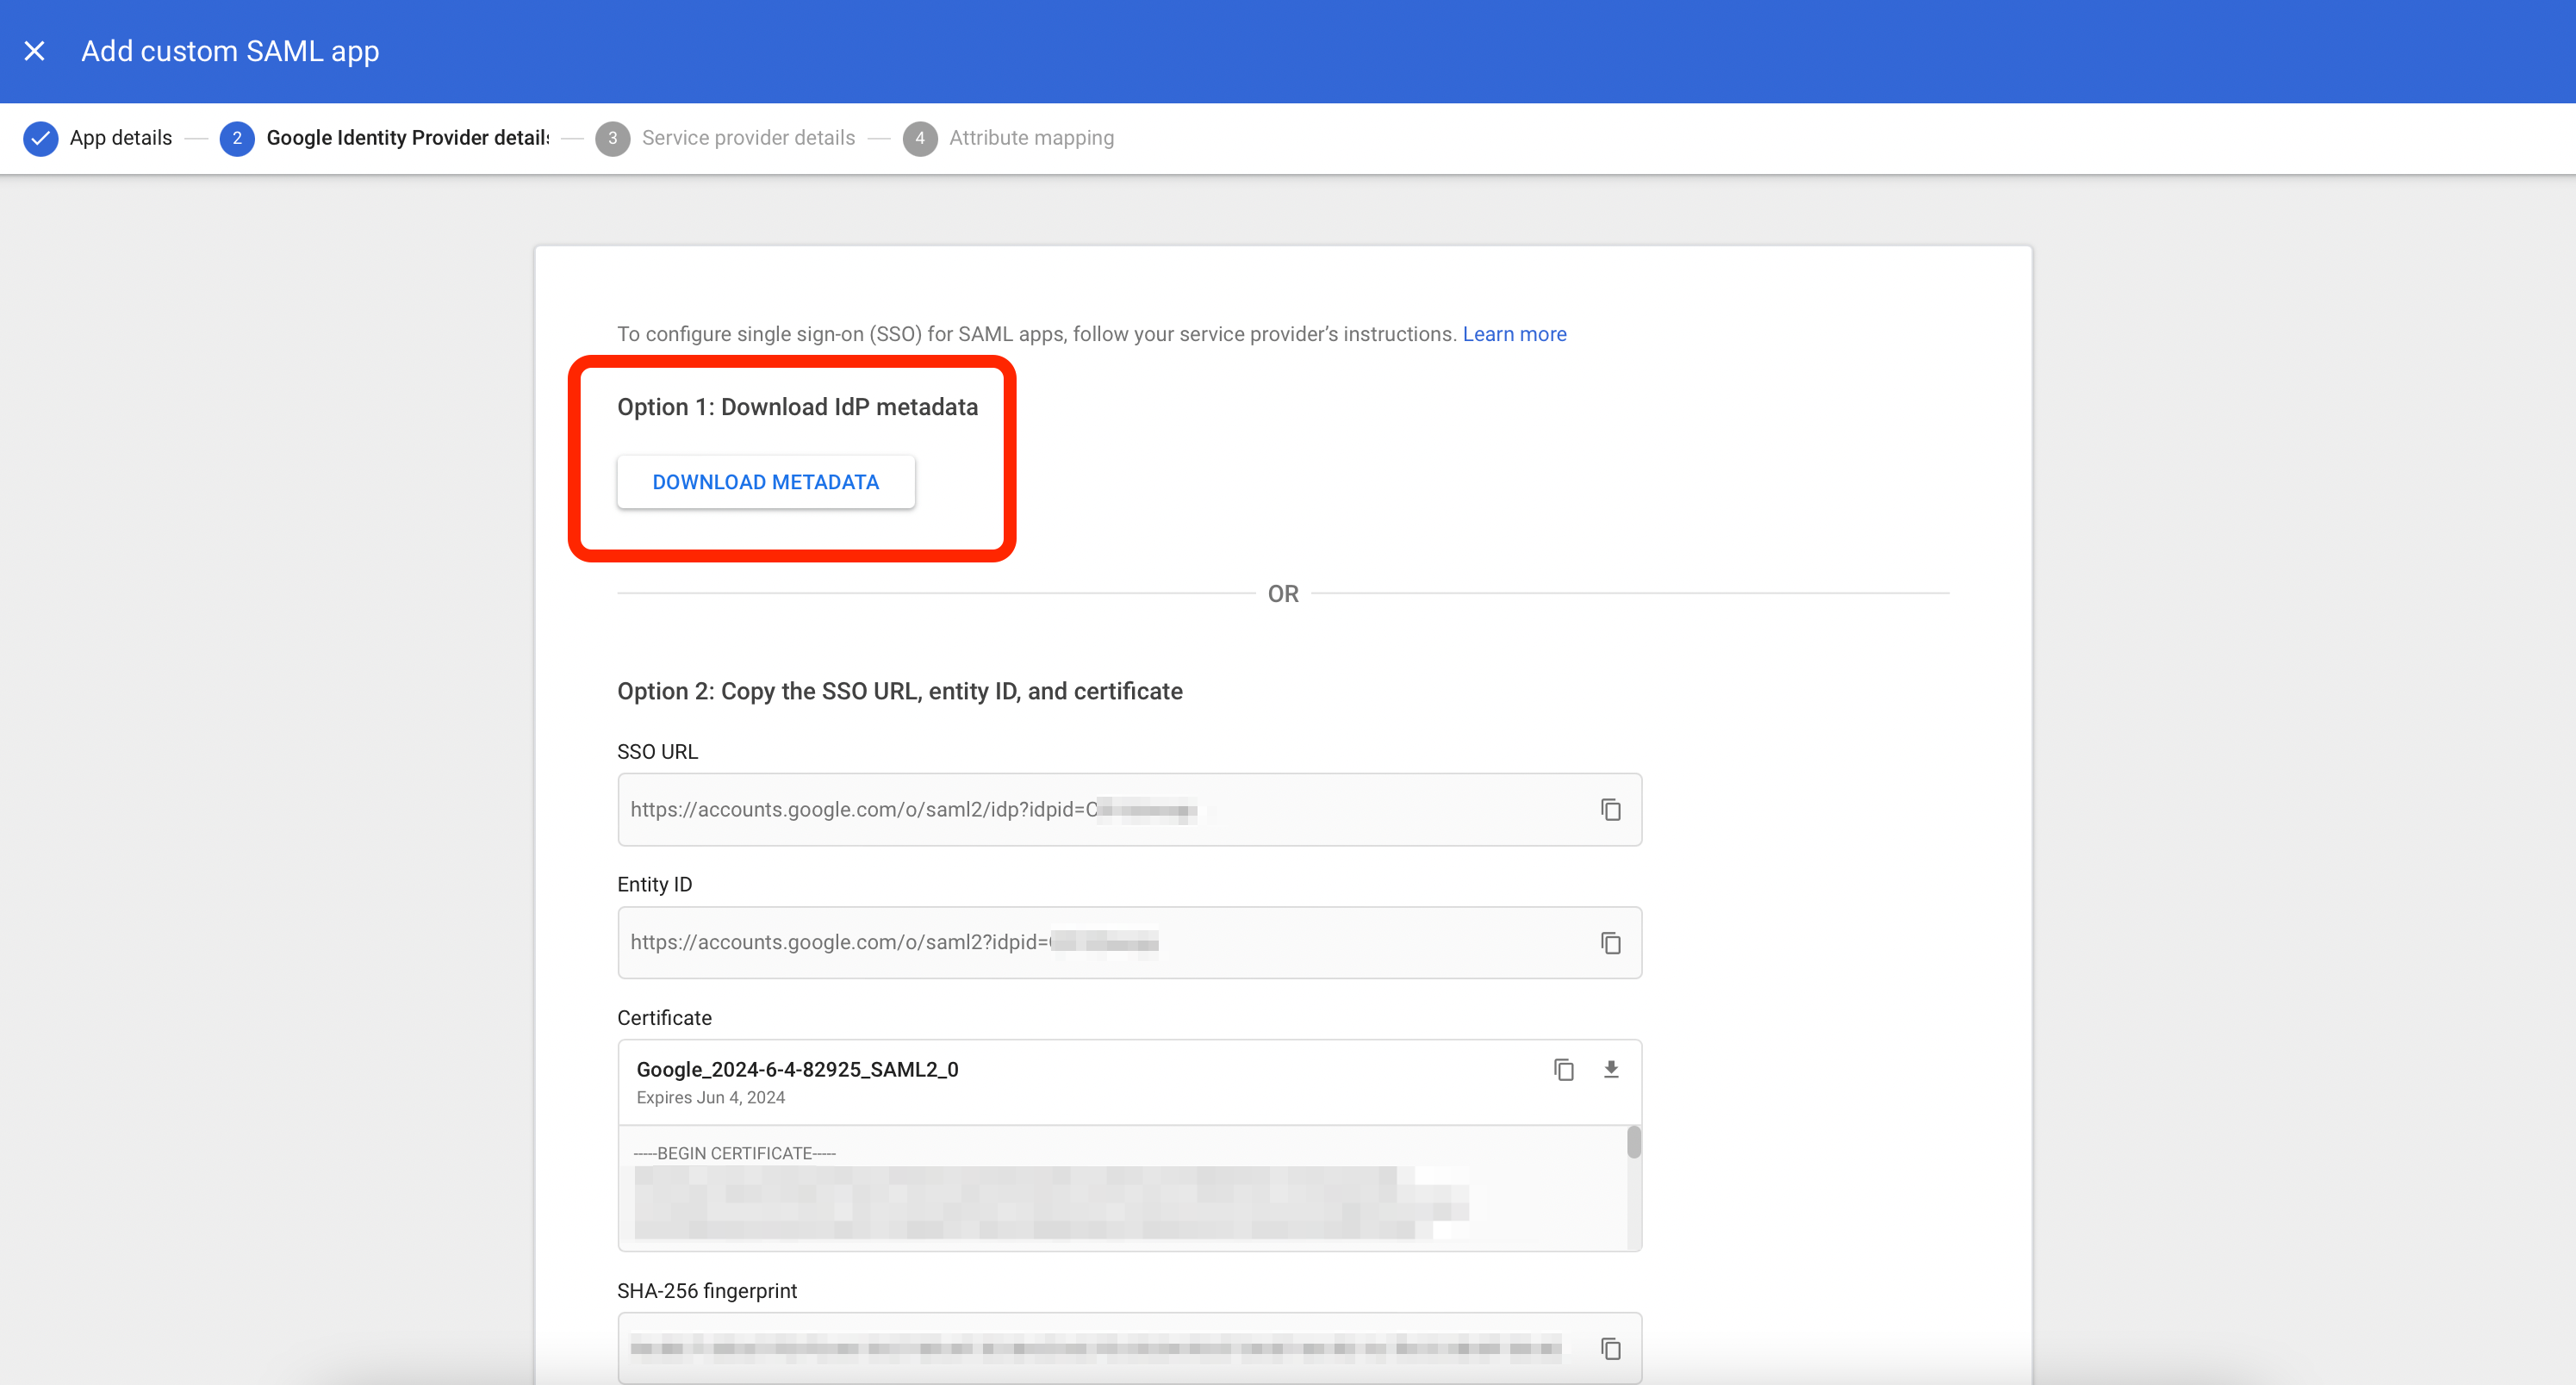
<p>In here, we will download the metadata file.
This is a unique per SAML app file, which contains the information of this app.
You want to save this file somewhere safe as it is the one you will need to send Jamf to enable SSO for the Protect tenant:</p>

<p><img src="/assets/img/4-1.png" alt="" /></p>

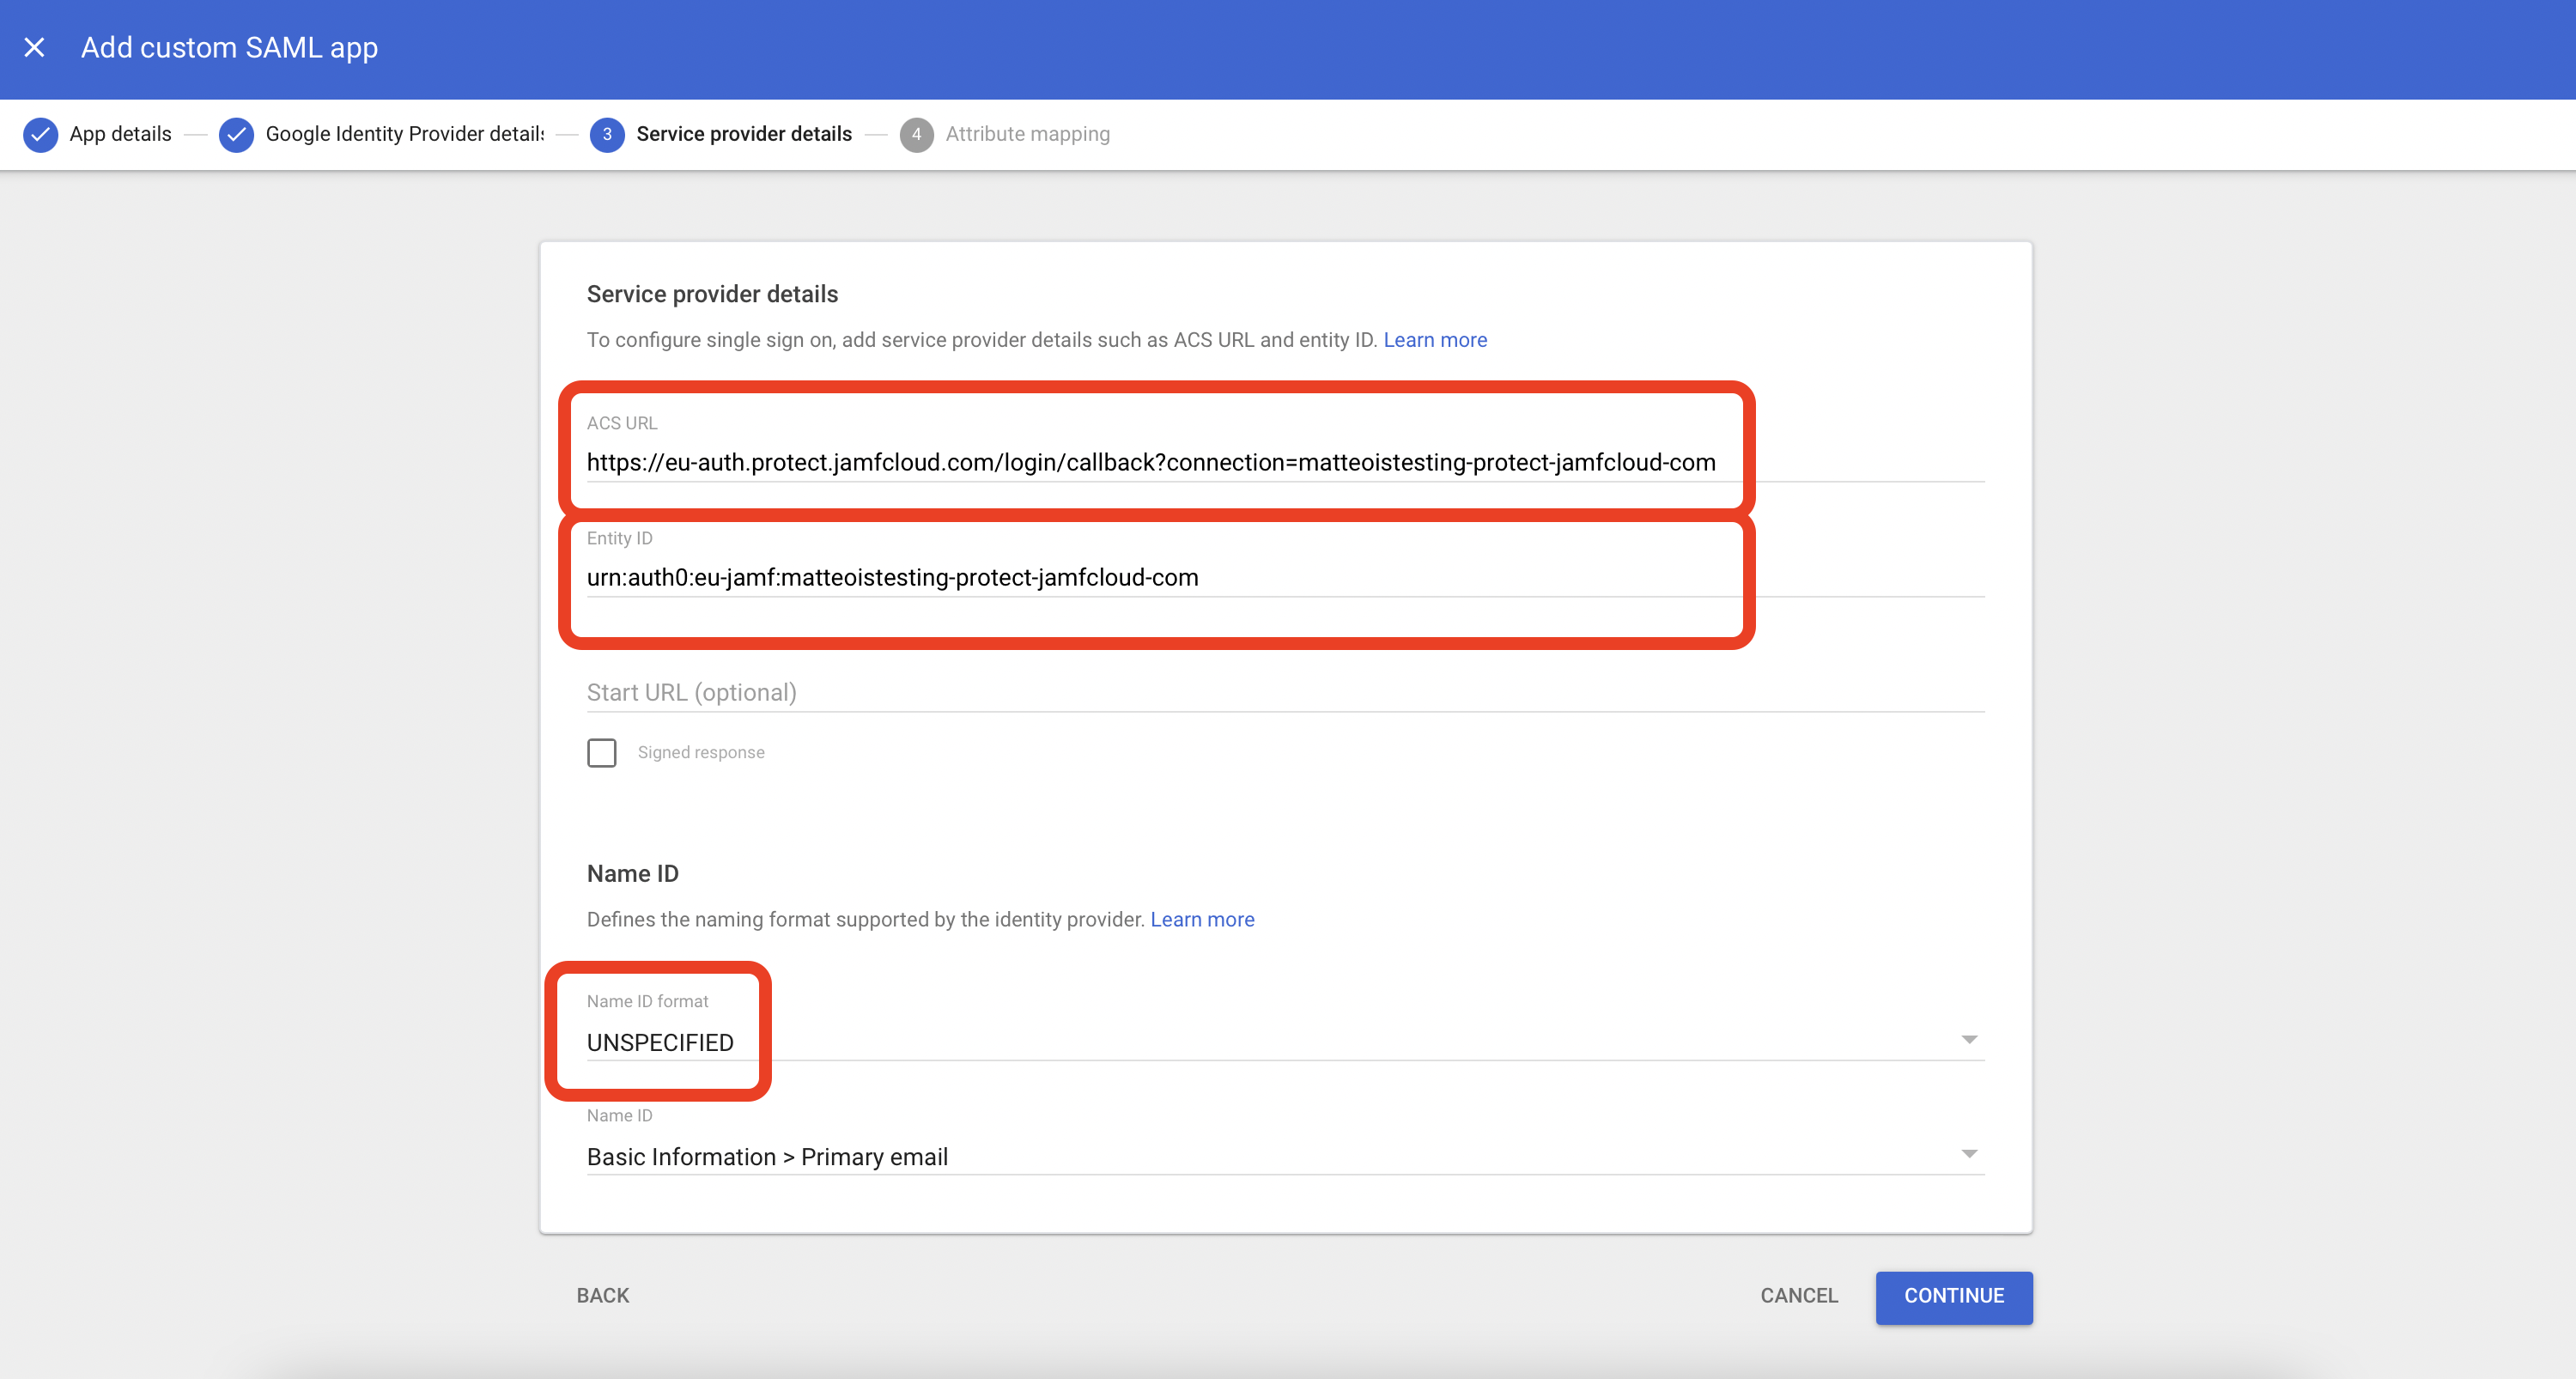
<p>The next step after we move on clicking Continue, is to configure the ACS URL and the Entity ID.</p>

<p>For those, we can refer Jamf’s documentation:</p>

<p><a href="https://docs.jamf.com/jamf-protect/documentation/Integrating_with_Google_Cloud.html">https://docs.jamf.com/jamf-protect/documentation/Integrating_with_Google_Cloud.html</a></p>

<p>For example, my tenant is https://matteoistesting.protect.jamfcloud.com/
So the <ConnectorName> to replace for both ACS URL and Entity ID will be:</ConnectorName></p>

<p>matteoistesting-protect-jamfcloud-com</p>

<p>Note the dashes in here, not the dots.</p>

<p>This test tenant I’m using is located in Europe so my ACS URL will be
EU—<code class="language-plaintext highlighter-rouge">https://eu-auth.protect.jamfcloud.com/login/callback?connection=matteoistesting-protect-jamfcloud-com</code></p>

<p>and my Entity ID:</p>

<p><code class="language-plaintext highlighter-rouge">urn:auth0:eu-jamf:matteoistesting-protect-jamfcloud-com</code></p>

<p><img src="/assets/img/7-2.png" alt="" /></p>

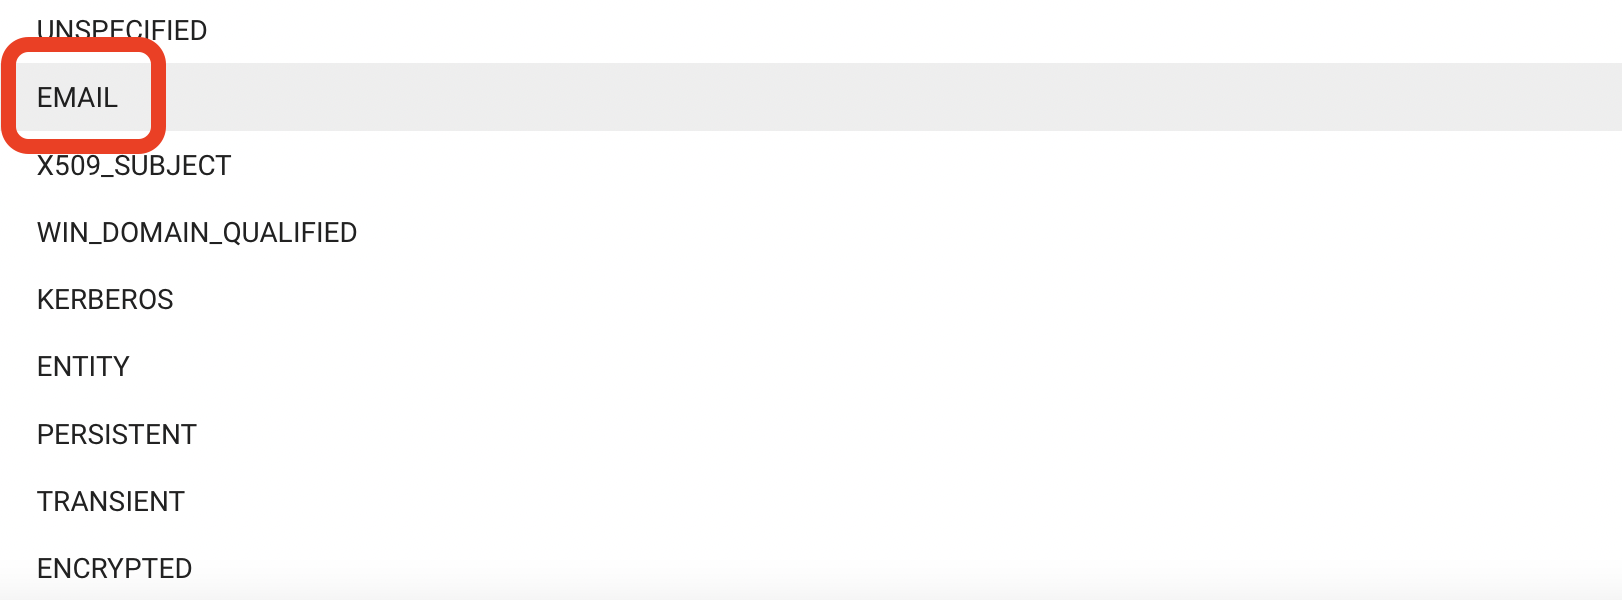
<p>Once we’ve configured ACS URL and Entity ID accordingly to our tenant, we want to setup the<code class="language-plaintext highlighter-rouge"> </code><em>Name ID format</em>** and set that to <strong><em>EMAIL</em></strong>:</p>

<p><img src="/assets/img/8-3.png" alt="" /></p>

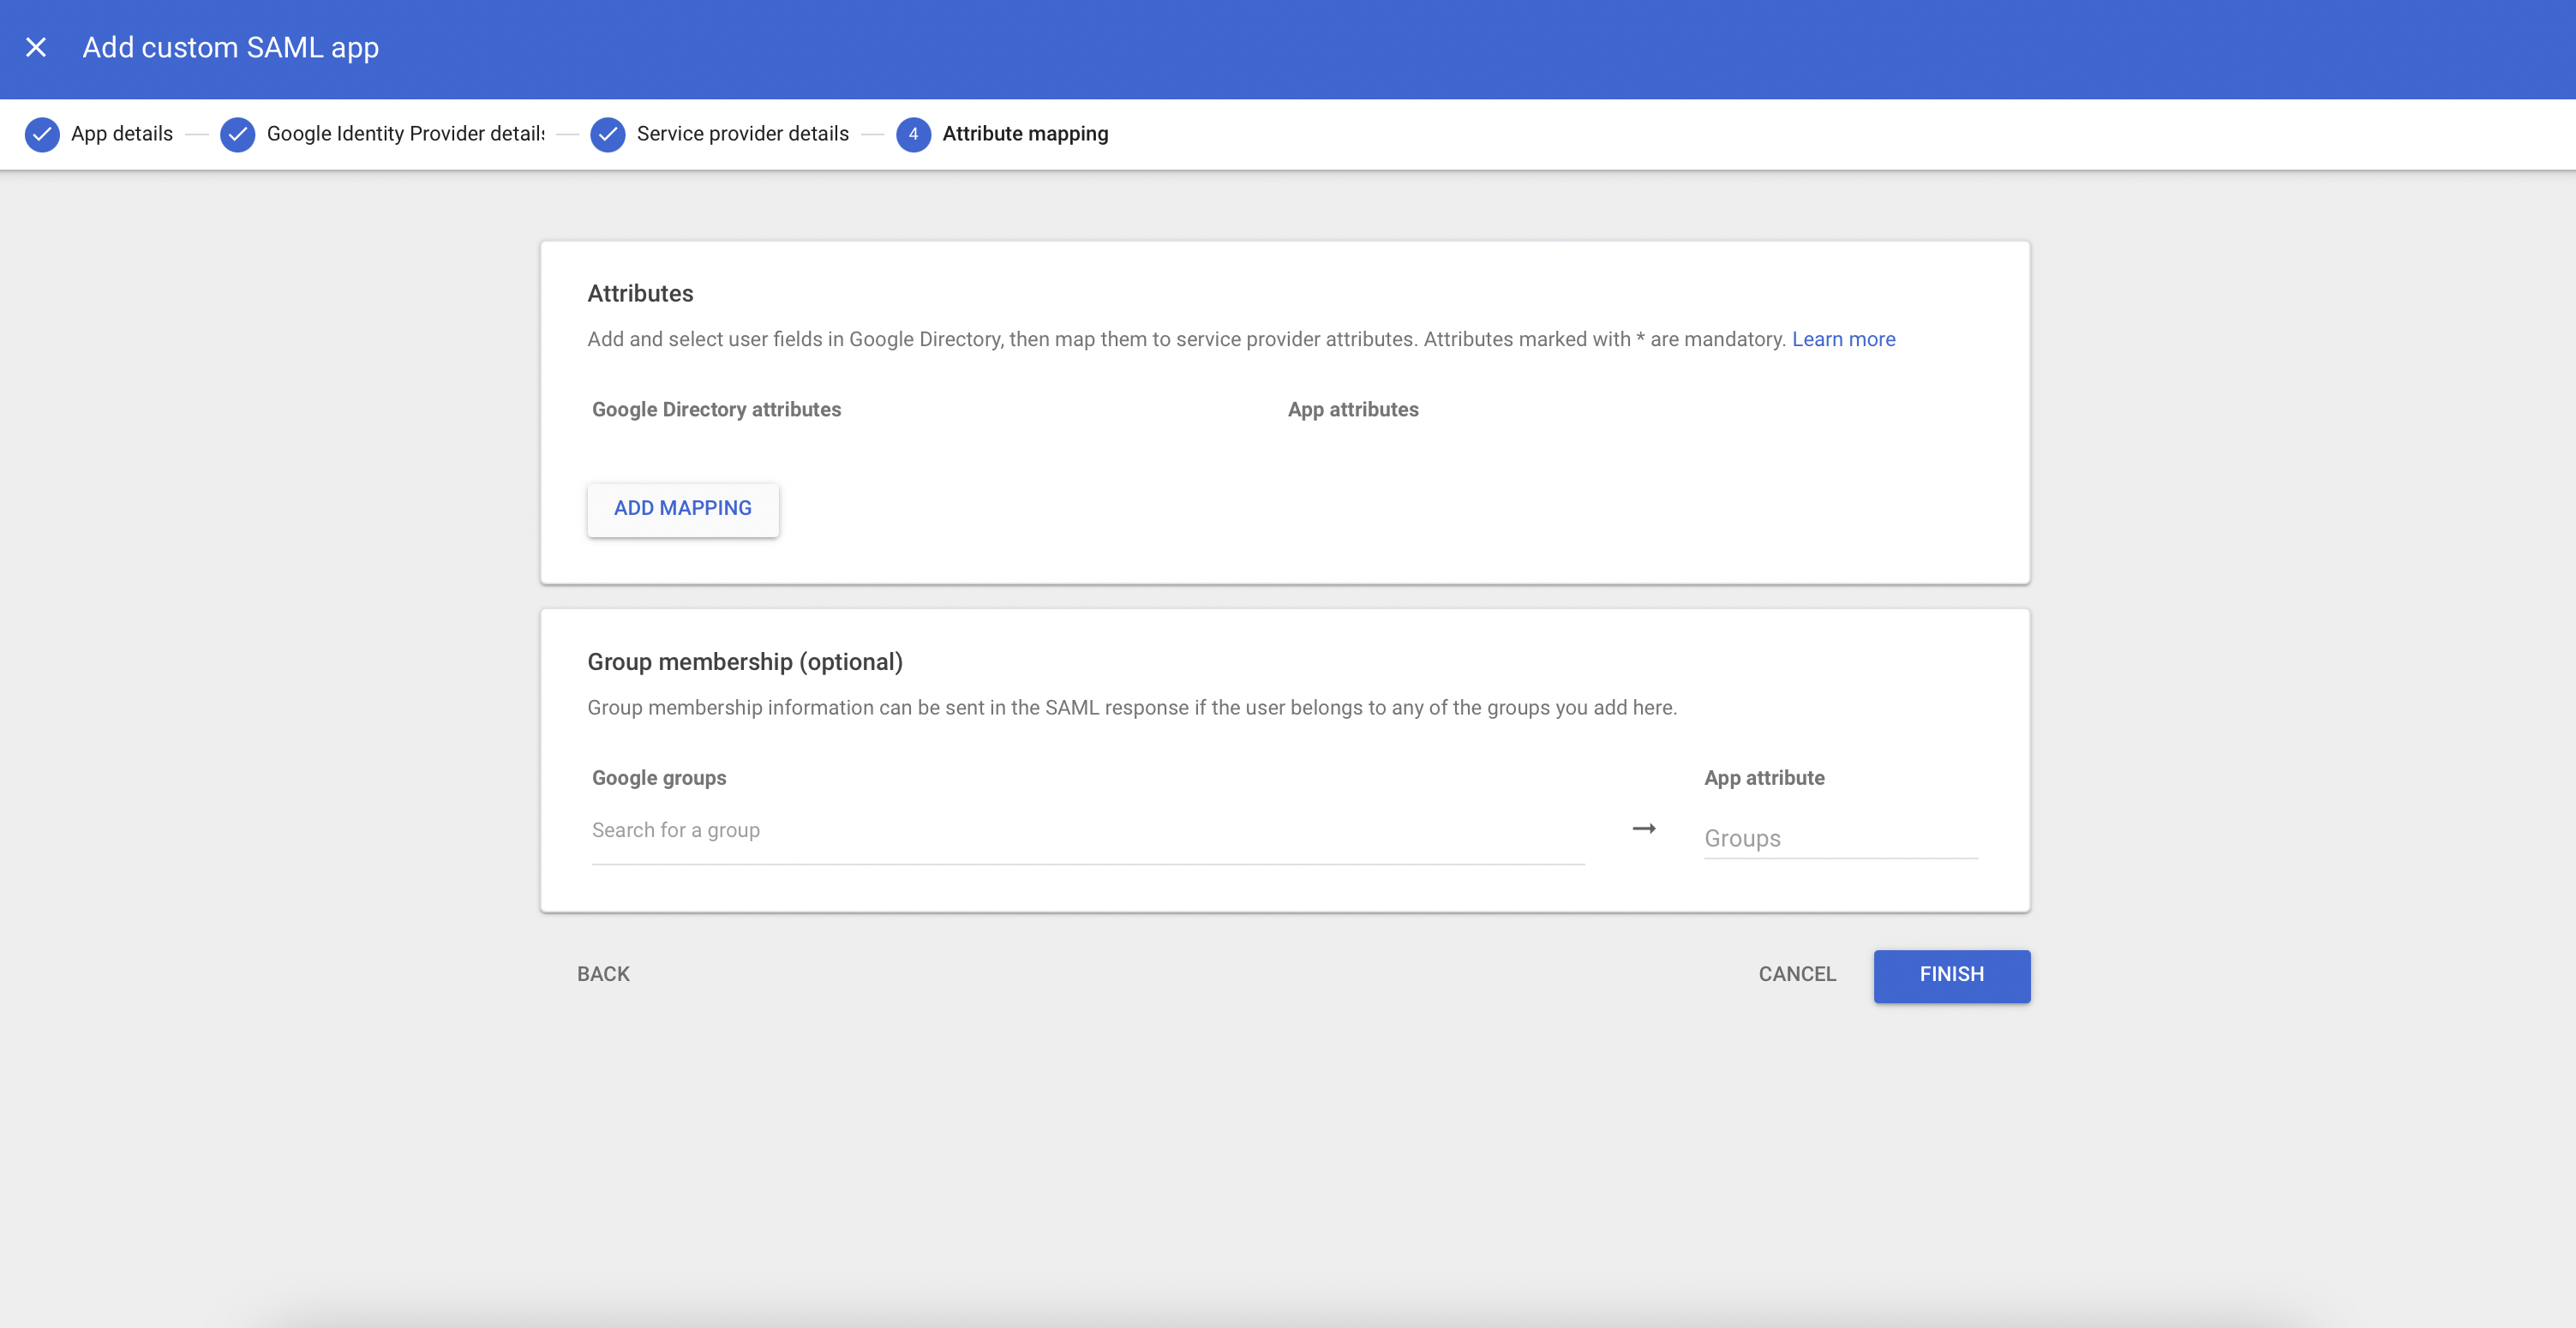
<p>Lets hit continue and move to the last step of configuring the SAML app. We will leave the default configuration here so we can click on <strong><em>Finish</em></strong> to have Google Workspace build the SAML app:</p>

<p><img src="/assets/img/9-2.png" alt="" /></p>

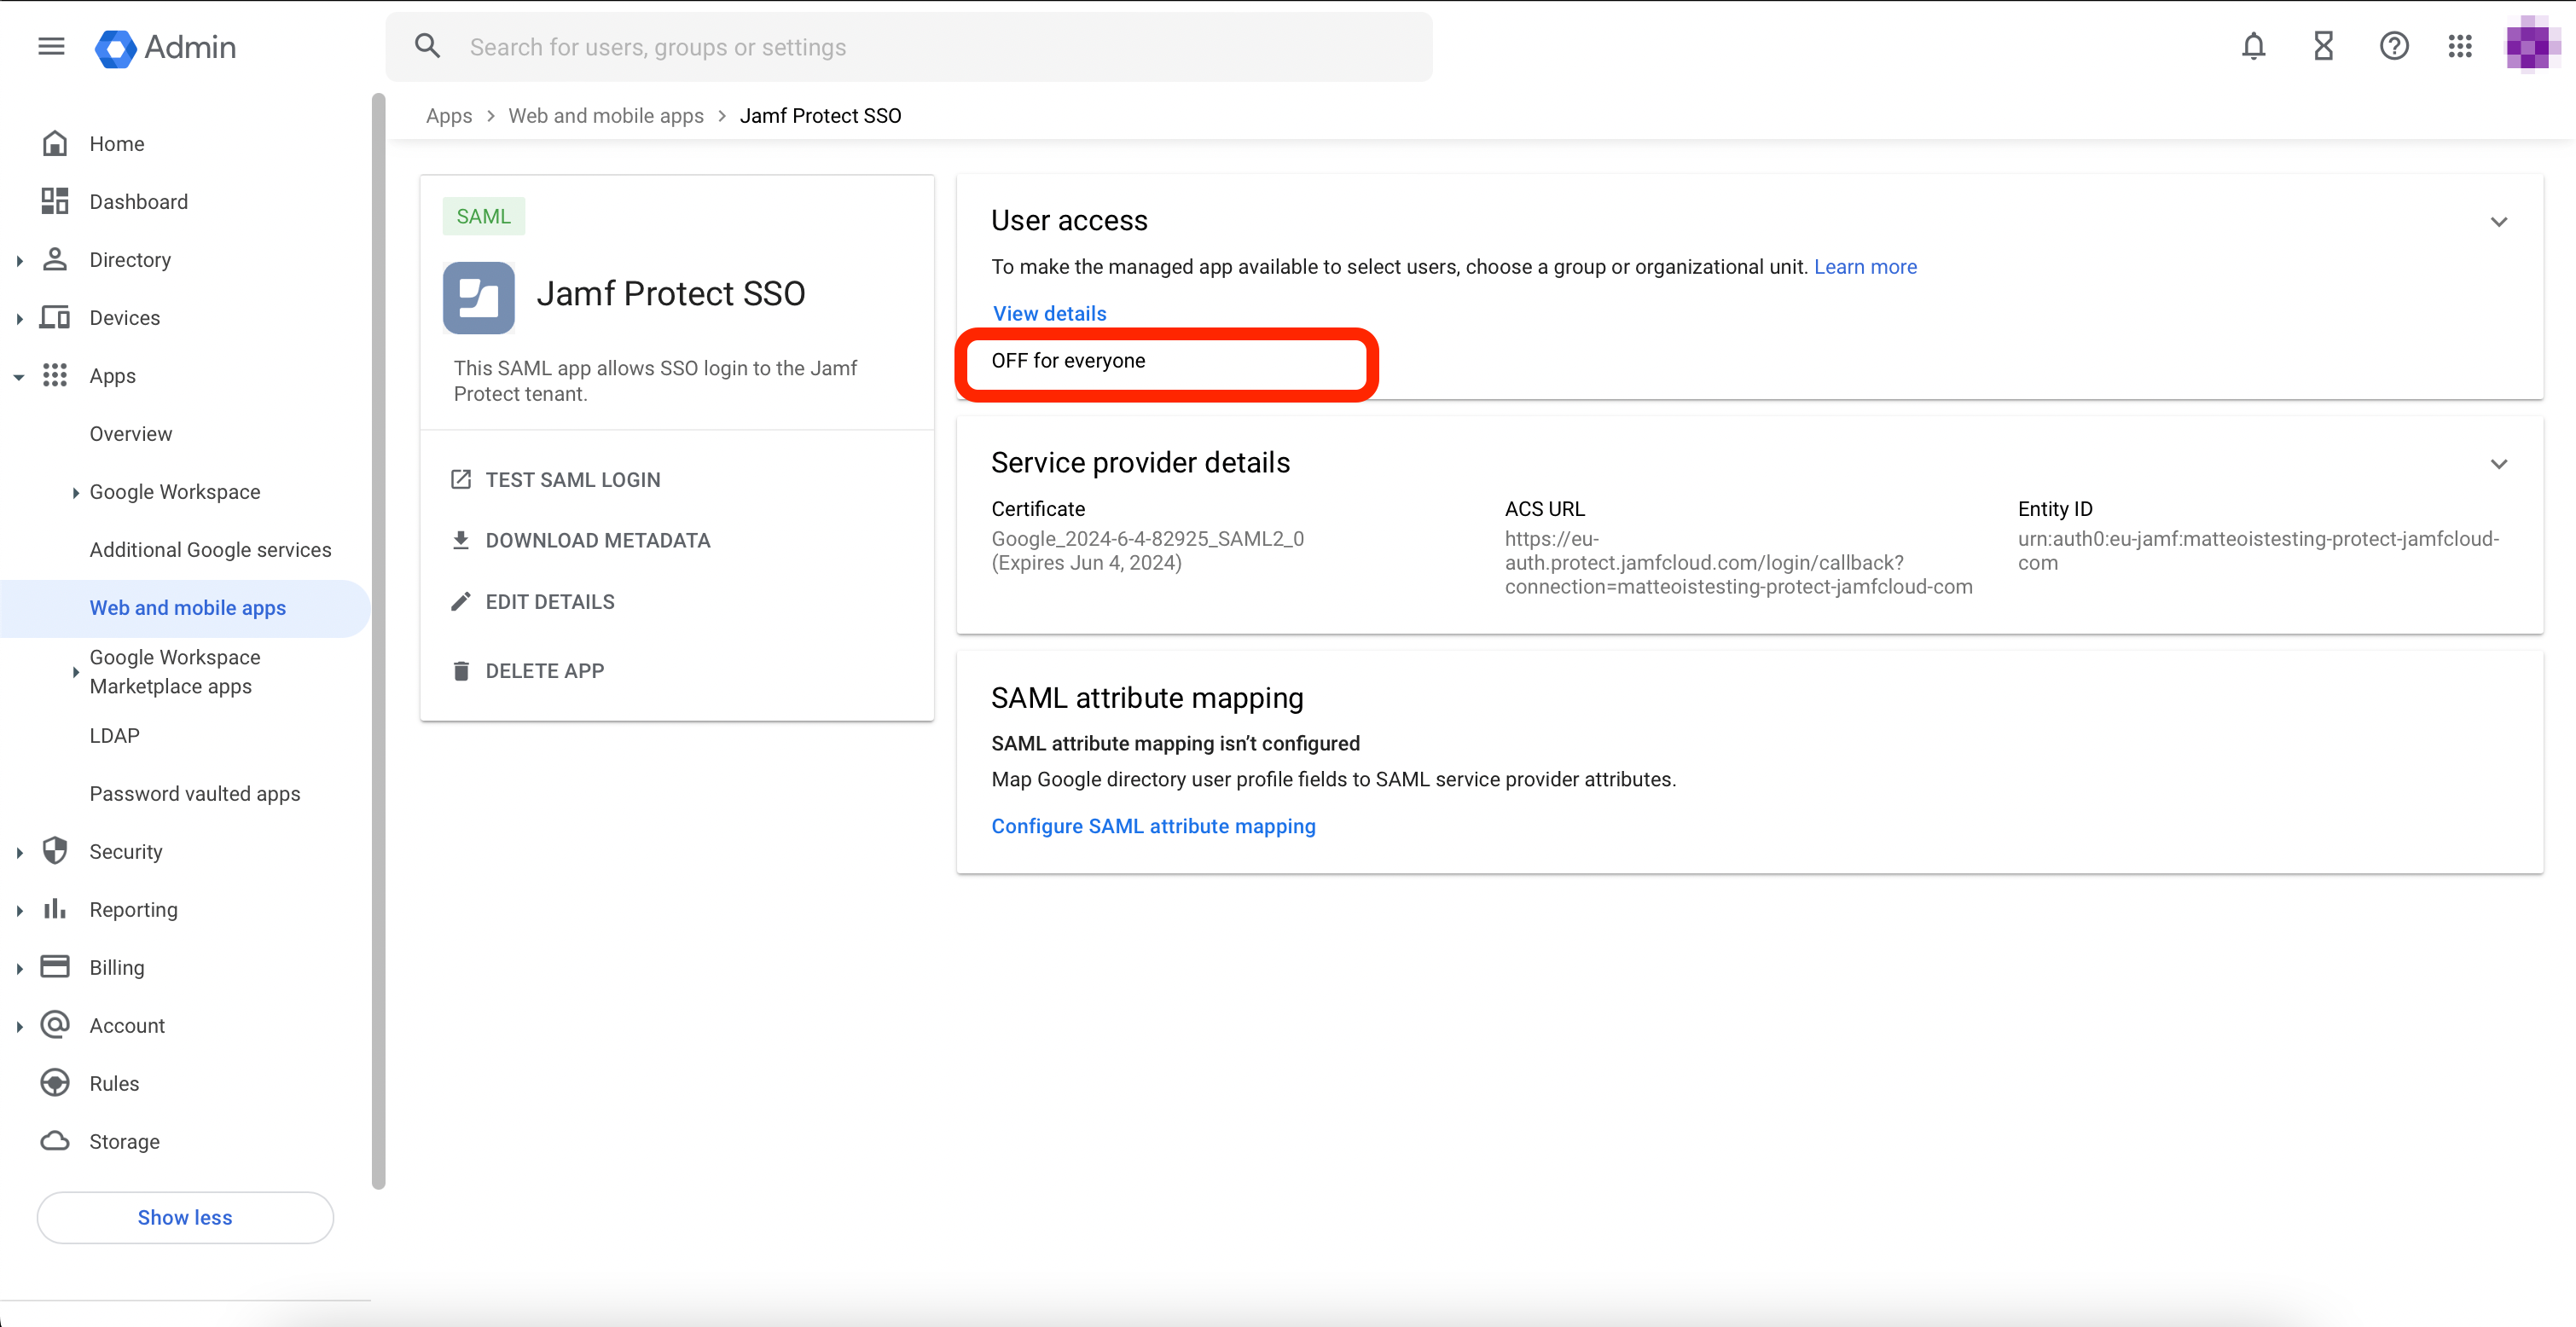
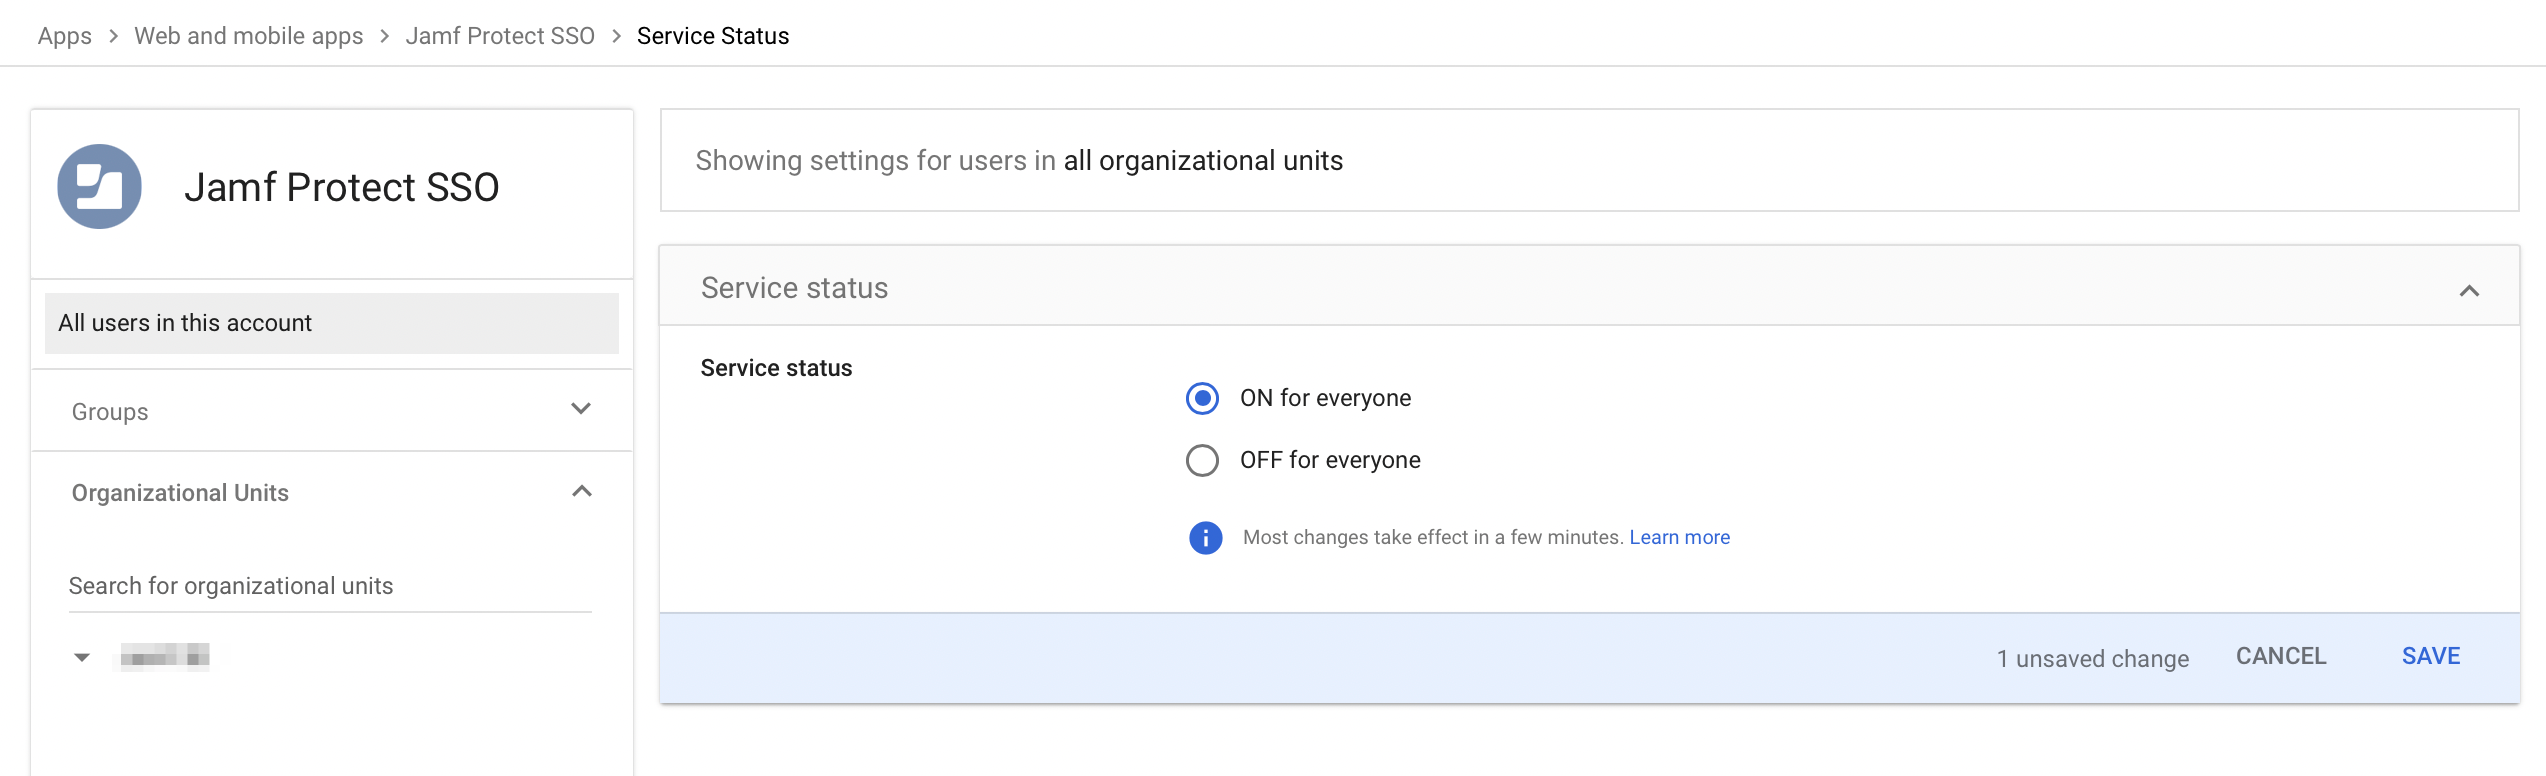
<p>Once the SAML app have been successfully crated, note that by default, it will not be enabled, see the <strong><em>OFF for everyone</em></strong>:</p>

<p><img src="/assets/img/10-3.png" alt="" /></p>

<p>Lets click on it and enable it by setting it to <strong><em>ON for everyone</em></strong>:</p>

<p><img src="/assets/img/11-2.png" alt="" /></p>

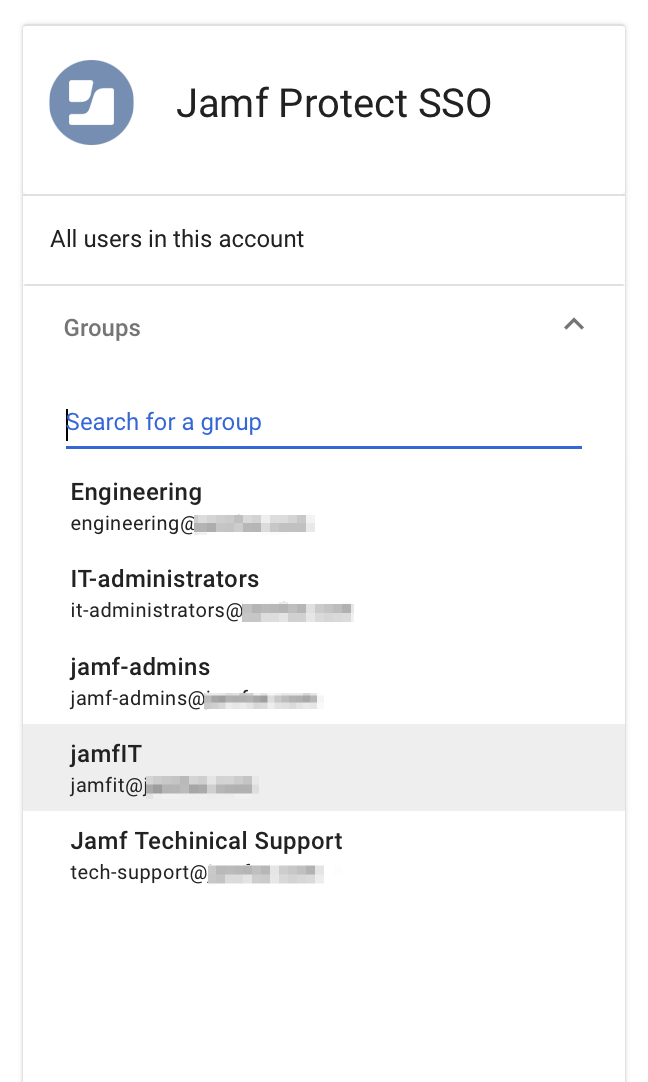
<p>The very last step now is to assign user groups to our SAML app:</p>

<p><img src="/assets/img/12-3.png" alt="" /></p>

<p>**This is a very important step as, assigning those groups, will translate in granting access to Jamf Protect only to Google Workspace users that are member of such groups.</p>

<p>Once we’ve finished, we can reach out to Jamf and provide:</p>

<ul>
  <li>Google Workspace domain</li>
  <li>IdP metadata file</li>
</ul>

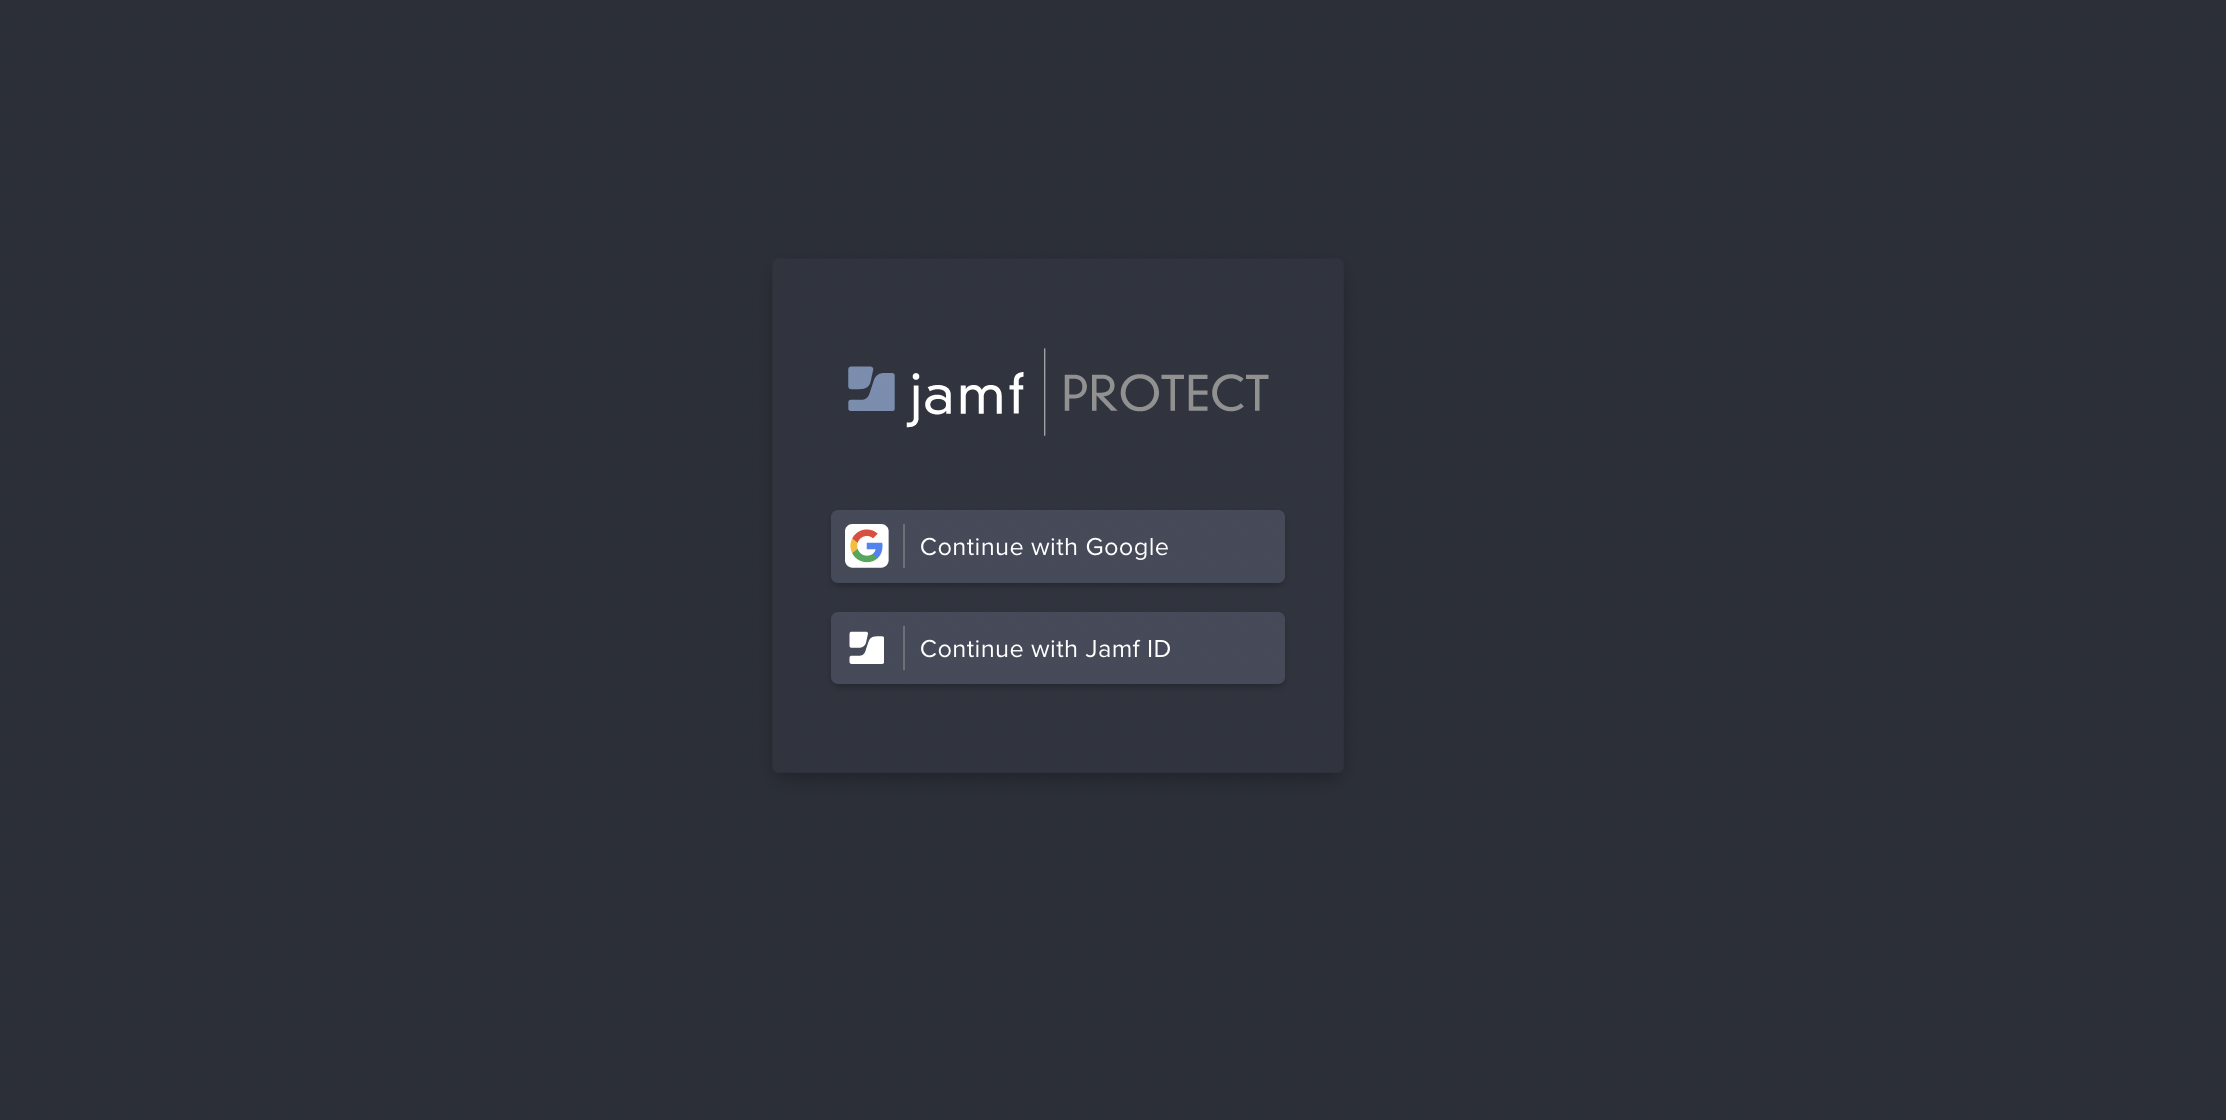
<p>Once Jamf will confirm the SSO has been setup for our tenant, we should see a new <em>Continue with Google</em>** button to show up under the /login URL of our tenant:</p>

<p><img src="/assets/img/screenshot-2022-08-22-at-14.55.40-2.png" alt="" /></p>

<p>And that’s pretty much it.
We can click on it and we’ll be redirected to Google Workspace for authentication.</p>

<p>Keep in mind, by default Jamf disables IdP initiated logins, for good reasons: https://auth0.com/docs/authenticate/protocols/saml/saml-sso-integrations/identity-provider-initiated-single-sign-on</p>

<p>This means we can’t launch Protect console from our Google Workspace profile.
If you’re ok with having IdP initiated login enabled, just let Jamf know and they will enable it for you.</p>]]></content><author><name>Matteo Bolognini</name></author><summary type="html"><![CDATA[This will be a quick post to help navigate Google Workspace to setup a SAML app to be used with Jamf Protect to enable SSO on the tenant.]]></summary></entry><entry><title type="html">Unified Logging for macOS, an introduction.</title><link href="https://skartek.dev/unified-logging-for-macos-an-introduction/" rel="alternate" type="text/html" title="Unified Logging for macOS, an introduction." /><published>2022-05-04T00:00:00+00:00</published><updated>2022-05-04T00:00:00+00:00</updated><id>https://skartek.dev/unified-logging-for-macos-an-introduction</id><content type="html" xml:base="https://skartek.dev/unified-logging-for-macos-an-introduction/"><![CDATA[<p>**<code class="language-plaintext highlighter-rouge">*What does the logs says?*</code></p>

<p>I couldn’t think of any different introduction to approach Unified Logging rather than this statement that is my personal mantra of troubleshooting/looking into any issue when it comes to end user devices.
Logging is the unique base for any device related issue for sure. 
But it can be much more, offering an insight and overview of apps, technologies and products running on our devices.</p>

<p><code class="language-plaintext highlighter-rouge">Where to start?</code></p>

<p>Traditionally, macOS and any 3rd party have logged into the “standard” location of <code class="language-plaintext highlighter-rouge">/var/log </code>, de facto writing out logs into files on disk.</p>

<p>Apple introduced radical changes in with macOS 10.12.x where Apple moved the system and process logs to a unified database on the Mac.</p>

<p>Let’s start with some references:</p>

<ul>
  <li>Apple Unified Logging Documentation - <a href="https://developer.apple.com/documentation/os/logging">https://developer.apple.com/documentation/os/logging</a></li>
  <li>Apple WWDC 2016 Into to Unified Logging - <a href="https://developer.apple.com/videos/play/wwdc2016/721/">https://developer.apple.com/videos/play/wwdc2016/721/</a></li>
  <li>“Unified Logging and Activity Tracing” - WWDC 2016, Session 721 - <a href="https://devstreaming-cdn.apple.com/videos/wwdc/2016/721wh2etddp4ghxhpcg/721/721_unified_logging_and_activity_tracing.pdf">https://devstreaming-cdn.apple.com/videos/wwdc/2016/721wh2etddp4ghxhpcg/721/721_unified_logging_and_activity_tracing.pdf</a></li>
</ul>

<p>The last one is a very comprehensive session, lets try to over-simplify the content and try to describe what Unified Logging is, in a nutshell:</p>

<ul>
  <li>Single efficient logging mechanism, offering a comprehensive and performant API</li>
  <li>Maximize information collection with minimum observer effect</li>
  <li>Compression of log data</li>
  <li>Managed log message lifecycle more than just time stamps</li>
  <li>a common system across macOS, iOS, watchOS, tvOS</li>
  <li>Designed with Privacy in mind and a Privacy first mindset</li>
</ul>

<p>Now that we have a bit of background of what Unified Logging is (UL for brevity in this post), let’s dig a bit more into.</p>

<p>Logs are stored in the <code class="language-plaintext highlighter-rouge">tracev3</code> formatted files in <code class="language-plaintext highlighter-rouge">/var/db/diagnostics</code>, which is a compressed binary format. 
As with all binary files, you’ll need new tools to read the files. The Console.app is a great UI to explore the logging, but it can be quite overwhelming.</p>

<p>To get our hands on logs, we can use the <code class="language-plaintext highlighter-rouge">log</code> command, on macOS - <code class="language-plaintext highlighter-rouge">/usr/bin/log</code></p>

<p>To get more information, simply open the Terminal.app and run:
<code class="language-plaintext highlighter-rouge">man log</code></p>

<p>The <code class="language-plaintext highlighter-rouge">log</code> command can be used to Collect and View Unified Logging data and.
There are 3 main verbs for the <code class="language-plaintext highlighter-rouge">log</code> command that is particularly interesting to look at:</p>

<ul>
  <li><code class="language-plaintext highlighter-rouge">log collect --output path</code> this allow us to generate a .logarchive file</li>
  <li><code class="language-plaintext highlighter-rouge">log show </code>this allow us to have macOS produce a log file of everything we’ve specified in our filter search, limited by time using the <code class="language-plaintext highlighter-rouge">--last</code> flag, for example if we’re interested only on the last 60 minutes of logging we will set <code class="language-plaintext highlighter-rouge">--last 1h</code></li>
  <li><code class="language-plaintext highlighter-rouge">log stream</code> this is a live streaming of everything we’ve specified in our filter search, it will not show any historical data, only starting from when the command is executed.</li>
</ul>

<p>Ok, so that’s it? Simple, we can now just go in Terminal.app and run <code class="language-plaintext highlighter-rouge">log show</code>!
Yes, but no. If you try that, you’ll see how comprehensive and extensive UL is, you will basically be flooded by information.
We’ve seen above we can use the <code class="language-plaintext highlighter-rouge">--last</code> flag to time-restrict the search and limit the logging to a specific period of time (we can go as low as 1 minute).
But that is not sufficient, given the verbosity of the output.</p>

<p>Here in rescue comes Predicates**!
As usual, lets first start with the docs: <a href="https://developer.apple.com/library/archive/documentation/Cocoa/Conceptual/Predicates/Articles/pSyntax.html">https://developer.apple.com/library/archive/documentation/Cocoa/Conceptual/Predicates/Articles/pSyntax.html</a>
Predicates are an option that provide granular control over filtering and provide the logic to confine a search to specific values.
Predicates gets hooked up in the <code class="language-plaintext highlighter-rouge">log</code> command query filter:</p>

<p><code class="language-plaintext highlighter-rouge">log steam --predicate '(predicate_here)'</code></p>

<p>For example, we can filter looking at data from Safari:</p>

<p><code class="language-plaintext highlighter-rouge">log stream --predicate '(process=="Safari")'</code></p>

<p>Predicates available:</p>

<div class="language-plaintext highlighter-rouge"><div class="highlight"><pre class="highlight"><code> eventType The type of event: activityCreateEvent, activityTransitionEvent, logEvent, signpostEvent, stateEvent, timesyncEvent, traceEvent and
 userActionEvent.

 eventMessage The pattern within the message text, or activity name of a log/trace entry.

 messageType For logEvent and traceEvent, the type of the message itself: default, info, debug, error or fault.

 process The name of the process the originated the event.

 processImagePath The full path of the process that originated the event.

 sender The name of the library, framework, kernel extension, or mach-o image, that originated the event.

 senderImagePath The full path of the library, framework, kernel extension, or mach-o image, that originated the event.

 subsystem The subsystem used to log an event. Only works with log messages generated with os_log(3) APIs.

 category The category used to log an event. Only works with log messages generated with os_log(3) APIs. When category is used, the subsystem
 filter should also be provided.
</code></pre></div></div>

<p>Now the last one in the list, <code class="language-plaintext highlighter-rouge">subsystem</code>, is a very interesting one as it becomes very helpful to narrow down the search filter.
Charles Edge <a href="https://twitter.com/cedge318">krypted</a> did a great job providing a list of Apple’s <code class="language-plaintext highlighter-rouge">subsystems</code>: https://gist.github.com/krypted/495e48a995b2c08d25dc4f67358d1983</p>

<p>For any other .app on a device, we can pull its subsystem from the Info.plist using a command like the below:</p>

<p><code class="language-plaintext highlighter-rouge">defaults read /Applications/APP_NAME.app/Contents/Info.plist CFBundleIdentifier</code></p>

<p>Example with Jamf Protect:</p>

<p><code class="language-plaintext highlighter-rouge">$ defaults read /Applications/JamfProtect.app/Contents/Info.plist CFBundleIdentifier
com.jamf.protect.daemon</code></p>

<p>In this example, if we would like to stream Jamf Protect data logged, a very simple UL search could be like:</p>

<p>log stream –predicate “subsystem == ‘com.jamf.protect.daemon’</p>

<p>Some examples from Apple’s man page:</p>

<div class="language-plaintext highlighter-rouge"><div class="highlight"><pre class="highlight"><code>Filter for specific subsystem:
log show --predicate 'subsystem == "com.example.my_subsystem"' 


Filter for specific subsystem and category:
 log show --predicate '(subsystem == "com.example.my_subsystem") &amp;&amp; (category == "desired_category")'


 Filter for specific subsystem and categories:
 log show --predicate '(subsystem == "com.example.my_subsystem") &amp;&amp; (category IN { "category1", "category2" })'


 Filter for a specific subsystem and sender(s):
 log show --predicate '(subsystem == "com.example.my_subsystem") &amp;&amp; ((senderImagePath ENDSWITH "mybinary") || (senderImagePath ENDSWITH "myframework"))'
</code></pre></div></div>

<p>Log verbosity.
There are different level of logging verbosity available:</p>

<ul>
  <li>Default</li>
  <li>Info</li>
  <li>Debug</li>
  <li>Error</li>
  <li>Fault</li>
</ul>

<p>Unless specified, the Default logging level is always the default (who would have guessed) level.
This can be configured in the UL filter:</p>

<p><code class="language-plaintext highlighter-rouge">log (stream/show) --predicate (--debug/ --info)</code></p>

<p>In some specific scenarios, it is useful to enforce the default logging of a binary (or an app) to debug for troubleshooting purposes.
To ensure debug level logging is saved for a given subsystem you can run one of these commands:</p>

<p><code class="language-plaintext highlighter-rouge">log config --subsystem "com.jamf.management.daemon"--mode "level:debug,persist:debug"</code></p>

<p><code class="language-plaintext highlighter-rouge">log config --subsystem "com.jamf.management.binary"--mode "level:debug,persist:debug" </code></p>

<p>Make sure to reset to default settings once done:</p>

<p><code class="language-plaintext highlighter-rouge">log config --subsystem "com.jamf.management.daemon"</code> <code class="language-plaintext highlighter-rouge">--reset</code></p>

<p><code class="language-plaintext highlighter-rouge">log config --subsystem "com.jamf.management.binary"</code> <code class="language-plaintext highlighter-rouge">--reset" </code></p>

<p>Logging levels can also be deployed via MDM: <a href="https://developer.apple.com/documentation/devicemanagement/systemlogging">https://developer.apple.com/documentation/devicemanagement/systemlogging</a></p>

<div class="language-plaintext highlighter-rouge"><div class="highlight"><pre class="highlight"><code>&lt;plist version=”1.0”&gt;
&lt;dict&gt;
 &lt;key&gt;PayloadContent&lt;/key&gt;
 &lt;array&gt;
 &lt;dict&gt;
 &lt;key&gt;Processes&lt;/key&gt;
 &lt;dict/&gt;
 &lt;key&gt;Subsystems&lt;/key&gt;
 &lt;dict&gt;
 &lt;key&gt;com.example.app&lt;/key&gt;
 &lt;dict&gt;
 &lt;key&gt;DEFAULT-OPTIONS&lt;/key&gt;
 &lt;dict&gt;
 &lt;key&gt;Level&lt;/key&gt;
 &lt;dict&gt;
 &lt;key&gt;Enable&lt;/key&gt;
 &lt;string&gt;Info&lt;/string&gt;
 &lt;/dict&gt;
</code></pre></div></div>

<p>Now that we have explored a bit how Unified Logging is built, what’s the data structure and interactions, let’s see some Jamf related examples of UL filters:</p>

<p>We can start with a very basic streaming for the management framework using either the <code class="language-plaintext highlighter-rouge">info</code> or <code class="language-plaintext highlighter-rouge">debug</code> log verbosity level:</p>

<p><code class="language-plaintext highlighter-rouge">/usr/bin/log stream --predicate 'subsystem BEGINSWITH "com.jamf.management"' --level info</code></p>

<p><code class="language-plaintext highlighter-rouge">/usr/bin/log stream --predicate 'subsystem BEGINSWITH "com.jamf.management"' --level debug</code></p>

<p>Or, for example, we can look at specific days only and restrict our search to those only - for example last month of logs - date format YYYY-MM-DD:</p>

<p><code class="language-plaintext highlighter-rouge">/usr/bin/log show --predicate 'subsystem BEGINSWITH "com.jamf"' --style compact --debug --start '2022-04-01' --end '2022-05-01'</code></p>

<p>Or we can also format for a specific time range: YYYY-MM-DD HH:MM:SS:</p>

<p><code class="language-plaintext highlighter-rouge">/usr/bin/log show --predicate 'subsystem BEGINSWITH "com.jamf"'--style compact --debug --start '2022-05-02 10:00:00'--end '2022-05-02 11:00:00'</code></p>

<p>Last mention on privacy. As we saw, Unified Logging is designed to not log any kind of private information.
For investigation purposes, this might be disabled. 
Within the <a href="https://developer.apple.com/documentation/devicemanagement/systemlogging">SystemLogging</a> documentation, there is mention of a specific key that can enable the logging of Private Data:</p>

<div class="language-plaintext highlighter-rouge"><div class="highlight"><pre class="highlight"><code> &lt;key&gt;Enable-Private-Data&lt;/key&gt;
 &lt;true/&gt;
</code></pre></div></div>

<p>As an example, we can look at some Safari UL logging obtained with a filter like the below:</p>

<p><code class="language-plaintext highlighter-rouge">log stream --predicate '(process == "Safari" and message contains "Look up" || message contains "databases")' --debug</code></p>

<p>Without <code class="language-plaintext highlighter-rouge">Enable-Private-Data</code> set to true (or with the key pair set to false), when browsing to a website URL within Safari, the actual URL is masked behind a <code class="language-plaintext highlighter-rouge">&lt;private&gt;</code></p>

<p>` Debug 0x0 592 0 Safari: (SafariSafeBrowsing) [com.apple.Safari.SafeBrowsing:Lookup] Look up a ur`l <private></private></p>

<p>When <code class="language-plaintext highlighter-rouge">Enable-Private-Data</code> is enabled, with the same UL filter we can actually see the ULR that has been browsed:</p>

<p>` Debug 0x0 592 0 Safari: (SafariSafeBrowsing) [com.apple.Safari.SafeBrowsing:Lookup] Look up a url https://www.google.com/`</p>

<p>Keep in mind that Private-Data is completely transparent to the end-user if it’s enabled.
If should only be enabled for specific troubleshooting purposes and disabled immediately after testing is completed.</p>

<p>As we’ve seen, Unified Logging is extremely powerful and can be very very flexible.
If offers virtually unlimited customization.</p>

<p>A very good example of usage can be found here <a href="https://www.modtitan.com/2022/03/in-weeds-with-app-installers-preview.html">https://www.modtitan.com/2022/03/in-weeds-with-app-installers-preview.html</a> where <a href="https://twitter.com/emilyooo">Dr. K</a> brilliantly debugged Jamf’s App Installers using Unified Logging filters.</p>

<p>What usage can be made of UL then?</p>

<p>For instance, an example is provided by Jamf Protect, which can pull specific UL filtered logs and ship them onto a SIEM of your choice.
There’s quite a few UL filters example on the Protect GitHub repository: <a href="https://github.com/jamf/jamfprotect/tree/main/unified_log_filters">https://github.com/jamf/jamfprotect/tree/main/unified_log_filters</a></p>]]></content><author><name>Matteo Bolognini</name></author><summary type="html"><![CDATA[***What does the logs says?*]]></summary></entry><entry><title type="html">Jamf Now - password sync Preview</title><link href="https://skartek.dev/jamf-now-password-sync-preview/" rel="alternate" type="text/html" title="Jamf Now - password sync Preview" /><published>2021-12-07T00:00:00+00:00</published><updated>2021-12-07T00:00:00+00:00</updated><id>https://skartek.dev/jamf-now-password-sync-preview</id><content type="html" xml:base="https://skartek.dev/jamf-now-password-sync-preview/"><![CDATA[<p>On 6 December 2021 Jamf has released a Preview of a new feature in Jamf Now that will enable and facilitate password sync on macOS, leveraging Jamf Connect.</p>

<p>First of all, where do we start from? Of course the documentation!**https://docs.jamf.com/jamf-now/documentation/Jamf_Connect_Deployment.html</p>

<p>Before we dig into, I’d like to stress this feature is currently on Preview and as per the documentation it states:
“<em>Previews give you a first look at upcoming features and functionality, and allow you to provide feedback and submit defects to our software developers. Preview features and documentation are provided for testing purposes and should not be considered final.”</em></p>

<p>This feature is currently supported for Okta and AzureAD. Similar to the “complete suite” that is Jamf Connect, this new iteration on Jamf Now allows to synchronize the local account password on a Mac with the Okta/AzureAD password so both of them are in sync and, most importantly, if there is a mismatch of the local account password, prompt the user to change the local password so it matches the IdP password and get FileVault password updates as well.</p>

<p>Ok time to start with the setup. In this example I will use Okta but pretty much the same steps applies for AzureAD ref: https://docs.jamf.com/jamf-connect/2.7.0/documentation/Integrating_with_Microsoft_Azure_AD.html#ID-00001cea).</p>

<p>First of all, again documentation on how to create the Okta app:
https://docs.jamf.com/jamf-connect/2.7.0/documentation/Integrating_with_Okta.html</p>

<p>Once logged in the Admin console, we’ll head over to</p>

<ul>
  <li>Applications** &gt; <strong>Create App Integration</strong></li>
</ul>

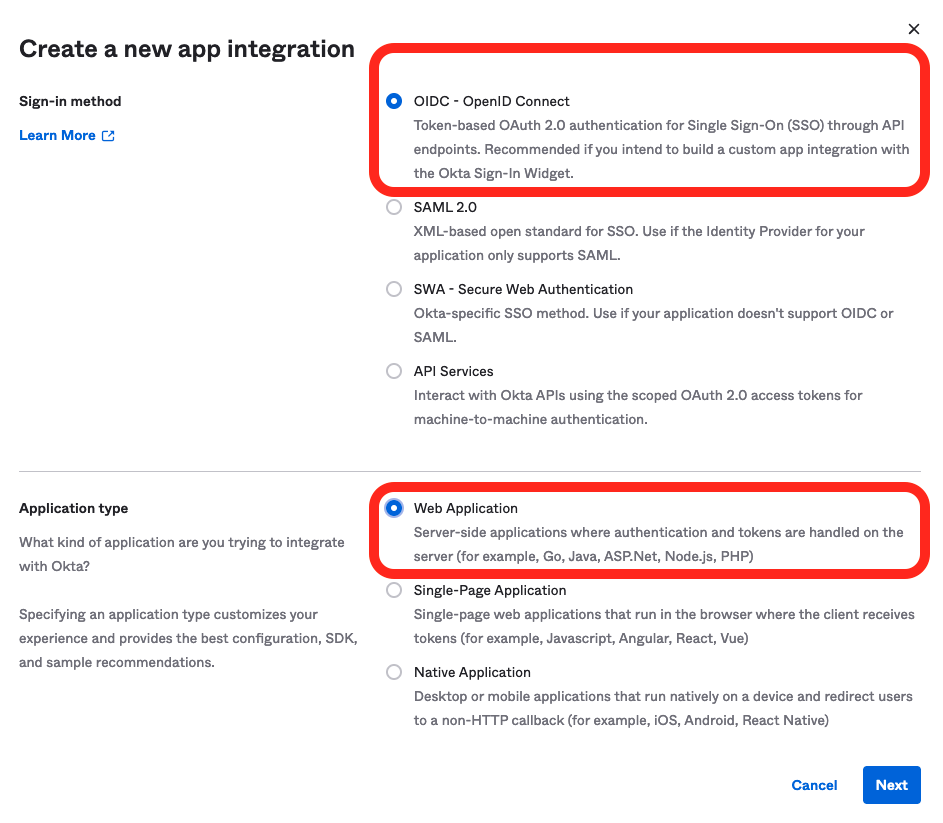
<p>In the next screen we’re gonna select:</p>

<ol>
  <li><strong>OIDC - OpenID Connect</strong> as the sign-in method.<strong>3.Native Application</strong> as the application type.</li>
</ol>

<p><img src="/assets/img/screenshot-2021-12-07-at-14.34.42.png" alt="" /></p>

<ol>
  <li>
    <p>Give the app a name in the Application name field.</p>
  </li>
  <li>
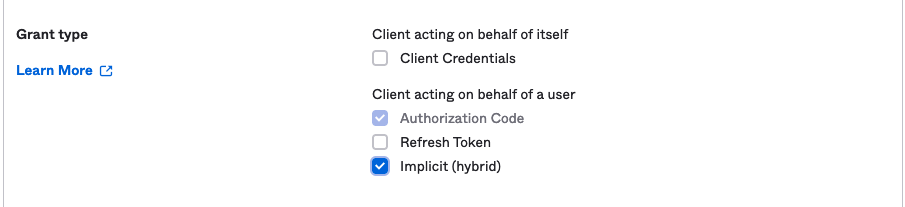
    <p>Set <strong>Authorization Code</strong> to <strong>Implicit (hybrid)</strong> in the <strong>Grant type</strong> section</p>
  </li>
</ol>

<p><img src="/assets/img/screenshot-2021-12-07-at-14.36.55.png" alt="" /></p>

<ol>
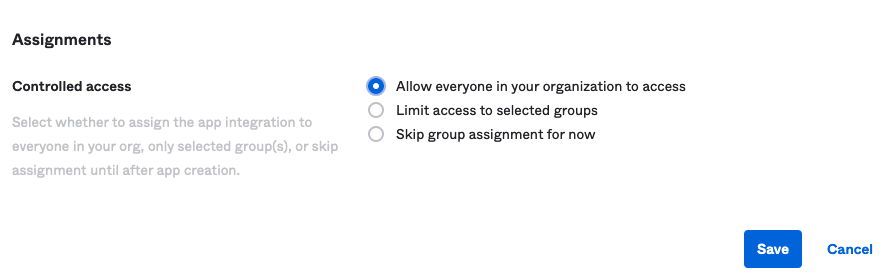
  <li>For this example, we will assing this app to ALL users within the org</li>
</ol>

<p><img src="/assets/img/screenshot-2021-12-07-at-14.40.22.png" alt="" /></p>

<ol>
  <li>Most important step of all, click <strong>Save</strong>.</li>
</ol>

<p>We now have configured our Okta app, so it’s time to head over to Jamf Now.</p>

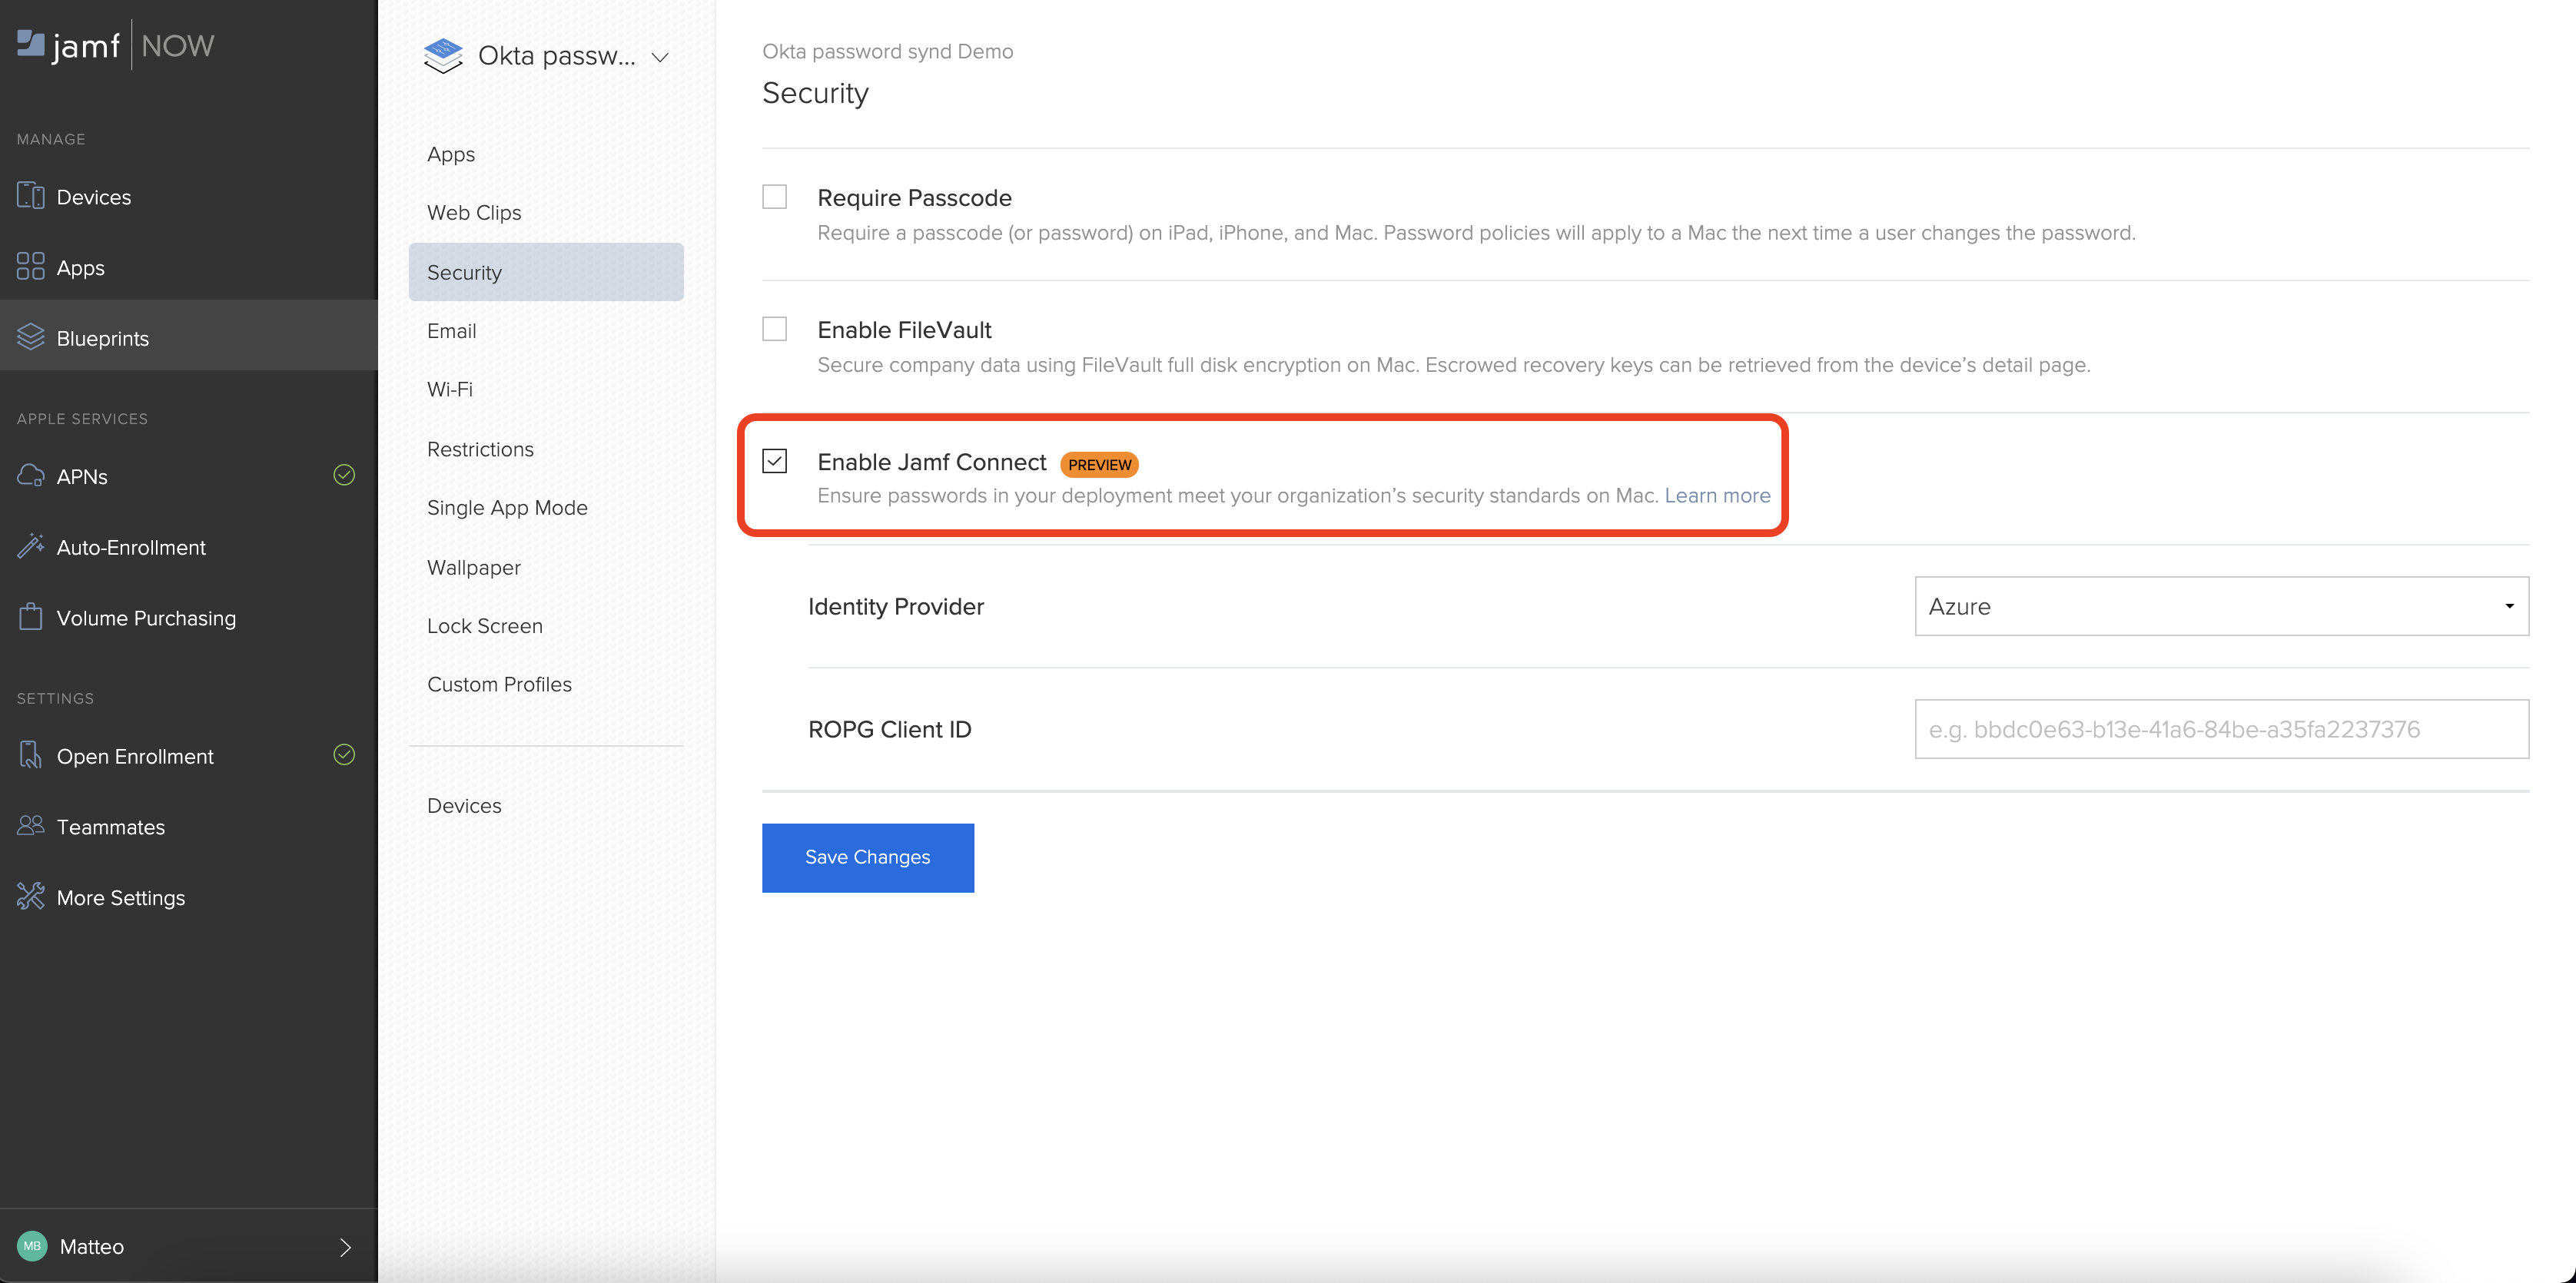
<p>Within our Jamf Now Blueprint lets head to the <strong>Security</strong> section and enable the <strong>Enable Jamf Connect</strong> checkbox.</p>

<p><img src="/assets/img/screenshot-2021-12-07-at-14.43.39.png" alt="" /></p>

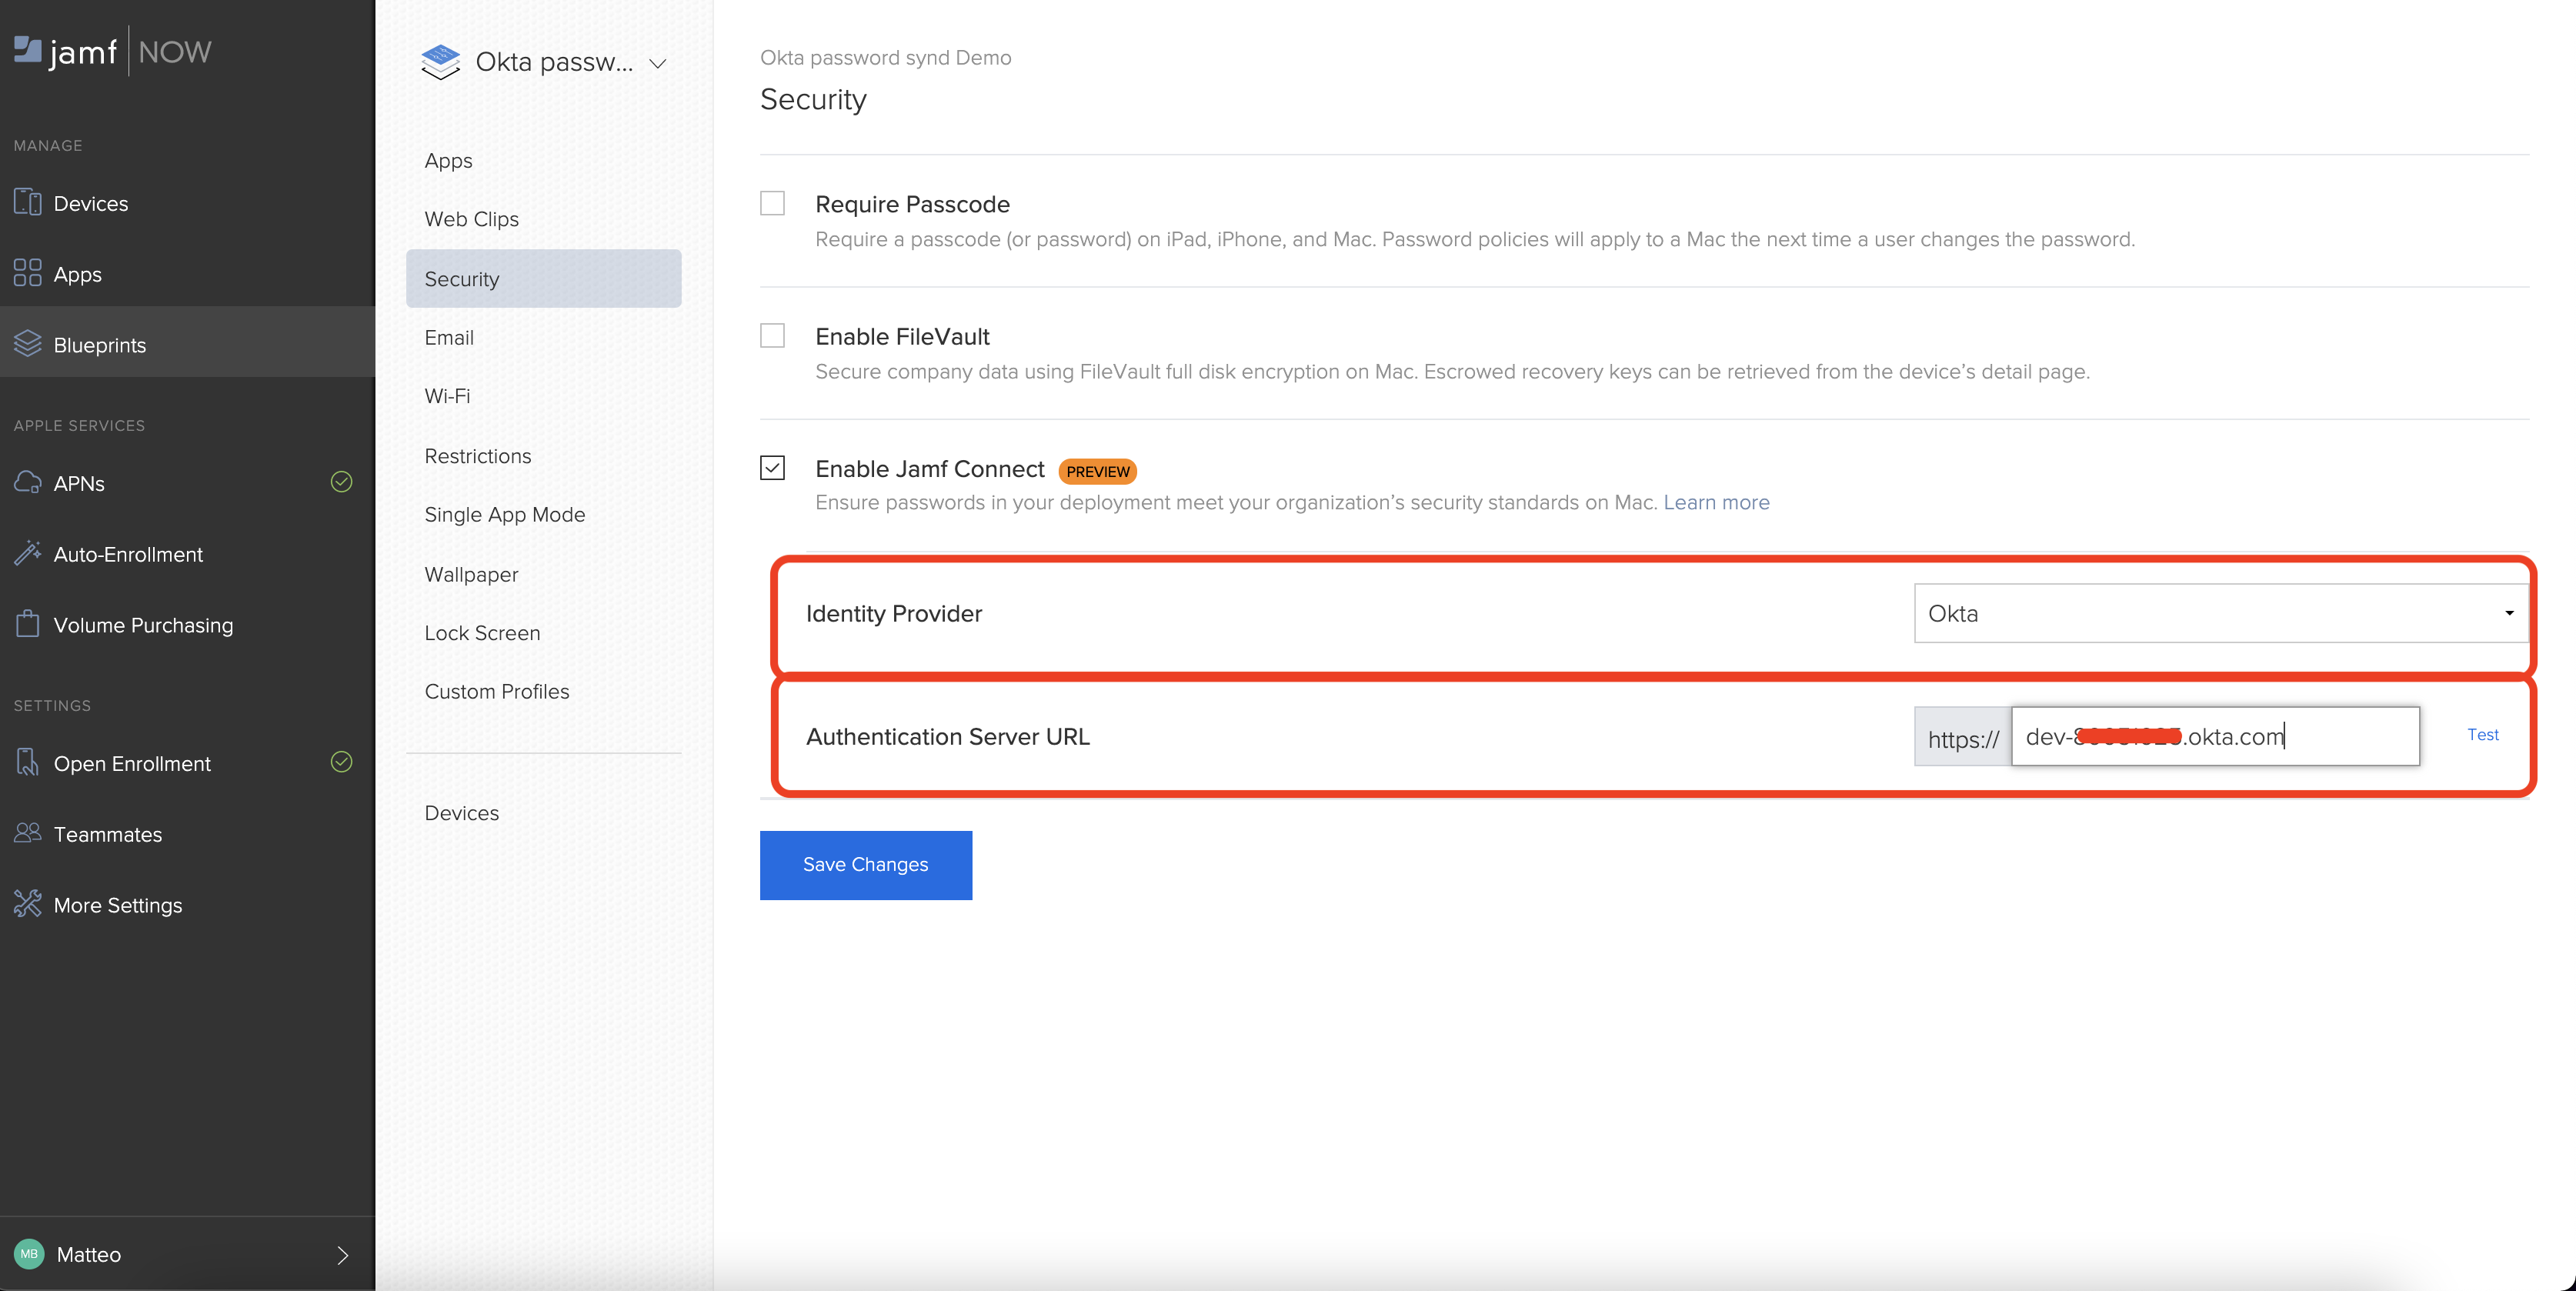
<p>This will bring up the configuration menu. Lets switch to Okta in the <strong>Identity</strong> <strong>Provider</strong> field and provide our Okta tenant (domain)</p>

<p><img src="/assets/img/screenshot-2021-12-07-at-14.42.37-1.png" alt="" /></p>

<p>There is a built in webui to test the configuration. Most likely you will get an error like</p>

<p><img src="/assets/img/screenshot-2021-12-07-at-14.47.34.png" alt="" /></p>

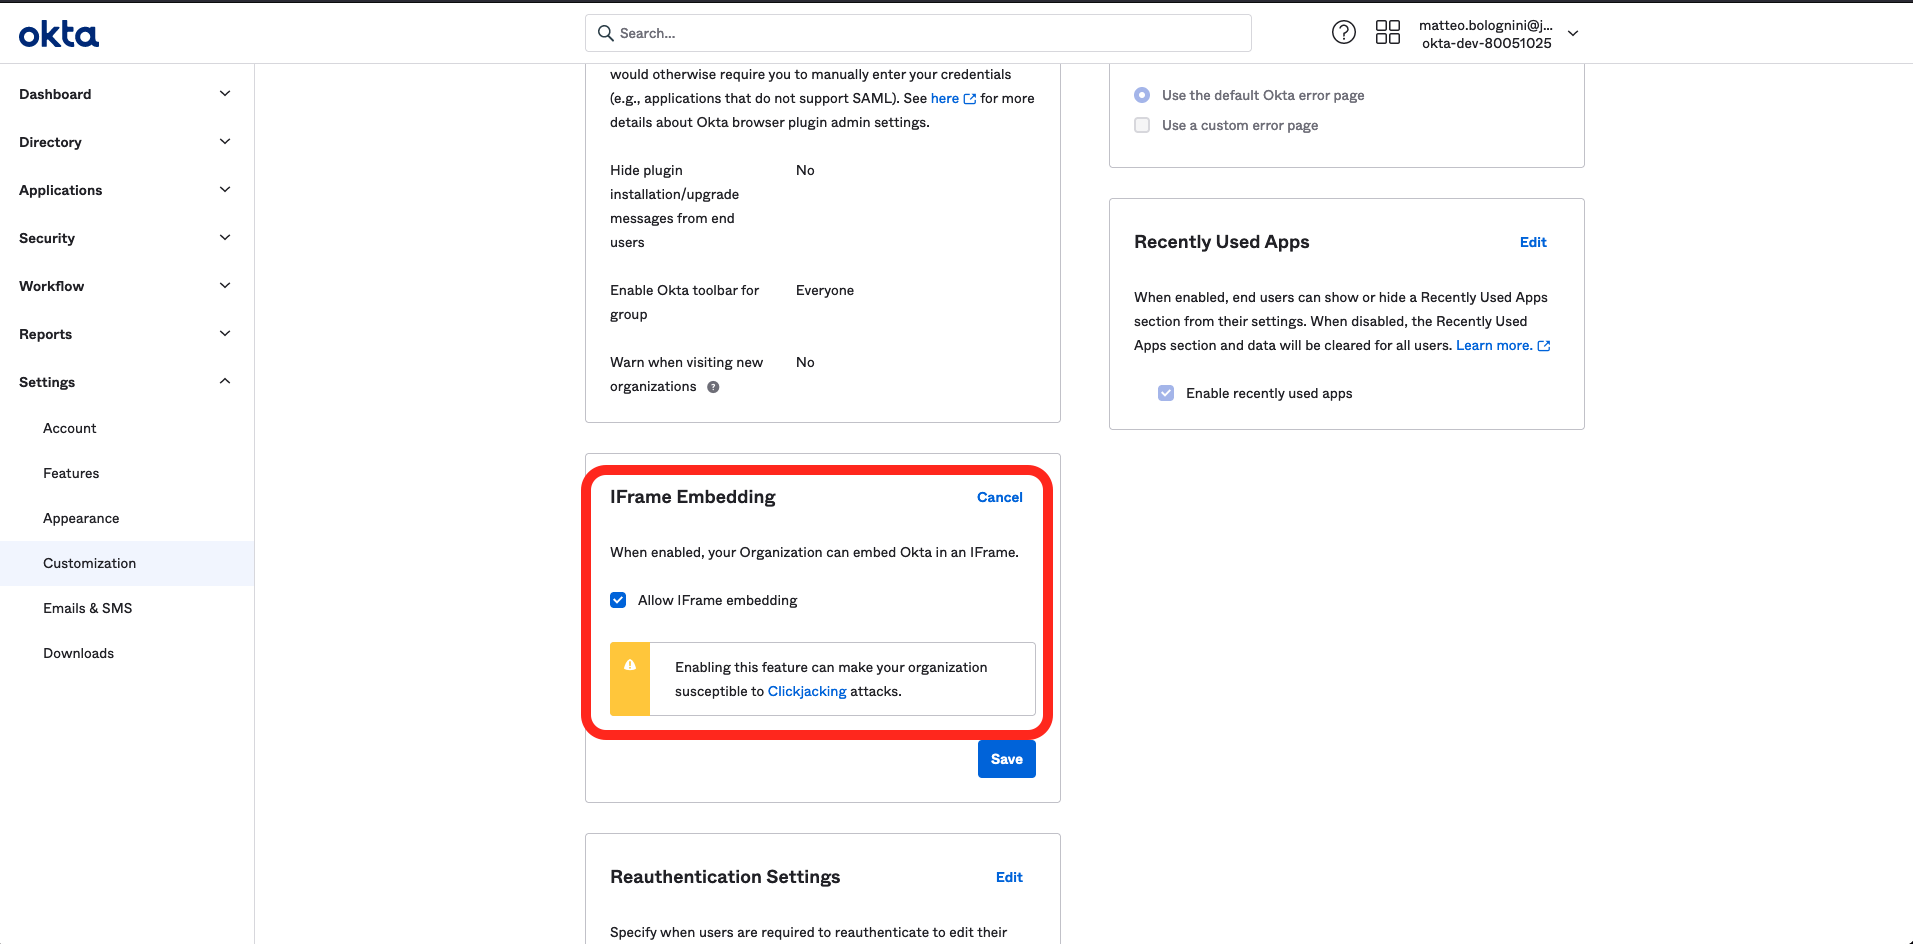
<p>This is just expected as, by default, Okta is not allowed to be embedded in an iFrame.<strong>I don’t recommend this but you can change this setting by logging as admin and going to Settings</strong> -&gt; <strong>Customization</strong> -&gt; <strong>IFrame</strong> <strong>Embedding</strong> and checking “<strong>Allow</strong> <strong>IFrame</strong> <strong>embedding</strong>”</p>

<p><img src="/assets/img/screenshot-2021-12-07-at-14.50.31.png" alt="" /></p>

<p>Once this is done, if you revisit the Blueprint and click again on <strong>Test</strong>, you’ll notice the Okta UI login should now be displayed.</p>

<p>Once we’re at this point, the configuration is pretty much completed we can save and wait for the Blueprint to sync on the device.</p>

<p>Digging into a bit we’ll find 2 components will be installed on the device:</p>
<ol>
  <li>
    <p>A Configuration Profile, containing the Okta setup and config</p>
  </li>
  <li>
    <p>An application in /Applications. This is the actual app used to keep password in sync.
On this first iteration of the Preview, the app won’t auto-launch and needs to by launched manually by the user</p>
  </li>
</ol>

<p><img src="/assets/img/screenshot-2021-12-07-at-15.00.57-1.png" alt="" /></p>

<p>Finally, lets have a look at how it all works.
In this short video we’ll see</p>
<ul>
  <li>a user opening the Jamf Connect application</li>
  <li>getting a prompt to provide the Okta password</li>
  <li>a second prompt to provide the local account password
This is the point where Connects kicks in, identify the user’s Okta password is not matching the local account password and proceed to change the local account password to match the Okta one and update the FileVault password as well.</li>
</ul>

<p>https://youtu.be/sgZ4pApj3dw</p>

<p>The Connect app also gives the user ability to change/reset their Okta password via the menu bar app. This ensures that when changing the Okta password, the local account and FV passwords are all kept in sync as well.</p>

<p>Hope it helps :)</p>]]></content><author><name>Matteo Bolognini</name></author><summary type="html"><![CDATA[On 6 December 2021 Jamf has released a Preview of a new feature in Jamf Now that will enable and facilitate password sync on macOS, leveraging Jamf Connect.]]></summary></entry><entry><title type="html">Deploy Jamf Protect with Jamf Now</title><link href="https://skartek.dev/deploy-jamf-protect-with-jamf-now/" rel="alternate" type="text/html" title="Deploy Jamf Protect with Jamf Now" /><published>2021-11-05T00:00:00+00:00</published><updated>2021-11-05T00:00:00+00:00</updated><id>https://skartek.dev/deploy-jamf-protect-with-jamf-now</id><content type="html" xml:base="https://skartek.dev/deploy-jamf-protect-with-jamf-now/"><![CDATA[<p>Jamf Protect is an enterprise endpoint security solution for the Mac. With Jamf Protect, you can create custom detections that protect computers with real-time monitoring for suspicious and unwanted activities, while measuring computers against the Center for Internet Security (CIS) benchmarks with security insights. Jamf Protect runs without using kernel extensions to support continuous macOS updates and preserve the Apple user experience.</p>

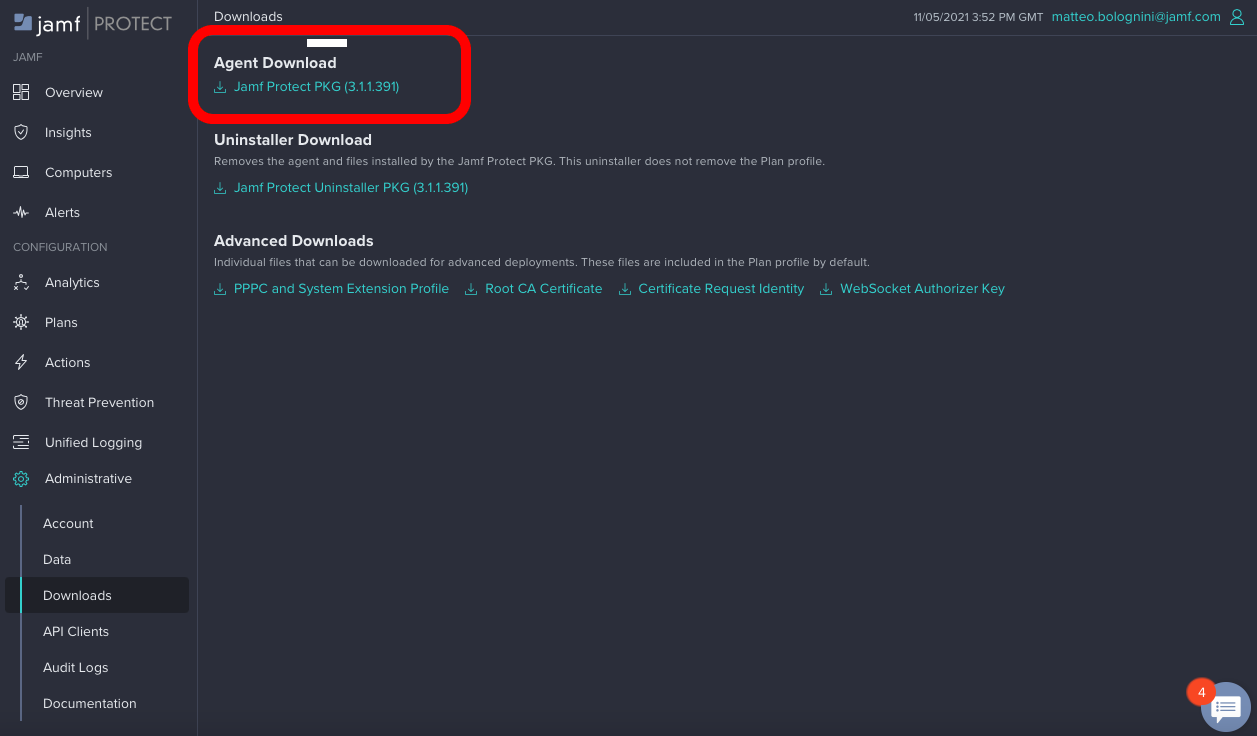
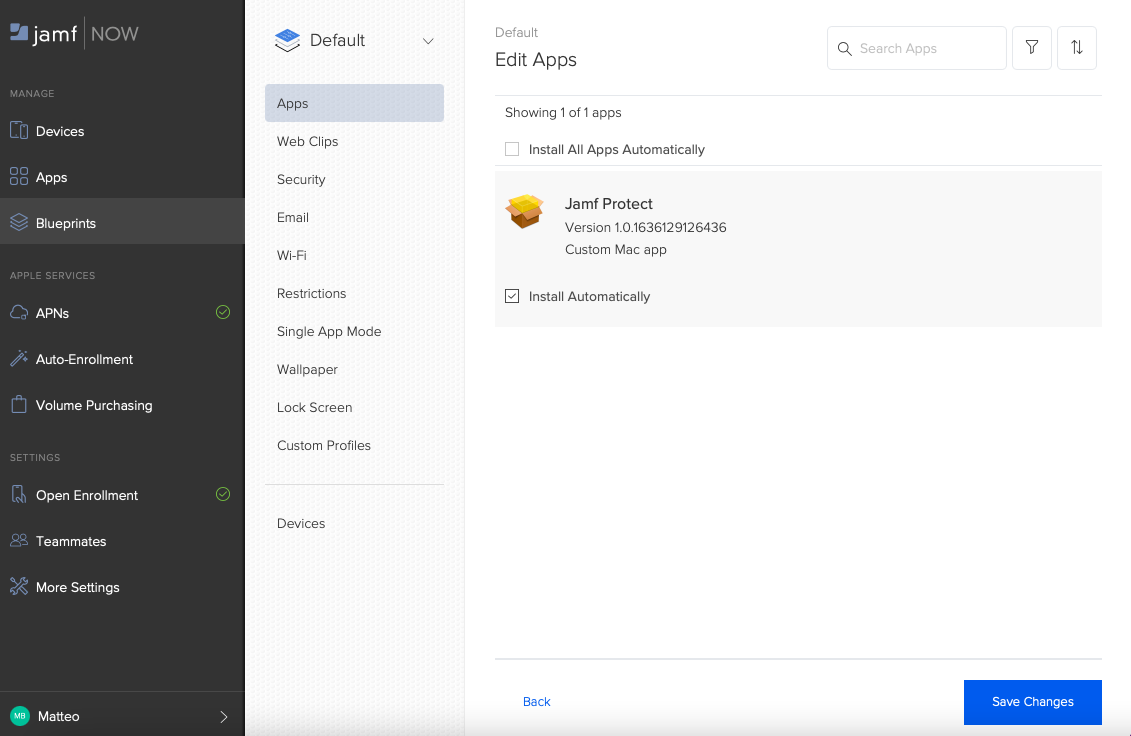
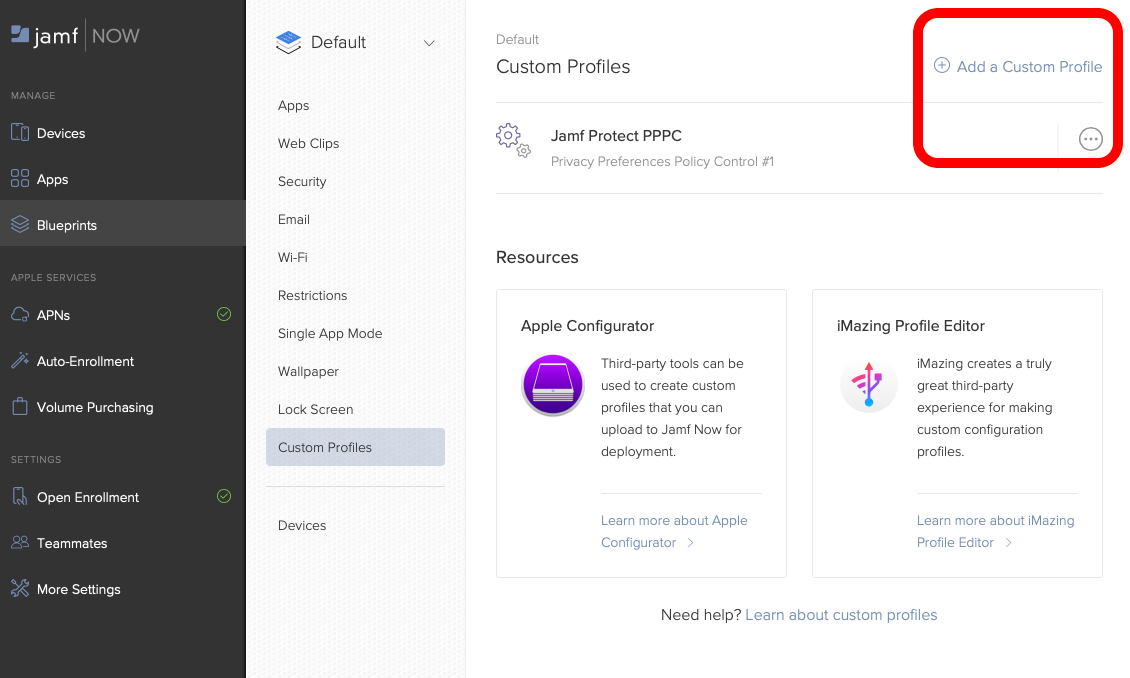
<p>Protect offers a seamless integration with Jamf Pro (ref: https://docs.jamf.com/jamf-protect/documentation/Jamf_Protect_Deployment.html) but can also be extremely easily deployed via Jamf Now in few simple steps.</p>

<p>To deploy Jamf Protect we need 2 basic items:</p>

<ul>
  <li>a Configuration Profile that contains anything that the agent needs (certificates, keychain items etc)</li>
  <li>and a pkg that is the actual application installer</li>
</ul>

<p>Let’s get into!</p>

<p>First we’re going to login to our Protect tenant.
We will then go to Plans and either select an existing Plan or make a new one. If you’re making a new Plan, please refer to https://docs.jamf.com/jamf-protect/documentation/Plans.html</p>

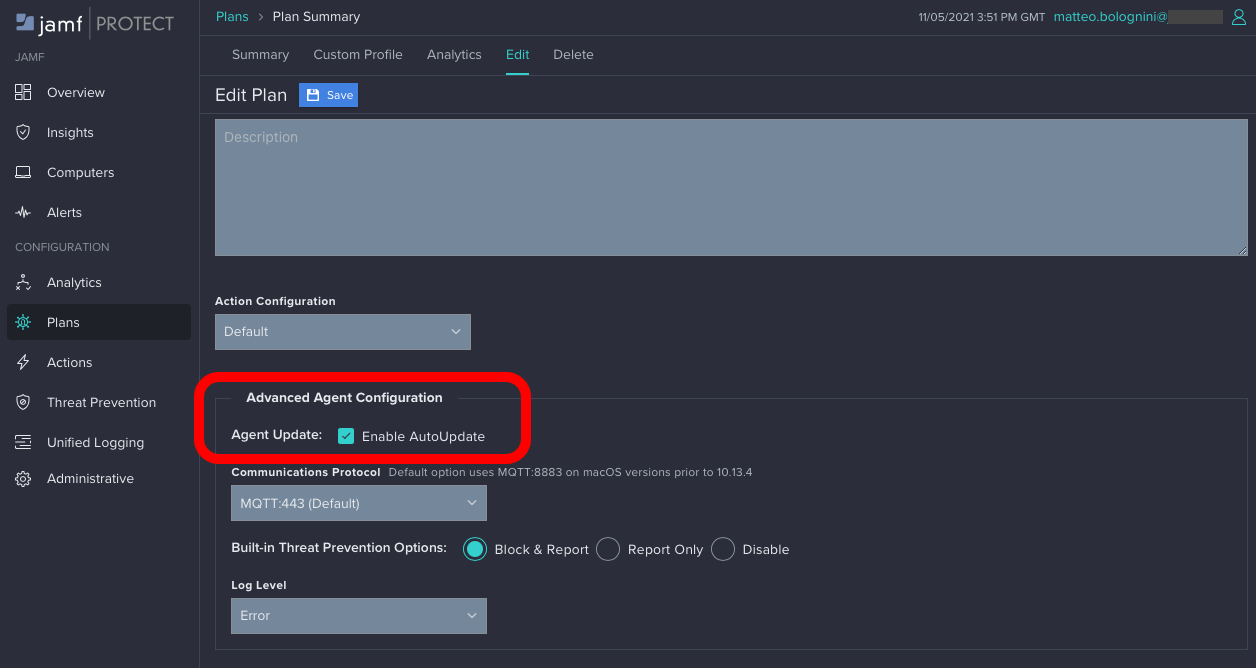
<p>Within our Plan, we want to make sure the Auto-Update feature is turned on:</p>

<p><img src="/assets/img/screenshot-2021-11-05-at-16.52.00.png" alt="" /></p>

<p>This will ensure that every time a new version of Protect is released, we do not have to worry about re-packaging or mananing the updated, but the agent itself will auto-update without intervention.</p>

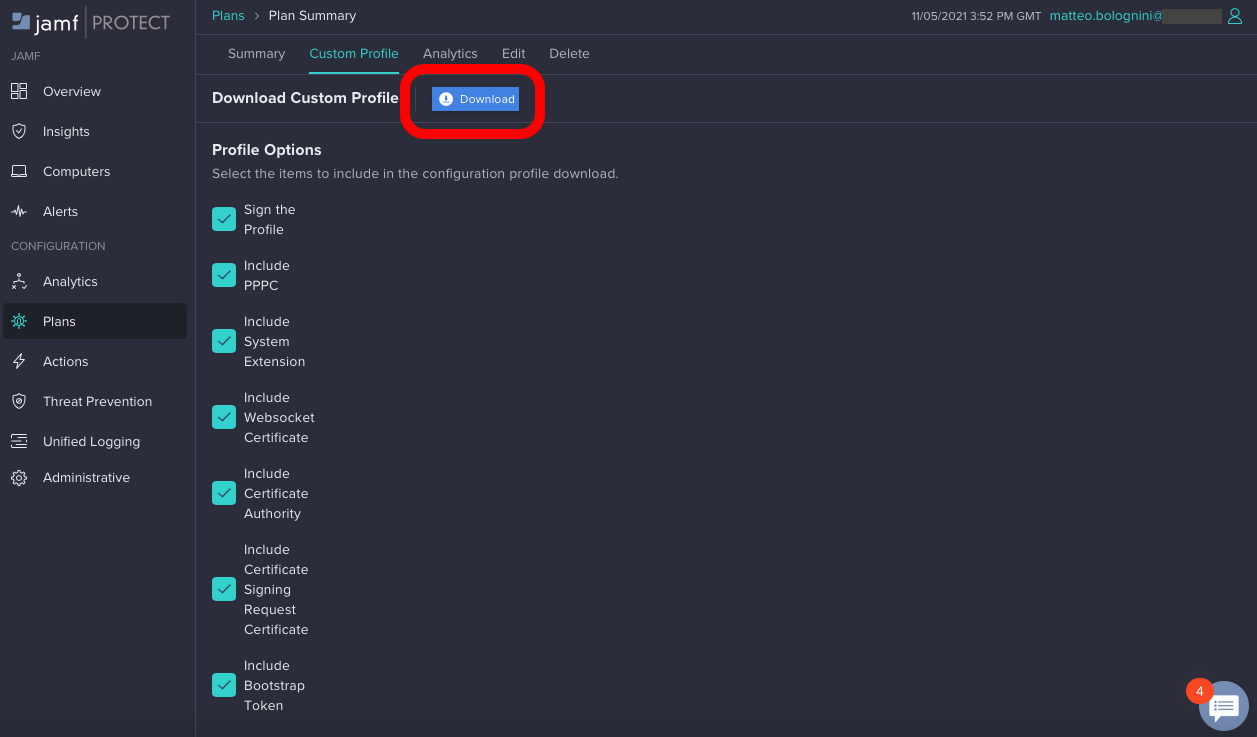
<p>Next we’re gonna download a Configuration Profile for our Plan by clicking the “Download” button into the “Custom Profile” section.</p>

<p><img src="/assets/img/screenshot-2021-11-05-at-16.52.16.png" alt="" /></p>

<p>Lastly, we want to hop into Protect &gt; Administrative &gt; Downloads and download the installer:”</p>

<p><img src="/assets/img/screenshot-2021-11-05-at-16.52.33.png" alt="" /></p>

<p>Now that we have both a pkg and the Configuration Profile downloaded from the Protect tenant, we can hop into Jamf Now console.</p>

<p>First we will go into Apps &gt; Add an App</p>

<p>If this is the first time you add a custom app, you’ll see a screen like the above, otherwise it you’ll see a list of your current apps and the “Add an App” button would be in the top right of the screen.</p>

<p>The process is very simple, simply drag and drop in the app we downloaded from Protect:</p>

<p>https://youtu.be/1lietbkPa6M</p>

<p>Now that we have our pkg uploaded, we can add it to a Blueprint for deployment.
Let’s go in our Blueprint &gt; Apps &gt; Custom App &gt; Add App</p>

<p>and add the Jamf Protect pkg making sure “Install Automatically” gets enabled</p>

<p><img src="/assets/img/screenshot-2021-11-05-at-17.24.38.png" alt="" /></p>

<p>Lastly, we can go to Custom Profiles and click on “Add a Custom Profile” to upload:</p>

<p><img src="/assets/img/screenshot-2021-11-05-at-17.25.36.png" alt="" /></p>

<p>The process should look like this:</p>

<p>https://youtu.be/f4-CCWcVpVQ</p>

<p>Let’s bring it all together now and do a test.
I’m going to enroll a test device via Open Enrollment and then check for the Configuration Profile and pkg auto deployment:</p>

<p>https://youtu.be/2iPqxi0qx0s</p>]]></content><author><name>Matteo Bolognini</name></author><summary type="html"><![CDATA[Jamf Protect is an enterprise endpoint security solution for the Mac. With Jamf Protect, you can create custom detections that protect computers with real-time monitoring for suspicious and unwanted activities, while measuring computers against the Center for Internet Security (CIS) benchmarks with security insights. Jamf Protect runs without using kernel extensions to support continuous macOS updates and preserve the Apple user experience.]]></summary></entry><entry><title type="html">Jamf Protect Data Fowarding to an Amazon S3 Bucket</title><link href="https://skartek.dev/jamf-protect-data-fowarding-to-an-amazon-s3-bucket/" rel="alternate" type="text/html" title="Jamf Protect Data Fowarding to an Amazon S3 Bucket" /><published>2020-10-28T00:00:00+00:00</published><updated>2020-10-28T00:00:00+00:00</updated><id>https://skartek.dev/jamf-protect-data-fowarding-to-an-amazon-s3-bucket</id><content type="html" xml:base="https://skartek.dev/jamf-protect-data-fowarding-to-an-amazon-s3-bucket/"><![CDATA[<p>With the release on 2020-10-23, Jamf Protect added support to forward data to an AWS S3 bucket from the Jamf Protect tennant.</p>

<p>What this means is that you can have an S3 bucket to ingest data that the macOS clients send over to Jamf Protect cloud tennant.</p>

<p>As per Jamf’s documentation; only data that is sent to the Jamf Protect Cloud via an action configuration (alerts, logs, and unified logs) can be forwarded to Amazon S3:**https://docs.jamf.com/jamf-protect/administrator-guide/Release_History.html</p>

<p>What we will need to setup the integration:</p>
<ul>
  <li>an existing S3 bucket</li>
  <li>an IAM role that Jamf Protect will assume when forwarding data over to S3</li>
</ul>

<p>Jamf also provide a nice CloudFormation template that can configure everything we need (S3 bucket and IAM role) for us.</p>

<p>Download CloudFormation template**</p>

<p>Let’s first download the CloudFormation template from the Jamf Protect tennant<strong>Once logged in, we can get the template from the Administrative</strong> &gt; <strong>Data</strong> section</p>

<p><img src="/assets/img/screenshot-2020-10-28-at-09.39.25.png" alt="" /></p>

<p>Once we have our template, we can head over to ASW and create the IAM role that will be used to run the CloudFormation stack.**
Setup IAM role
1.** Login to the AWS console<strong>2.</strong> Once at the Dashboard search for <strong>IAM</strong></p>

<p><img src="/assets/img/screenshot-2020-10-28-at-10.18.26.png" alt="" /></p>

<p><strong>3.</strong> Select <strong>Roles</strong> from the side menu bar</p>

<p><img src="/assets/img/screenshot-2020-10-28-at-10.22.45.png" alt="" /></p>

<ol>
  <li>Click <strong>Create role</strong></li>
</ol>

<p><img src="/assets/img/screenshot-2020-10-28-at-10.14.28.png" alt="" /></p>

<ol>
  <li>When prompted to <strong>Choose a use case</strong>, select <strong>CloudFormation</strong> and click <strong>Next:Permissions</strong></li>
</ol>

<p><img src="/assets/img/screenshot-2020-10-28-at-10.25.50.png" alt="" /></p>

<ol>
  <li>Click <strong>Create policy</strong>**This will open a new tab in the browser</li>
</ol>

<p><img src="/assets/img/screenshot-2020-10-28-at-10.28.23.png" alt="" /></p>

<ol>
  <li>In the next Policy editor builder click JSON**</li>
</ol>

<p><img src="/assets/img/screenshot-2020-10-28-at-10.29.39.png" alt="" /></p>

<p><strong>8. **Before proceeding with this, I need to specify something.</strong>What we’re doing now is to give permission to this IAM user to run the CloudFormation template. This won’t be the IAM user that Jamf Protect will assume when forwarding the logs, such user will be created by the CloudFormation template. The IAM user we’re about to create will need to exist only for the time needed to CloudFormation to run our stack.</p>

<p>To be specific, this IAM role will neeed to be able to perform 3 actions
 - create an S3 bucket</p>
<ul>
  <li>modify it’s policy</li>
  <li>and create an IAM role (the one Jamf Protect will assume)</li>
</ul>

<p>That said the below is the permissions set I’ve found “safe enough” for my test env. In any production env please do NOT use this snippet and consult with your AWS IAM admin on the needed permissions to bee granted.
I’ll grant those permissions to my IAM role and then delete the role as soon as the CloudFormation stack will be completed</p>

<div class="language-plaintext highlighter-rouge"><div class="highlight"><pre class="highlight"><code>{
 "Version": "2012-10-17",
 "Statement": &amp;#091;
 {
 "Action": &amp;#091;
 "s3:CreateBucket",
 "s3:DeleteBucket",
 "s3:DeleteBucketOwnershipControls",
 "s3:DeleteBucketPolicy",
 "s3:DeleteBucketWebsite",
 "s3:DeleteObject",
 "s3:DeleteObjectTagging",
 "s3:DeleteObjectVersion",
 "s3:DeleteObjectVersionTagging",
 "s3:GetBucketAcl",
 "s3:GetBucketCORS",
 "s3:GetBucketLocation",
 "s3:GetBucketLogging",
 "s3:GetBucketNotification",
 "s3:GetBucketObjectLockConfiguration",
 "s3:GetBucketOwnershipControls",
 "s3:GetBucketPolicy",
 "s3:GetBucketPolicyStatus",
 "s3:GetBucketPublicAccessBlock",
 "s3:GetBucketRequestPayment",
 "s3:GetBucketTagging",
 "s3:GetBucketVersioning",
 "s3:GetBucketWebsite",
 "s3:GetEncryptionConfiguration",
 "s3:ListAllMyBuckets",
 "s3:ListBucket",
 "s3:ListBucketVersions",
 "s3:PutBucketAcl",
 "s3:PutBucketCORS",
 "s3:PutBucketLogging",
 "s3:PutBucketNotification",
 "s3:PutBucketObjectLockConfiguration",
 "s3:PutBucketOwnershipControls",
 "s3:PutBucketPolicy",
 "s3:PutBucketPublicAccessBlock",
 "s3:PutBucketRequestPayment",
 "s3:PutBucketTagging",
 "s3:PutBucketVersioning",
 "s3:PutBucketWebsite",
 "s3:PutEncryptionConfiguration"
 ],
 "Effect": "Allow",
 "Resource": "*"
 },
 {
 "Action": &amp;#091;
 "iam:AttachRolePolicy",
 "iam:CreateRole",
 "iam:DeleteRole",
 "iam:GetAccountPasswordPolicy",
 "iam:GetGroup",
 "iam:GetGroupPolicy",
 "iam:GetPolicy",
 "iam:GetPolicyVersion",
 "iam:GetRole",
 "iam:GetRolePolicy",
 "iam:GetUser",
 "iam:GetUserPolicy",
 "iam:ListPolicies",
 "iam:ListRolePolicies",
 "iam:ListRoleTags",
 "iam:ListRoles",
 "iam:ListUserTags",
 "iam:ListUsers",
 "iam:PutRolePolicy",
 "iam:PutUserPolicy",
 "iam:TagRole",
 "iam:TagUser",
 "iam:UntagRole",
 "iam:UntagUser",
 "iam:UpdateRole",
 "iam:UpdateRoleDescription"
 ],
 "Effect": "Allow",
 "Resource": "*"
 }
 ]
}
</code></pre></div></div>

<p>9.** Paste in your policy and click <strong>Review policy</strong></p>

<p><img src="/assets/img/screenshot-2020-10-28-at-10.41.56.png" alt="" /></p>

<p><strong>10. **Review your policy and give it a friendly **Name</strong> and if you want, add a <strong>Description</strong> <strong>Once you’re set, hit Create policy</strong></p>

<p><img src="/assets/img/screenshot-2020-10-28-at-11.25.43.png" alt="" /></p>

<p>**11. **Go back to the IAM role creation page and search for the newly created policy</p>

<p><img src="/assets/img/screenshot-2020-10-28-at-11.54.19.png" alt="" /></p>

<p><strong>12. **Select the policy by ticking the box and click **Next:Tags</strong></p>

<p><img src="/assets/img/screenshot-2020-10-28-at-11.54.45.png" alt="" /></p>

<p><strong>13.</strong> (Optional) add in any key pair tags and then click <strong>Next:Review</strong></p>

<p><img src="/assets/img/screenshot-2020-10-28-at-12.03.11.png" alt="" /></p>

<p><strong>14. **Choose a name for the IAM role and then click **Create Role</strong></p>

<p><img src="/assets/img/screenshot-2020-10-28-at-12.05.27.png" alt="" /></p>

<p><strong>CloudFormation stack</strong></p>

<p><strong>1.</strong> Now that we have our “build” IAM role with its own permissions granted with the Policy let’s go to CloudFormation and build our stack in AWS console click <strong>Services</strong> and type in <strong>CloudFormation</strong></p>

<p><img src="/assets/img/screenshot-2020-10-28-at-11.29.09.png" alt="" /></p>

<p><strong>2. **In the CloudFormation dashboard click **Create stack</strong></p>

<p><img src="/assets/img/screenshot-2020-10-28-at-11.33.22.png" alt="" /></p>

<p><strong>3.</strong> Leave <strong>Prepare template</strong> set to the default and switch <strong>Specify Template</strong> to <strong>Upload a template file</strong> and use the Choose file button to upload the template we downloaded from Jamf Protect.<strong>Once the template is uploaded click Next</strong></p>

<p><img src="/assets/img/screenshot-2020-10-28-at-11.37.16.png" alt="" /></p>

<p><strong>4.</strong>Choose a <strong>Stack name</strong>**This is mostly an identifier to check your stack building later</p>

<p><img src="/assets/img/screenshot-2020-10-28-at-11.44.26.png" alt="" /></p>

<p>5.** Choose a name for the S3 bucket<strong>The JamfProtectBucketName</strong> is the variable in the stack template, in this field we’re giving the stack which value should be used to create the S3 bucket, that will be named based on what is provided in this field</p>

<p><img src="/assets/img/screenshot-2020-10-28-at-11.45.57.png" alt="" /></p>

<p><strong>6.</strong> Click <strong>Next</strong></p>

<p><img src="/assets/img/screenshot-2020-10-28-at-11.46.05.png" alt="" /></p>

<p><strong>7.</strong> In the <strong>Configure stack options</strong> section scroll down to <strong>Permissions</strong> and select the IAM user we created before</p>

<p><img src="/assets/img/screenshot-2020-10-28-at-12.13.08.png" alt="" /></p>

<p><strong>8.</strong> Scroll to the bottom of the page and click <strong>Next</strong></p>

<p><img src="/assets/img/screenshot-2020-10-28-at-12.13.16.png" alt="" /></p>

<p><strong>9. **Review your stack build and give consent to CloudFormation to use the IAM role permissions and then click **Save stack</strong></p>

<p><img src="/assets/img/screenshot-2020-10-28-at-12.16.10.png" alt="" /></p>

<p>CloudFormation will now process the Stack we configured and will display us the status</p>

<p><img src="/assets/img/screenshot-2020-10-28-at-12.19.11.png" alt="" /></p>

<p>The page sometimes it’s a little bit slow in the background auto-refresh, if needed use the refresh button</p>

<p><img src="/assets/img/screenshot-2020-10-28-at-12.19.11-copy.png" alt="" /></p>

<p>Let’s break down what the stack did**First it created a Policy for the S3 bucket</p>

<p><img src="/assets/img/screenshot-2020-10-28-at-12.19.25-copy.png" alt="" /></p>

<p>Then it creates an IAM role. This is the role that Jamf Protect will assume when sending data over to the S3 bucket</p>

<p><img src="/assets/img/screenshot-2020-10-28-at-12.19.25-copy-2.png" alt="" /></p>

<p>Lastly it creates the S3 bucket</p>

<p><img src="/assets/img/screenshot-2020-10-28-at-12.19.25-copy-3.png" alt="" /></p>

<p>If we go back to IAM** &gt; <strong>Roles</strong> we can now see the role the Stack created in a format with the name we choose for the stack with <strong>-JamfProtectWriterRole</strong>-UNIQUEID appended to.</p>

<p><img src="/assets/img/screenshot-2020-10-28-at-12.28.33.png" alt="" /></p>

<p>If we go to S3 we can also see the newly created bucket with the name we choose</p>

<p><img src="/assets/img/screenshot-2020-10-28-at-12.31.12.png" alt="" /></p>

<p>One last thing, just to keep things clean, now that the CloudFormation stack has successfully completed, we can go back in IAM &gt; Roles &gt; select our “build” IAM role that was created with the sole purpose of being used by this stack and delete it</p>

<p><img src="/assets/img/screenshot-2020-10-28-at-14.44.33.png" alt="" /></p>

<p><strong>Configure Jamf Protect to forward data to S3</strong></p>

<p>**Now that we have an S3 bucket and an IAM role enable to POST data we just need to configure Jamf Protect to forward data.</p>
<ol>
  <li><strong>Once logged in, we can get the template from the **Administrative</strong> &gt; <strong>Data</strong> section and on the <strong>Amazon S3 Bucket Name</strong> simply provide the name of the S3 bucket the stack created for us</li>
</ol>

<p><img src="/assets/img/screenshot-2020-10-28-at-12.33.09.png" alt="" /></p>

<p><strong>2.</strong> Provide a <strong>Prefix</strong></p>

<p><img src="/assets/img/screenshot-2020-10-28-at-12.36.23.png" alt="" /></p>

<p>**3. **Now go back to AWS &gt; IAM &gt; Roles &gt; select the role the stack created for us and copy the ARN name</p>

<p><img src="/assets/img/screenshot-2020-10-28-at-12.33.43.png" alt="" /></p>

<p>**4. **Paste the IAM Role ARN into Jamf Protect</p>

<p><img src="/assets/img/screenshot-2020-10-28-at-12.37.40.png" alt="" /></p>

<p><strong>5.</strong> Click <strong>Save</strong></p>

<p><img src="/assets/img/screenshot-2020-10-28-at-12.40.38.png" alt="" /></p>

<p><strong>6.</strong> Go to the Actions &gt; choose your deployed Action &gt; Edit and enable the data forwarding option</p>

<p><img src="/assets/img/screenshot-2020-10-28-at-12.40.56.png" alt="" /></p>

<p>How to verify the integration is completed?
Head back to S3 and we should now have a directory on our S3 bucket</p>

<p><img src="/assets/img/screenshot-2020-10-28-at-12.45.24.png" alt="" /></p>

<p>Inspecting the content of the few directories there and we should fine a file posted as a test by Jamf Protect to check all is good, should be something like</p>

<p><img src="/assets/img/screenshot-2020-10-28-at-12.46.17.png" alt="" /></p>

<p>And that’s pretty much it. From now on, alerts, logs, and unified logs that will be sent over to the Jamf Protect cloud instance will also be forwarded to our AWS S3 bucket and be stored there.</p>]]></content><author><name>Matteo Bolognini</name></author><summary type="html"><![CDATA[With the release on 2020-10-23, Jamf Protect added support to forward data to an AWS S3 bucket from the Jamf Protect tennant.]]></summary></entry></feed>