November 5, 2021
Deploy Jamf Protect with Jamf Now
Jamf Protect is an enterprise endpoint security solution for the Mac. With Jamf Protect, you can create custom detections that protect computers with real-time monitoring for suspicious and unwanted activities, while measuring computers against the Center for Internet Security (CIS) benchmarks with security insights. Jamf Protect runs without using kernel extensions to support continuous macOS updates and preserve the Apple user experience.
Protect offers a seamless integration with Jamf Pro (ref: https://docs.jamf.com/jamf-protect/documentation/Jamf_Protect_Deployment.html) but can also be extremely easily deployed via Jamf Now in few simple steps.
To deploy Jamf Protect we need 2 basic items:
- a Configuration Profile that contains anything that the agent needs (certificates, keychain items etc)
- and a pkg that is the actual application installer
Let’s get into!
First we’re going to login to our Protect tenant. We will then go to Plans and either select an existing Plan or make a new one. If you’re making a new Plan, please refer to https://docs.jamf.com/jamf-protect/documentation/Plans.html
Within our Plan, we want to make sure the Auto-Update feature is turned on:
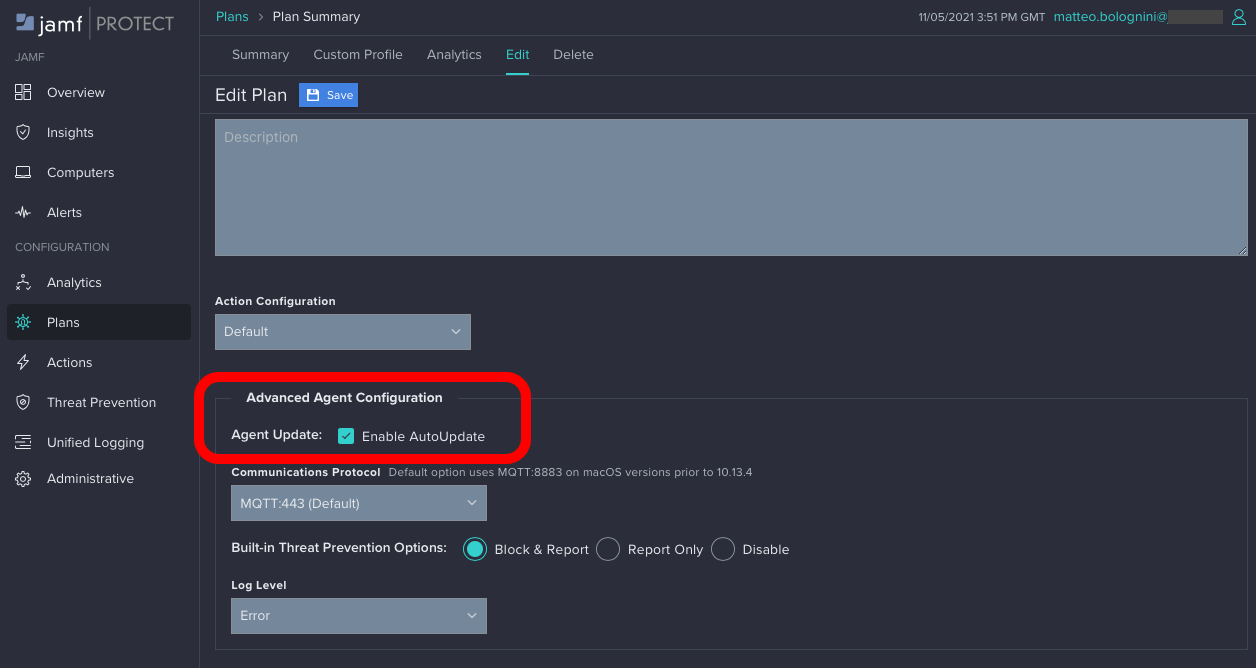
This will ensure that every time a new version of Protect is released, we do not have to worry about re-packaging or mananing the updated, but the agent itself will auto-update without intervention.
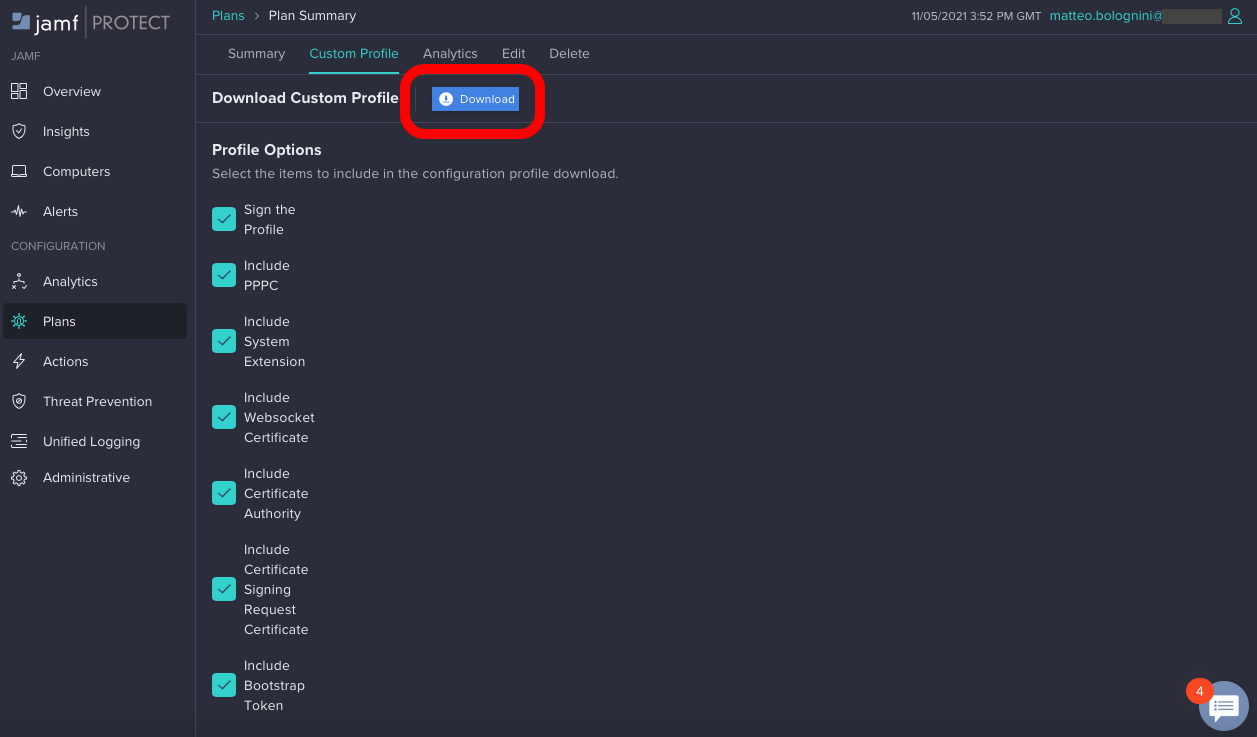
Next we’re gonna download a Configuration Profile for our Plan by clicking the “Download” button into the “Custom Profile” section.
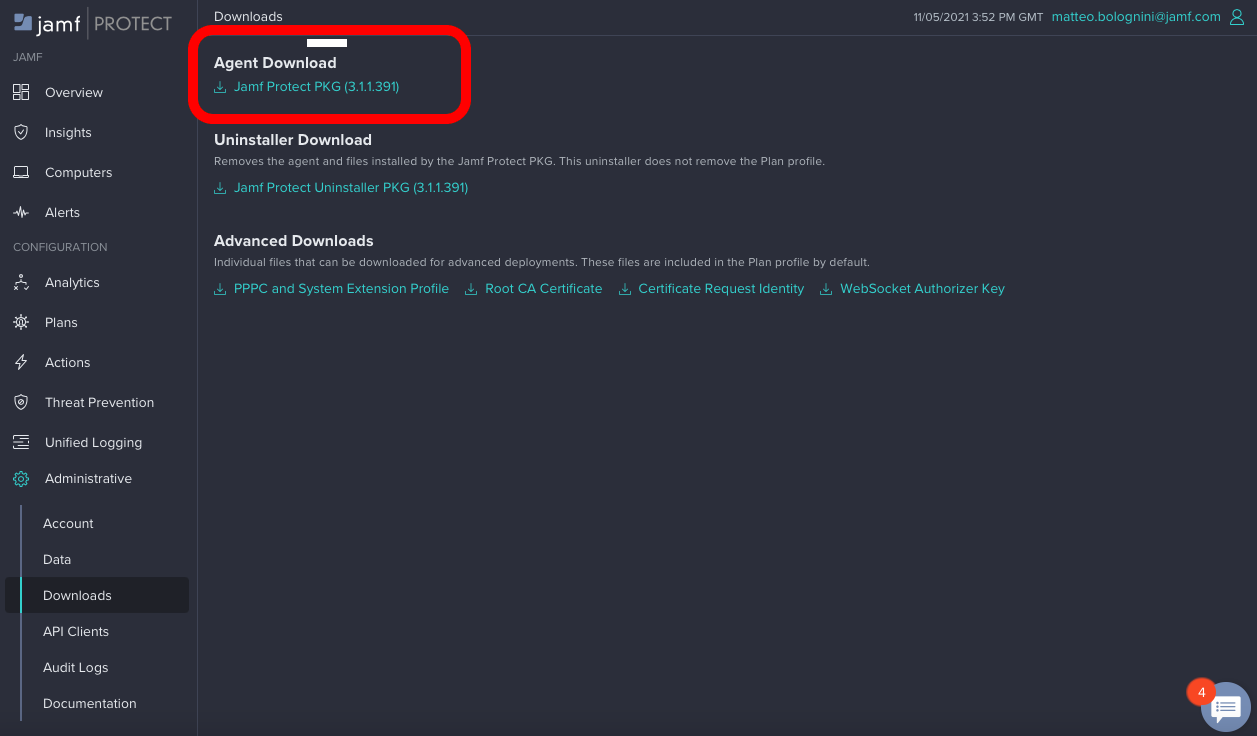
Lastly, we want to hop into Protect > Administrative > Downloads and download the installer:”
Now that we have both a pkg and the Configuration Profile downloaded from the Protect tenant, we can hop into Jamf Now console.
First we will go into Apps > Add an App
If this is the first time you add a custom app, you’ll see a screen like the above, otherwise it you’ll see a list of your current apps and the “Add an App” button would be in the top right of the screen.
The process is very simple, simply drag and drop in the app we downloaded from Protect:
https://youtu.be/1lietbkPa6M
Now that we have our pkg uploaded, we can add it to a Blueprint for deployment. Let’s go in our Blueprint > Apps > Custom App > Add App
and add the Jamf Protect pkg making sure “Install Automatically” gets enabled

Lastly, we can go to Custom Profiles and click on “Add a Custom Profile” to upload:
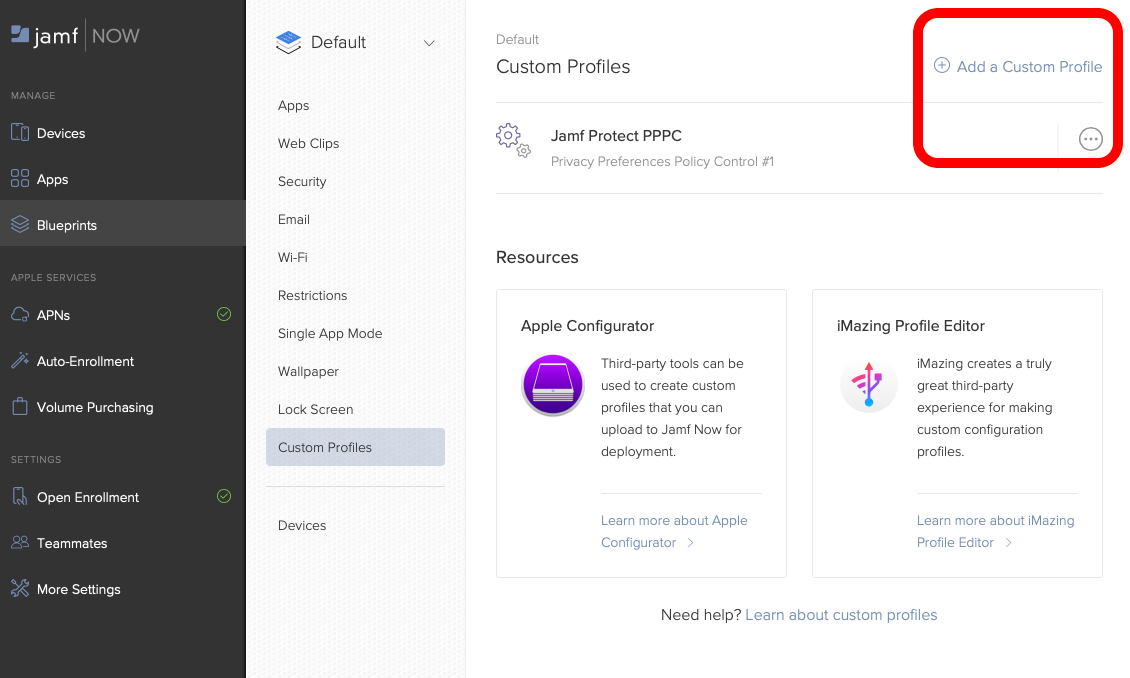
The process should look like this:
https://youtu.be/f4-CCWcVpVQ
Let’s bring it all together now and do a test. I’m going to enroll a test device via Open Enrollment and then check for the Configuration Profile and pkg auto deployment:
https://youtu.be/2iPqxi0qx0s