With the release on 2020-10-23, Jamf Protect added support to forward data to an AWS S3 bucket from the Jamf Protect tennant.
What this means is that you can have an S3 bucket to ingest data that the macOS clients send over to Jamf Protect cloud tennant.
As per Jamf’s documentation; only data that is sent to the Jamf Protect Cloud via an action configuration (alerts, logs, and unified logs) can be forwarded to Amazon S3:
https://docs.jamf.com/jamf-protect/administrator-guide/Release_History.html
What we will need to setup the integration:
– an existing S3 bucket
– an IAM role that Jamf Protect will assume when forwarding data over to S3
Jamf also provide a nice CloudFormation template that can configure everything we need (S3 bucket and IAM role) for us.
Download CloudFormation template
Let’s first download the CloudFormation template from the Jamf Protect tennant
Once logged in, we can get the template from the Administrative > Data section
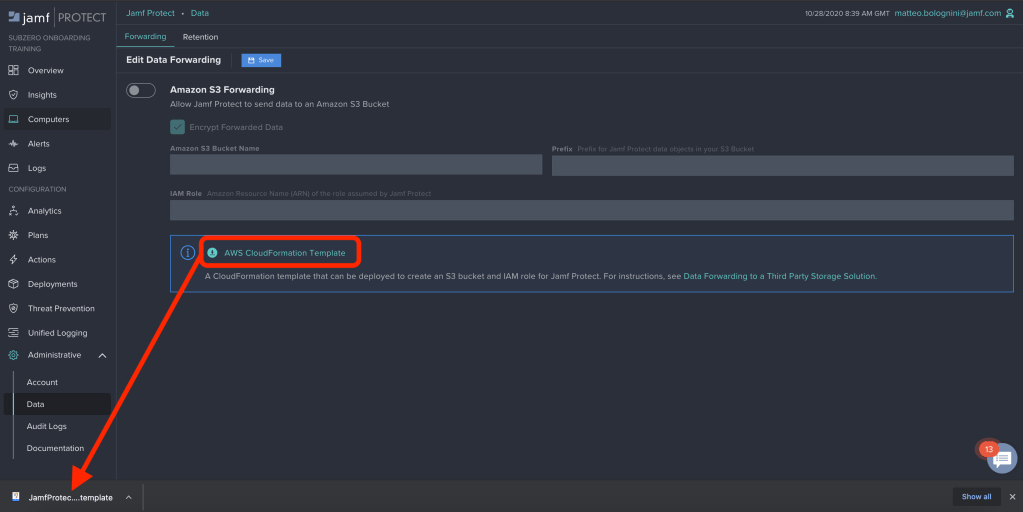
Once we have our template, we can head over to ASW and create the IAM role that will be used to run the CloudFormation stack.
Setup IAM role
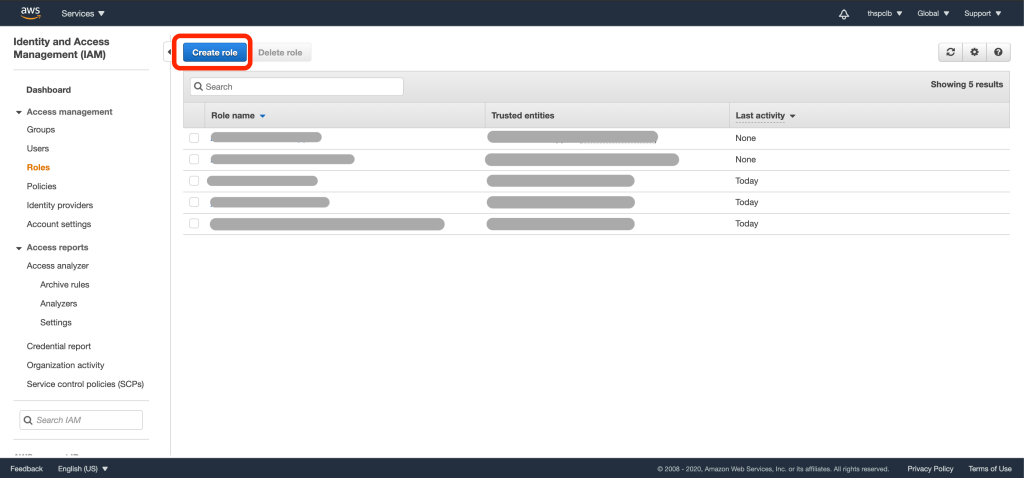
1. Login to the AWS console
2. Once at the Dashboard search for IAM

3. Select Roles from the side menu bar

4. Click Create role
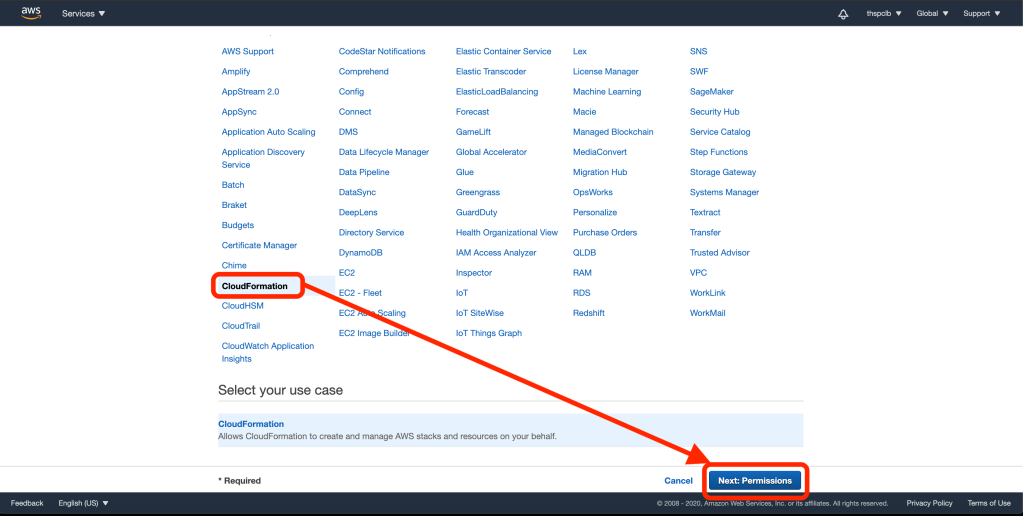
5. When prompted to Choose a use case, select CloudFormation and click Next:Permissions
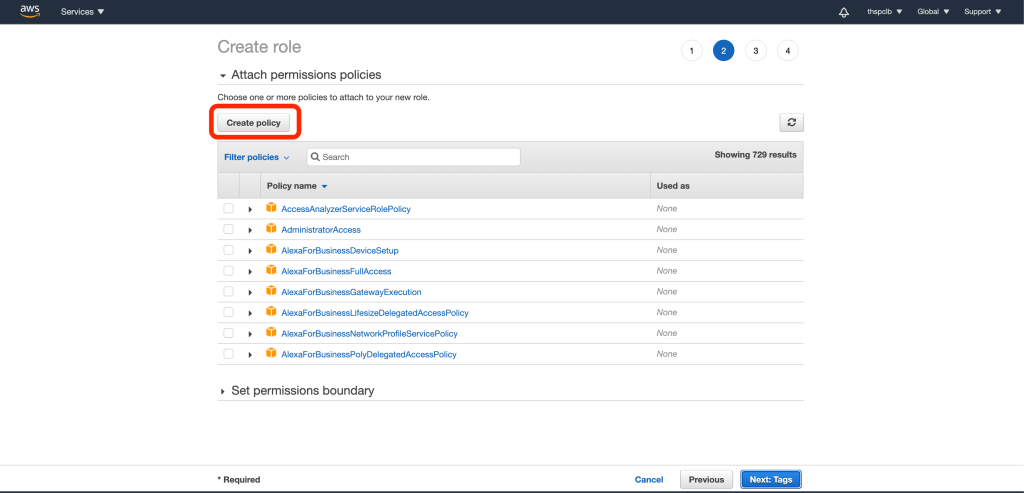
6. Click Create policy
This will open a new tab in the browser
7. In the next Policy editor builder click JSON
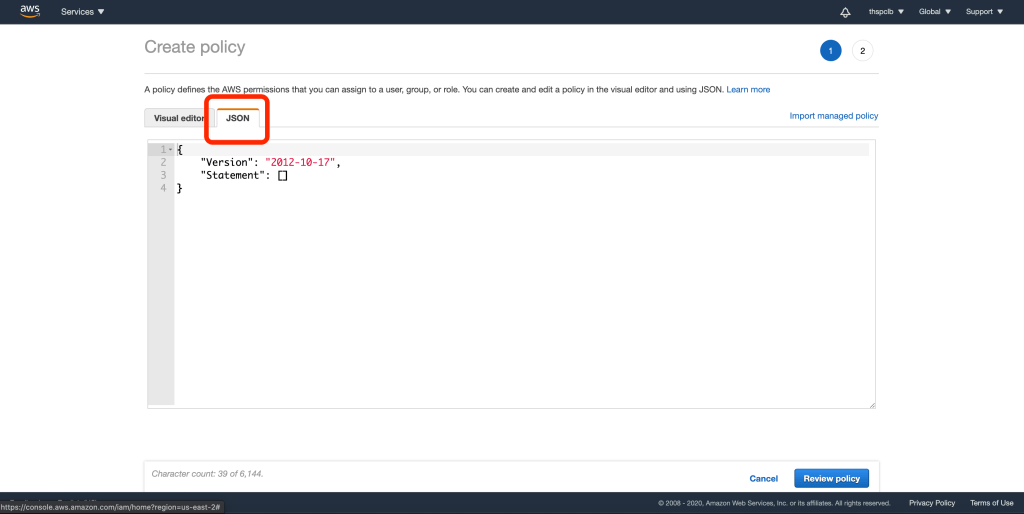
8. Before proceeding with this, I need to specify something.
What we’re doing now is to give permission to this IAM user to run the CloudFormation template. This won’t be the IAM user that Jamf Protect will assume when forwarding the logs, such user will be created by the CloudFormation template. The IAM user we’re about to create will need to exist only for the time needed to CloudFormation to run our stack.
To be specific, this IAM role will neeed to be able to perform 3 actions
– create an S3 bucket
– modify it’s policy
– and create an IAM role (the one Jamf Protect will assume)
That said the below is the permissions set I’ve found “safe enough” for my test env. In any production env please do NOT use this snippet and consult with your AWS IAM admin on the needed permissions to bee granted.
I’ll grant those permissions to my IAM role and then delete the role as soon as the CloudFormation stack will be completed
{
    "Version": "2012-10-17",
    "Statement": [
        {
            "Action": [
                "s3:CreateBucket",
                "s3:DeleteBucket",
                "s3:DeleteBucketOwnershipControls",
                "s3:DeleteBucketPolicy",
                "s3:DeleteBucketWebsite",
                "s3:DeleteObject",
                "s3:DeleteObjectTagging",
                "s3:DeleteObjectVersion",
                "s3:DeleteObjectVersionTagging",
                "s3:GetBucketAcl",
                "s3:GetBucketCORS",
                "s3:GetBucketLocation",
                "s3:GetBucketLogging",
                "s3:GetBucketNotification",
                "s3:GetBucketObjectLockConfiguration",
                "s3:GetBucketOwnershipControls",
                "s3:GetBucketPolicy",
                "s3:GetBucketPolicyStatus",
                "s3:GetBucketPublicAccessBlock",
                "s3:GetBucketRequestPayment",
                "s3:GetBucketTagging",
                "s3:GetBucketVersioning",
                "s3:GetBucketWebsite",
                "s3:GetEncryptionConfiguration",
                "s3:ListAllMyBuckets",
                "s3:ListBucket",
                "s3:ListBucketVersions",
                "s3:PutBucketAcl",
                "s3:PutBucketCORS",
                "s3:PutBucketLogging",
                "s3:PutBucketNotification",
                "s3:PutBucketObjectLockConfiguration",
                "s3:PutBucketOwnershipControls",
                "s3:PutBucketPolicy",
                "s3:PutBucketPublicAccessBlock",
                "s3:PutBucketRequestPayment",
                "s3:PutBucketTagging",
                "s3:PutBucketVersioning",
                "s3:PutBucketWebsite",
                "s3:PutEncryptionConfiguration"
            ],
            "Effect": "Allow",
            "Resource": "*"
        },
        {
            "Action": [
                "iam:AttachRolePolicy",
                "iam:CreateRole",
                "iam:DeleteRole",
                "iam:GetAccountPasswordPolicy",
                "iam:GetGroup",
                "iam:GetGroupPolicy",
                "iam:GetPolicy",
                "iam:GetPolicyVersion",
                "iam:GetRole",
                "iam:GetRolePolicy",
                "iam:GetUser",
                "iam:GetUserPolicy",
                "iam:ListPolicies",
                "iam:ListRolePolicies",
                "iam:ListRoleTags",
                "iam:ListRoles",
                "iam:ListUserTags",
                "iam:ListUsers",
                "iam:PutRolePolicy",
                "iam:PutUserPolicy",
                "iam:TagRole",
                "iam:TagUser",
                "iam:UntagRole",
                "iam:UntagUser",
                "iam:UpdateRole",
                "iam:UpdateRoleDescription"
            ],
            "Effect": "Allow",
            "Resource": "*"
        }
    ]
}
9. Paste in your policy and click Review policy
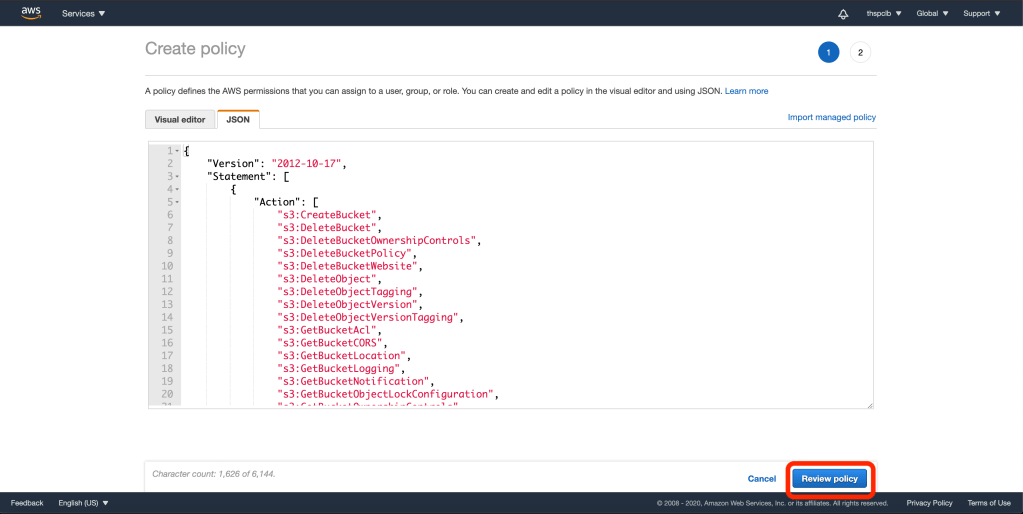
10. Review your policy and give it a friendly Name and if you want, add a Description
Once you’re set, hit Create policy

11. Go back to the IAM role creation page and search for the newly created policy

12. Select the policy by ticking the box and click Next:Tags

13. (Optional) add in any key pair tags and then click Next:Review

14. Choose a name for the IAM role and then click Create Role

CloudFormation stack
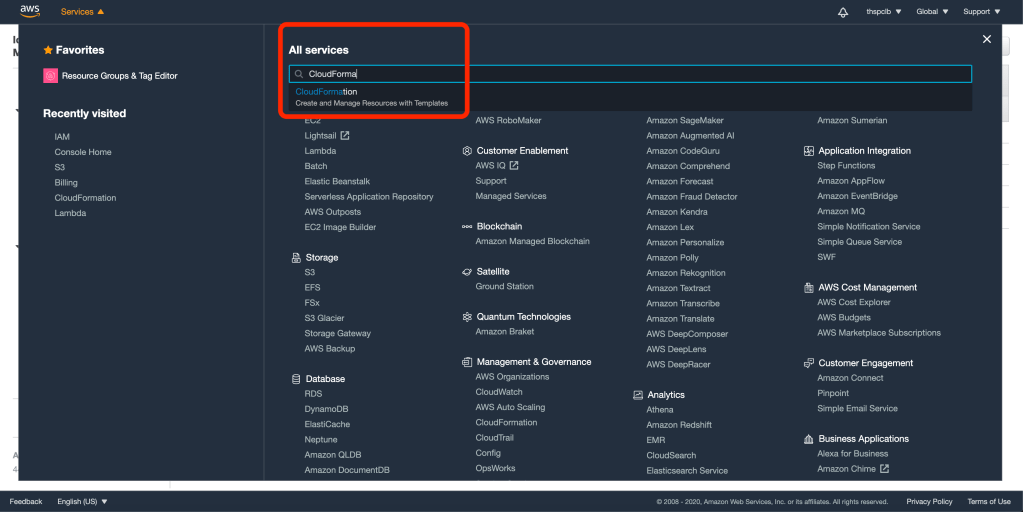
1. Now that we have our “build” IAM role with its own permissions granted with the Policy let’s go to CloudFormation and build our stack in AWS console click Services and type in CloudFormation
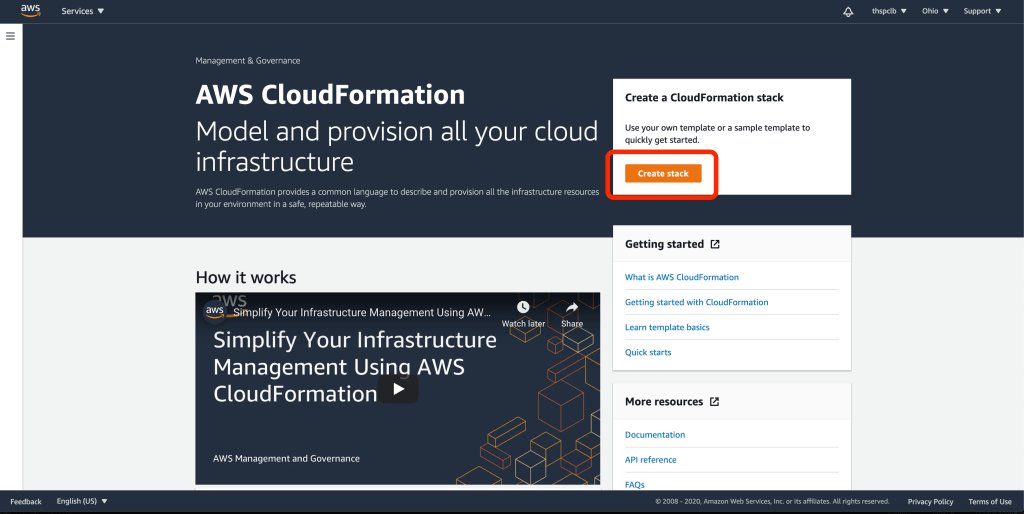
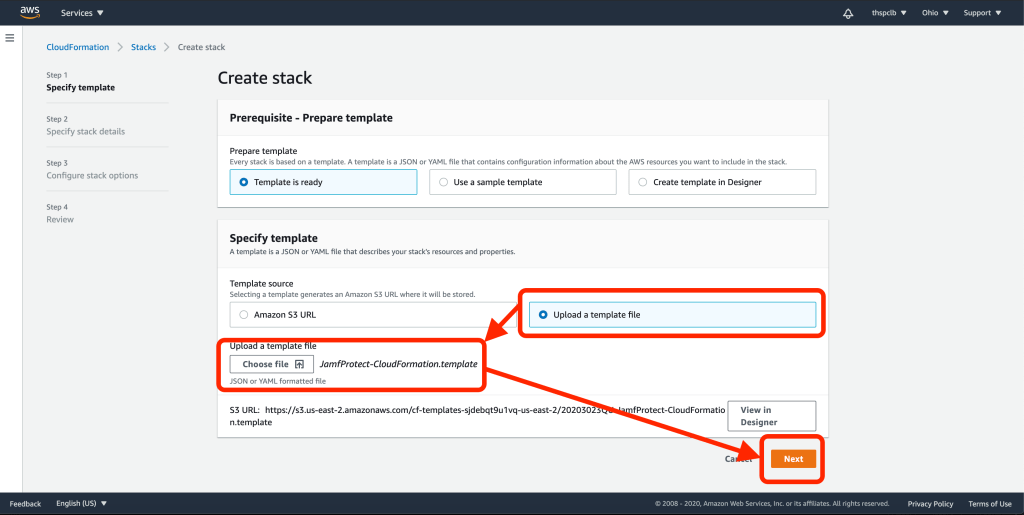
2. In the CloudFormation dashboard click Create stack
3. Leave Prepare template set to the default and switch Specify Template to Upload a template file and use the Choose file button to upload the template we downloaded from Jamf Protect.
Once the template is uploaded click Next
4.Choose a Stack name
This is mostly an identifier to check your stack building later
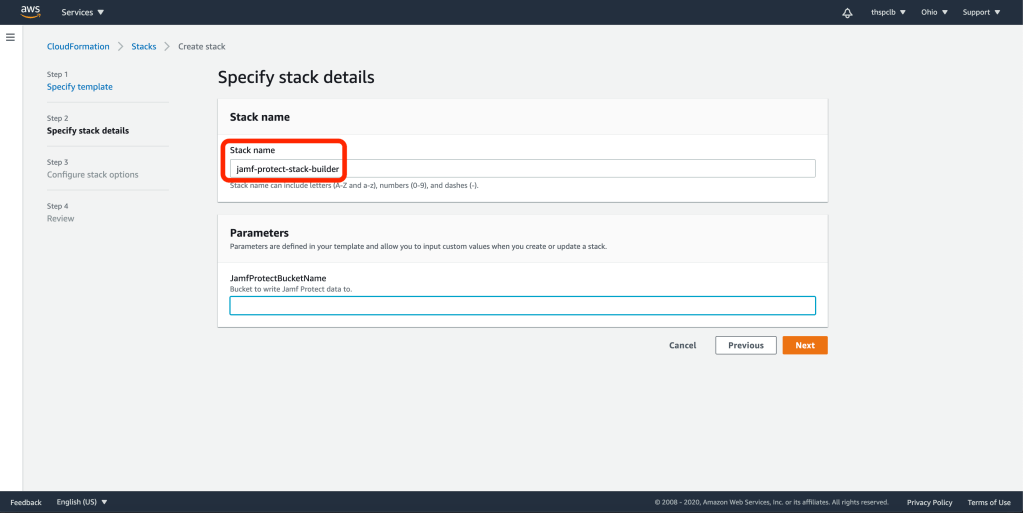
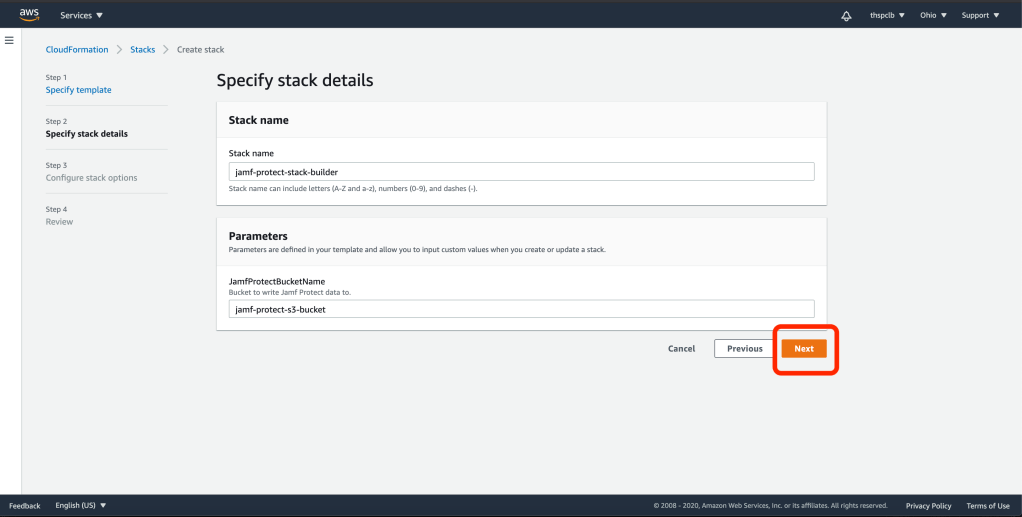
5. Choose a name for the S3 bucket
The JamfProtectBucketName is the variable in the stack template, in this field we’re giving the stack which value should be used to create the S3 bucket, that will be named based on what is provided in this field

6. Click Next
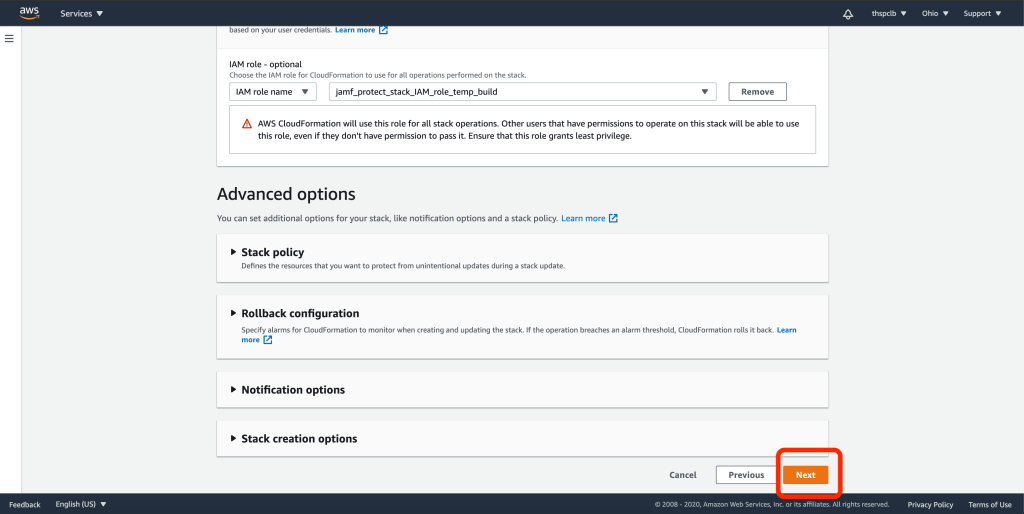
7. In the Configure stack options section scroll down to Permissions and select the IAM user we created before

8. Scroll to the bottom of the page and click Next
9. Review your stack build and give consent to CloudFormation to use the IAM role permissions and then click Save stack

CloudFormation will now process the Stack we configured and will display us the status
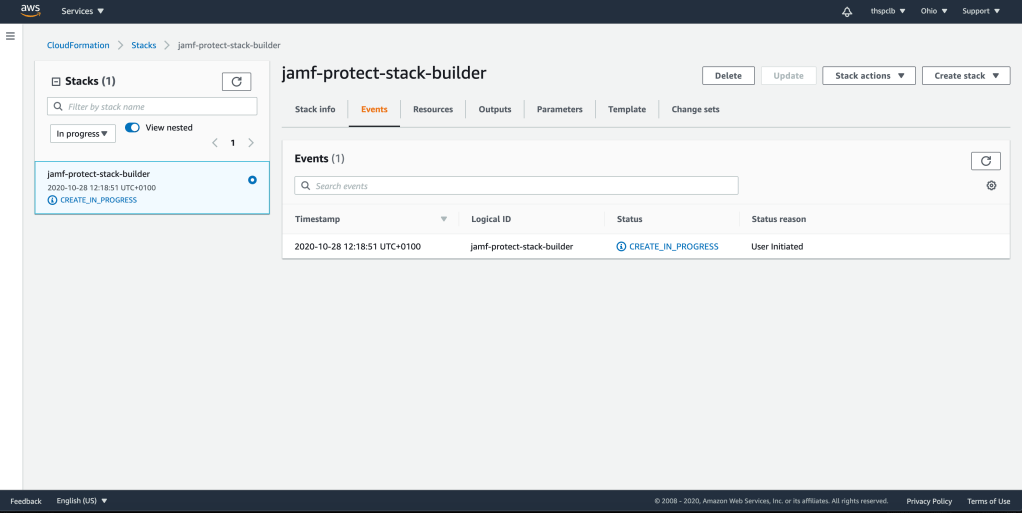
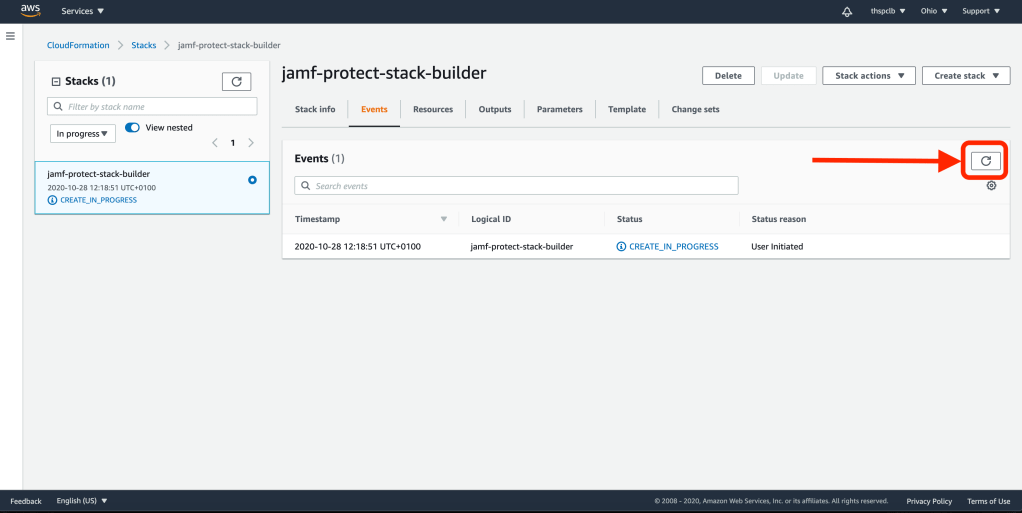
The page sometimes it’s a little bit slow in the background auto-refresh, if needed use the refresh button
Let’s break down what the stack did
First it created a Policy for the S3 bucket
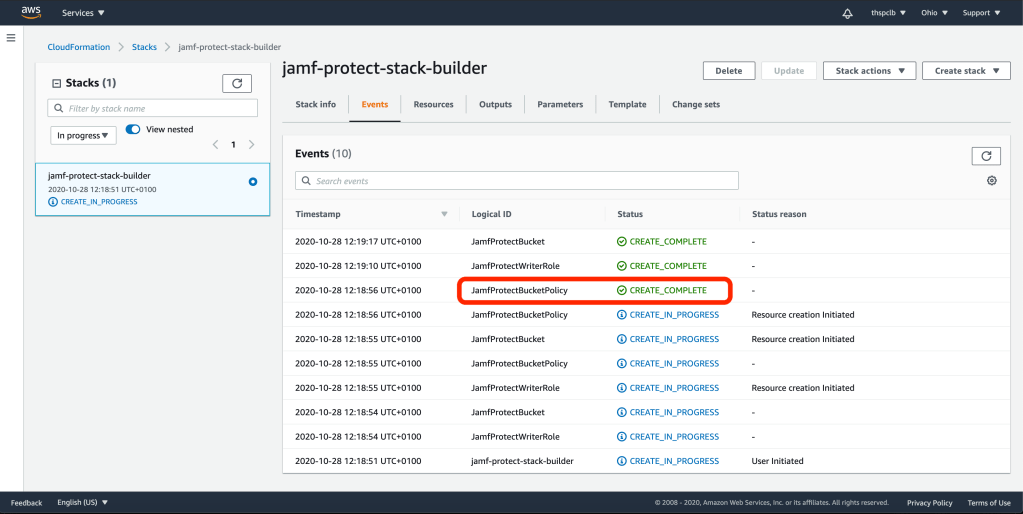
Then it creates an IAM role. This is the role that Jamf Protect will assume when sending data over to the S3 bucket

Lastly it creates the S3 bucket

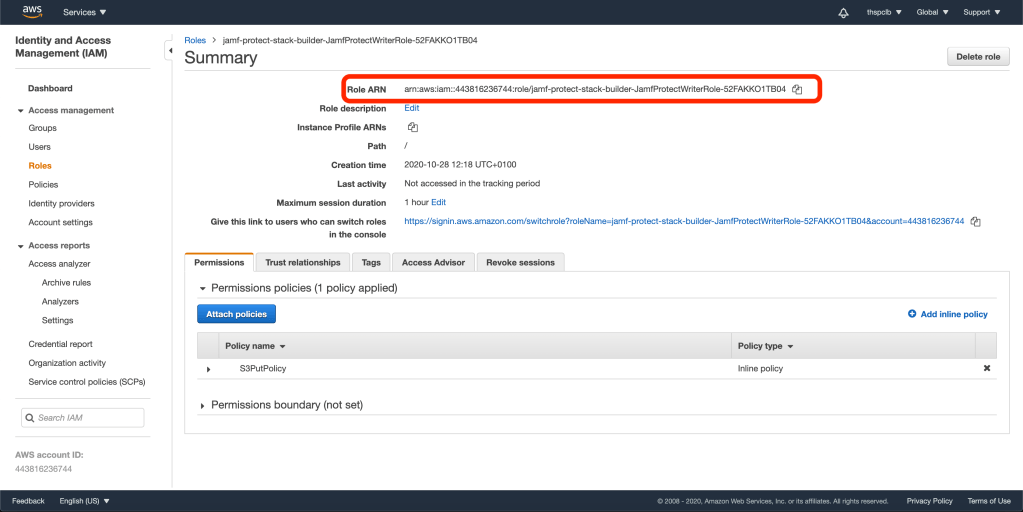
If we go back to IAM > Roles we can now see the role the Stack created in a format with the name we choose for the stack with -JamfProtectWriterRole-UNIQUEID appended to.

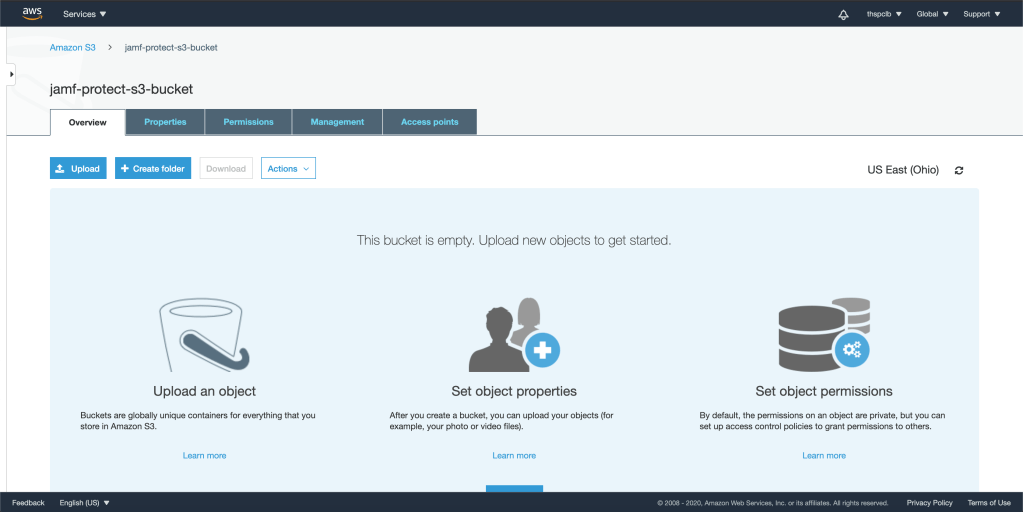
If we go to S3 we can also see the newly created bucket with the name we choose
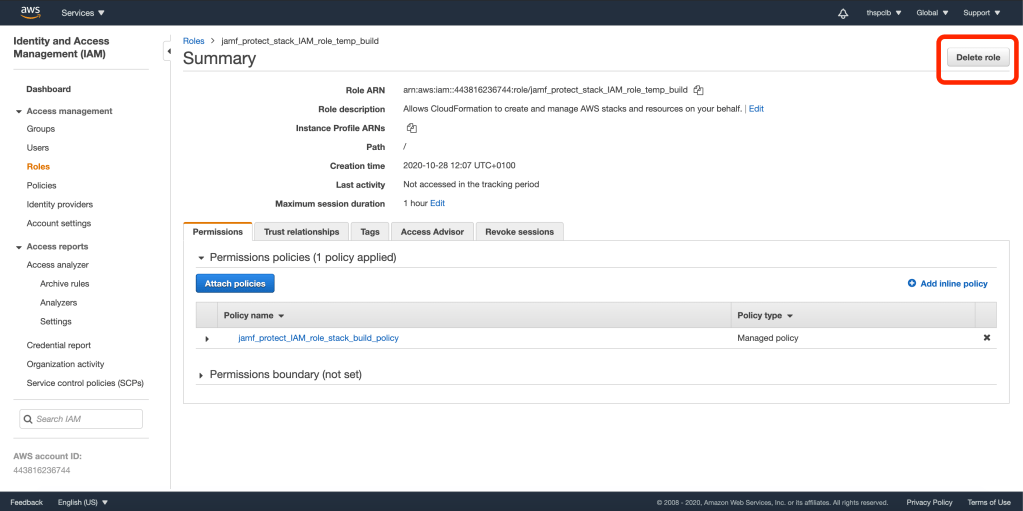
One last thing, just to keep things clean, now that the CloudFormation stack has successfully completed, we can go back in IAM > Roles > select our “build” IAM role that was created with the sole purpose of being used by this stack and delete it
Configure Jamf Protect to forward data to S3
Now that we have an S3 bucket and an IAM role enable to POST data we just need to configure Jamf Protect to forward data.
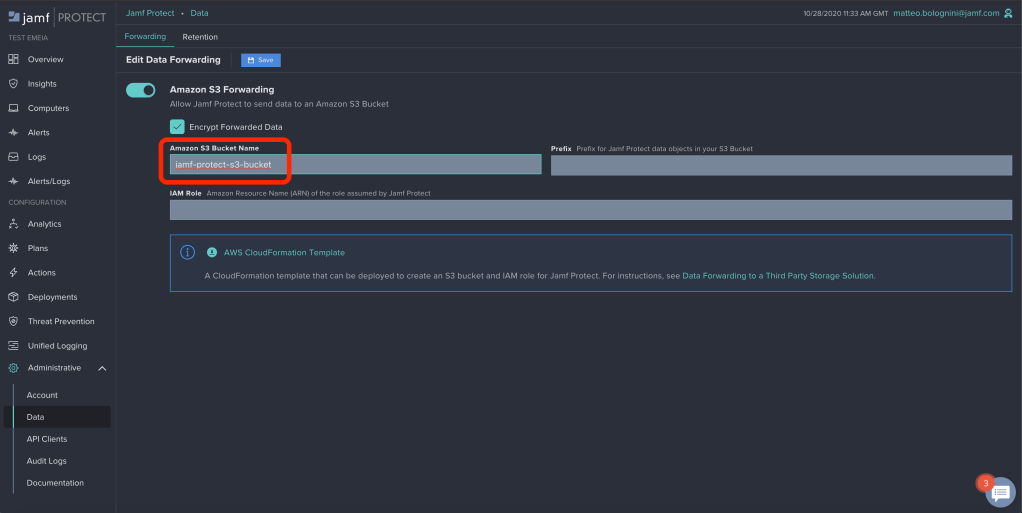
1. Once logged in, we can get the template from the Administrative > Data section and on the Amazon S3 Bucket Name simply provide the name of the S3 bucket the stack created for us
2. Provide a Prefix

3. Now go back to AWS > IAM > Roles > select the role the stack created for us and copy the ARN name
4. Paste the IAM Role ARN into Jamf Protect
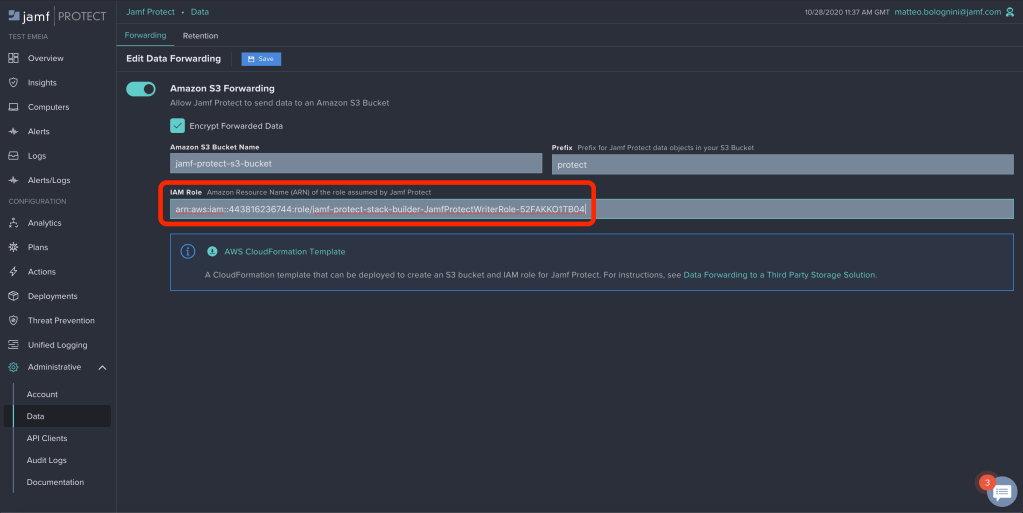
5. Click Save

6. Go to the Actions > choose your deployed Action > Edit and enable the data forwarding option

How to verify the integration is completed?
Head back to S3 and we should now have a directory on our S3 bucket
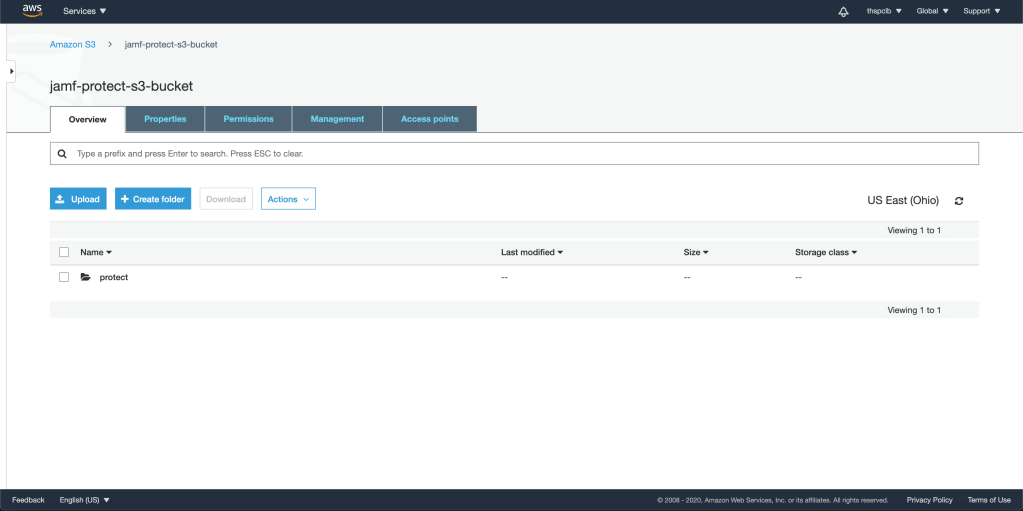
Inspecting the content of the few directories there and we should fine a file posted as a test by Jamf Protect to check all is good, should be something like
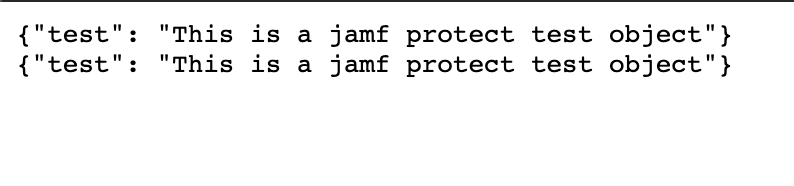
And that’s pretty much it. From now on, alerts, logs, and unified logs that will be sent over to the Jamf Protect cloud instance will also be forwarded to our AWS S3 bucket and be stored there.
